background image

4

Unpacking Instructions

May 2012

4

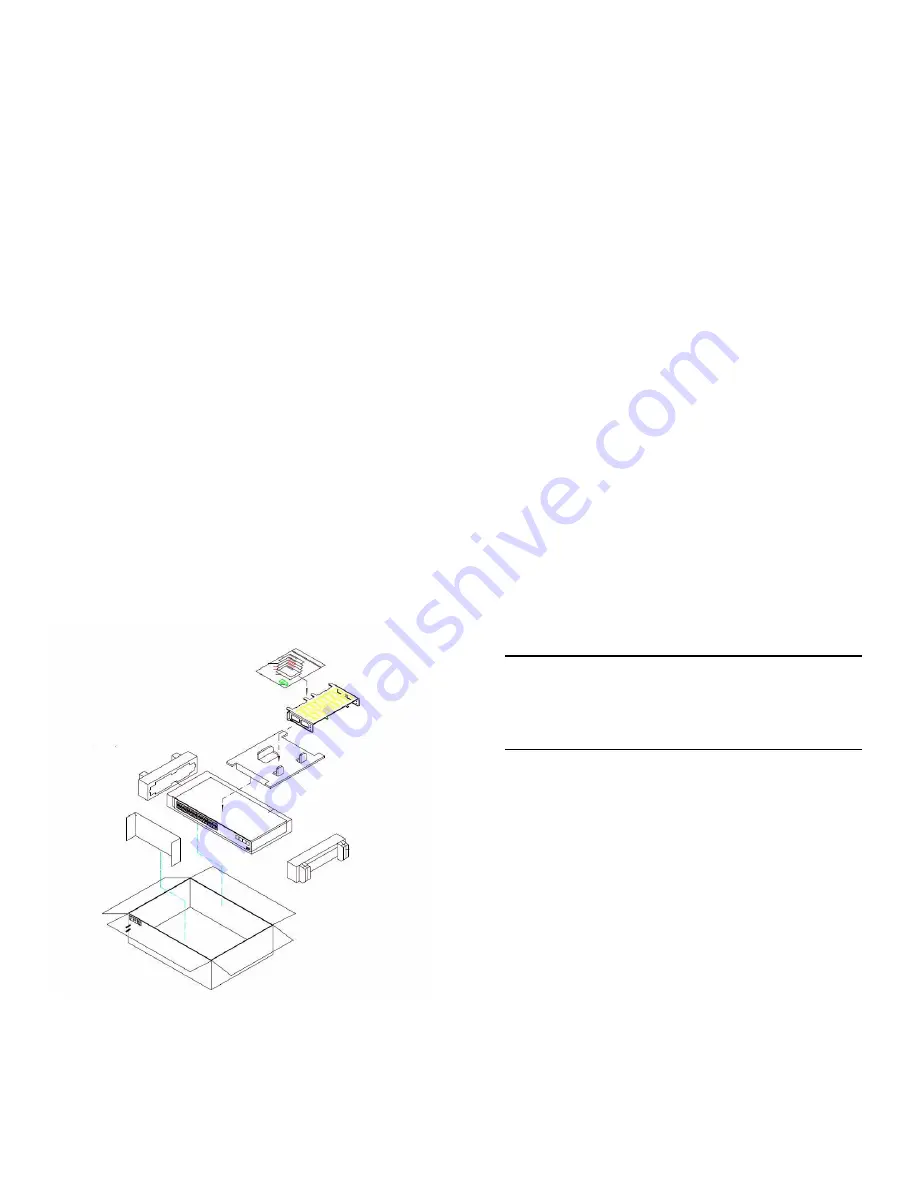
Carefully remove any foam pads and protective plastic 

from the switch chassis as in the example diagram.

5

Once all OmniSwitch 6450 switches have been 

removed from their packaging, continue to “Installation 
Options.”

Installation Options

Depending on the model, there are multiple ways in which the 
OmniSwitch 6450 switches can be installed: 

Rack-mount installation

Tabletop installation

Note: For detailed, step-by-step instructions on install-
ing and mounting OmniSwitch 6450 hardware and 
power supplies along with environmental and safety 
considerations, please refer to the OmniSwitch Hard-
ware Users Guide.  

Summary of Contents for OmniSwitch 6450

Page 1: ...OmniSwitch 6450 Series Getting Started Guide 060350 10 Rev B May 2012...

Page 2: ...OmniSwitch OmniStack and Alcatel Lucent OmniVista are registered trademarks of Alcatel Lucent OmniAccess Omni Switch Router PolicyView RouterView SwitchManager VoiceView WebView X Cell X Vision and th...

Page 3: ...es 6 Booting the Switch 6 Your First Login Session 7 Logging in to the Switch 7 Assigning an IP Address to the Switch 8 Unlocking Session Types 9 Changing the Login Password 10 Setting the System Time...

Page 4: ...iv May 2012...

Page 5: ...of fixed configuration Gigabit Ethernet stackable LAN switches with advanced Layer 2 and basic routing capabilities designed for both the Enterprise and Metro markets Refer to the Product Documentatio...

Page 6: ...lues examples usage guidelines and CLI to MIB variable mappings OmniSwitch 6250 6450 Switch Management Guide Includes procedures for readying a switch for integration into a network Topics include the...

Page 7: ...king the Chassis To protect your OmniSwitch chassis and hardware compo nents from electrostatic discharge ESD and physical damage read all unpacking recommendations and instructions care fully before...

Page 8: ...tinue to Installation Options Installation Options Depending on the model there are multiple ways in which the OmniSwitch 6450 switches can be installed Rack mount installation Tabletop installation N...

Page 9: ...ection to the switch and is required when logging into the switch for the first time By default this RJ 45 connector provides a DTE console connection 1 Locate the console port on the front of the swi...

Page 10: ...plug the power cord into an easily accessible power source such as a grounded AC outlet or an Uninterrupt ible Power Supply UPS The switch immediately begins the boot process Allow a few moments for...

Page 11: ...and time Set optional system information Save your changes Note You must be connected to the switch via the console port before initiating your first login session Logging in to the Switch When you f...

Page 12: ...ying user accounts and user privileges refer to the Managing Switch User Accounts chapter of your Switch Manage ment Guide Assigning an IP Address to the Switch Assigning an IP address to your OmniSwi...

Page 13: ...tch User Accounts chapter of your Switch Manage ment Guide Unlocking All Session Types To unlock all session types enter the following command syntax at the CLI prompt aaa authentication default local...

Page 14: ...er password might be engr2735 4 You will be prompted to re enter the password Enter the password a second time Note Be sure to remember or securely record all new passwords overriding configured passw...

Page 15: ...e followed by the current time in hh mm ss For example system time 18 35 00 The switch uses a 24 hour clock the time value shown in the above example would set the time to 6 35 PM To set the current d...

Page 16: ...etween words in the text string be sure to enclose the string in quotes For example system location NMS Lab NE Rack Viewing and Saving Changes To view your current changes enter show system at the CLI...

Page 17: ...patibility The following Web browsers are recommended for use with WebView Internet Explorer 6 0 and later Firefox 2 or 3 Logging In to WebView Note Before attempting to establish a WebView session be...

Page 18: ...er to the Managing Switch User Accounts chapter of your Switch Management Guide for information on modifying the default user name and password Navigating WebView After you have successfully logged in...

Page 19: ...llow you to view complete page contents under each feature By providing quick easy access to specific pages site maps can reduce time spent searching through the WebView application To access site map...

Page 20: ...w banner Detailed context based help is provided for each status table and configuration dialog window Additional Information For more information on using WebView refer to the Using WebView chapter i...

Page 21: ...ide for more information The login screen displays but the login fails This suggests either a user name and password or Authenti cated Switch Access error Try the following options Check that you are...

Page 22: ...18 Using WebView May 2012...

Reviews: