background image

English   

- 8 -

Basic Operations

You can  operate your TV using both  the remote
control  and  onset  buttons.

Operation with the buttons on the TV

Volume Setting

• Press “

 -

” button to decrease volume or “

 +

button to increase volume, so a volume level scale
(slider) will be displayed at the middle of the bottom
on  the  screen.

Programme Selection

• Press “

P/CH +

” button to select the next programme

or “

P/CH -

” button to select the previous programme.

Entering Main Menu

• Press the “

MENU

” button to enter Main menu. In the

Main menu select sub-menu using “

P/CH -

” or “

P/CH

+

” buttons and enter the sub-menu using “

 -

” or

 +

”  buttons. To learn the usage of the menus,

refer to the Menu System sections.

AV Mode

Press the “

TV/AV

” button at the control panel on the

the TV to switch your TV to AV modes.

Operation with Remote Control

The remote control of your TV is designed to control
all the functions of the model you selected. The func-
tions will be described in accordance with  the menu
system of your TV.

Functions  of the  menu  system  are described in  the
following  sections.

Volume Setting

Press “ 

V +

“ button to increase volume. Press  “

V -

button  to  decrease  volume.  A  volume  level  scale
(slider) will be displayed in the middle at the bottom of
the  screen.

Programme Selection (Previous or next
programme)

• Press “

P-

” button to select the previous programme.

• Press “

P+

” button to select the next programme.

Programme Selection (direct access):

Press  digit  buttons  on  the  remote  control  to  select
programmes between 0 and 9. TV will switch to the
selected programme. To select programmes between
10 - 999 (for IDTV) or 10-99 (for analogue), press the
digit  buttons  consecutively  which  programme  you
want  to  select  (eg.  for  programme  27,  first  press  2
and then 7). A delay of more than 3 seconds between
pressing first  and second  digit  will  result  in  only the
first digit being recognized.

Press directly the programme number to reselect single
digit programmes.

Everyday Operation

Pressing the “

TV

DTV

” button at any time while watch-

ing television programmes will switch the TV set be-
tween displaying the digital terrestrial television broad-
casting and its normal analogue broadcasting.

Information Banner

Whenever you change channel, using the 

“P-”

 / 

“P+”

button or  the  digit  buttons,  TV  displays  the  channel
picture along with an information banner at the bottom
of the screen. This will remain on the screen for ap-
proximately  three  seconds.  The  information  banner
can also be displayed at any time while watching TV
by pressing the

 “INFO”

 button on the remote control.

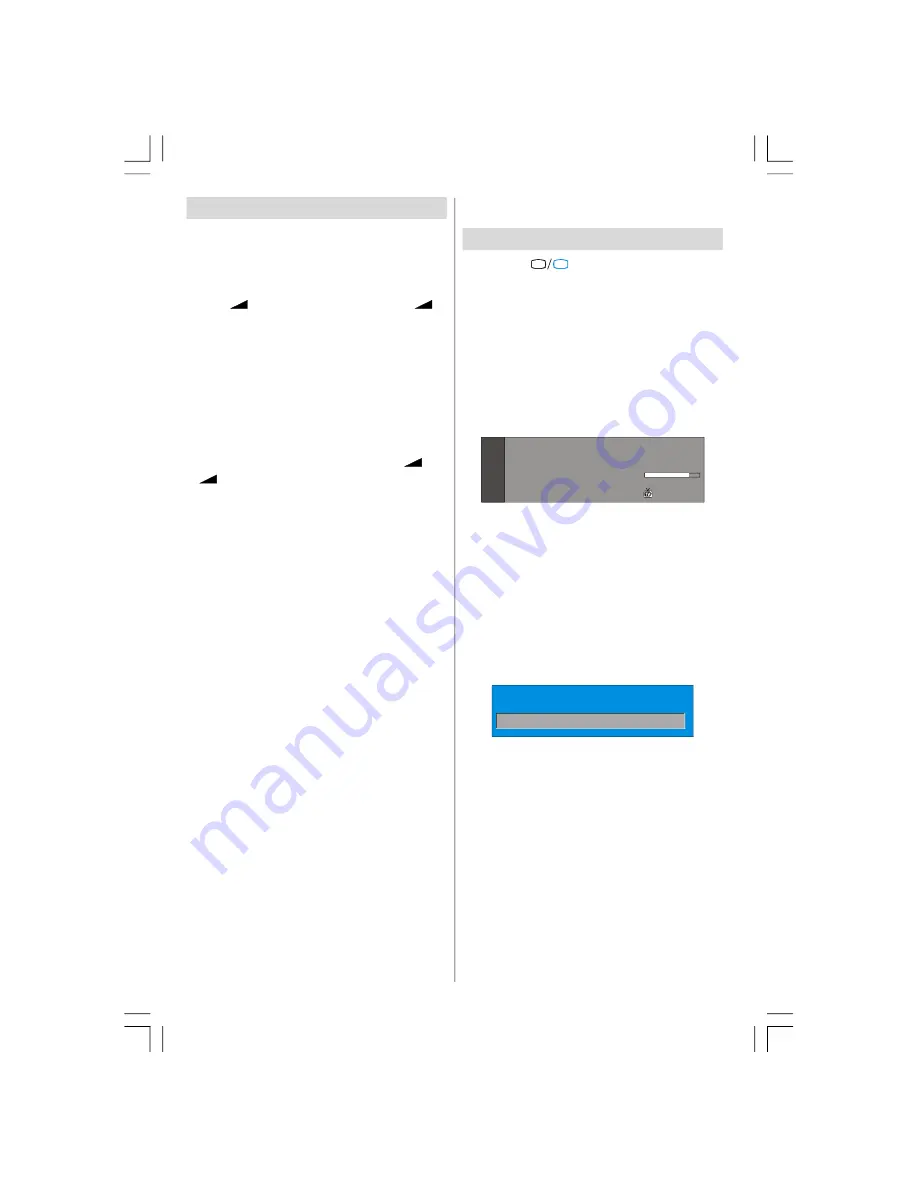
Now:  50/50
Next: Ace Lighting

1.     BBC ONE

Signal Level:

13:15

09:25 - 11:00
11:00 - 11:25

The  information  banner  gives  a number  of  facts  on
the channel selected and the programmes on it. The
name of the channel is displayed, along with its chan-
nel list number and an indication of the strength of the
signal received on this tuning channel.

Hint
Not  all  channels  broadcast  the  programme
data.  If  the  name  and  times  of  the  programmei
are  not  available  then  “No  Information  Avail-
able”  is  displayed  in  the  information  banner.

If the selected channel is locked, you must enter the
correct four digit code to  view the  channel.

Enter Lock Key

Electronic Programme Guide (EPG)

Some,  but  not  all,  channels  send  information  about
the  current and next  events. Please  note that  event
information is updated automatically. If there is no event
information data  available in channels, only channel
names  with 

“No  Information  Available” 

banner  is

displayed.

• Press 

“GUIDE”

 button to view the 

EPG

 menu.

• In EPG Menu, you can easily see the extended help
information by pressing 

“INFO”

 button and by press-

ing this button again you can close this window.

ENG-40756W-1055UK-40 INCH 17MB22 UK IDTV-(VIRTUAL DOLBY-WO PIP-WO PC)-50117255.p65

16.10.2007, 09:16

8

Summary of Contents for AV42751-HDID

Page 1: ...Customer Help Line 01422 263313 Opening Hours Mon Fri 8am 8pm Sat 9am 4pm Sun 11am 4pm Or visit our website at www ekey co uk AV42751 HDID ...

Page 2: ...ations 8 Everyday Operation 8 IDTV Menu System 10 Analogue TV Menu System 16 Other Features 21 Teletext 22 Connecting Peripheral Equipment 23 Tips 25 Specifications 25 Appendix A Aerial Connection 26 Appendix B Connect Peripheral Equipment 26 Peripheral Equipment Connections 27 Important Instruction 28 ENG 40756W 1055UK 40 INCH 17MB22 UK IDTV VIRTUAL DOLBY WO PIP WO PC 50117255 p65 16 10 2007 09 1...

Page 3: ...e Down OK SELECT Okay Store Cursor buttons Menu Menu Green button Picture Red button Sound Time Subtitle On Off in the Digital mode Teletext Mix NoFunction WIDE Imagesize Expand P P SWAP PreviousProgramme PP ColourTemperature Reveal Guide IndexPage Update NoFunction Hold NoFunction Blue button Yellow button TV DTV TV DTV Mode I II Mono stereo Dual I II Volume Volume EXIT No function Mute ENG 40756...

Page 4: ...English 3 LCD TV c TV AV MENU P CH ENG 40756W 1055UK 40 INCH 17MB22 UK IDTV VIRTUAL DOLBY WO PIP WO PC 50117255 p65 16 10 2007 09 16 3 ...

Page 5: ...o ensure reliable operation To pre vent overheating these openings must not be blocked or covered in anyway 6 Heat and Flames The set should not be placed near to naked flames and sources of intense heat such as an electric heater Ensure that no naked flame sources such as lighted candles are placed on top of the TV Batteries shall not be exposed to excessive heat such as sun shine fire or the lik...

Page 6: ...con tains a small amount of mercury please follow local ordinates or regulations for disposal 11 Disconnect Device The mains plug is used to disconnect TV set from the mains and therefore it shall remain readily operable 12 Excessive sound pressure from earphones and head phones can cause hearing loss 13 To prevent injury this device must be securely at tached to the wall in accordance with the in...

Page 7: ... any leakage of bat tery Switching The TV ON OFF To switch the TV on Your TV will switch on in two steps 1 Connect the power to 220 240V AC 50 Hz Press stand by button Then the TV switches itself to stand by mode Optional 2 To switch on the TV from stand by mode either Press a digit button on the remote control so that a channel number is selected or Press the P CH or P CH button on the TV or pres...

Page 8: ...l search appears on the screen TV switches to the analogue TV mode Yes Do you want to search for analogue channels No To seach for analogue channels select Yes The menu below is displayed to search for analogue chan nels Country Language UK Ok Cancel PLEASE CHECK ANTENNA CABLE AUTO PROGRAMMING SYSTEM TXT Language By pressing or button adjust the Country item and press to highlight Language item Us...

Page 9: ...d digit will result in only the first digit being recognized Press directly theprogramme numberto reselect single digit programmes Everyday Operation Pressing the TV DTV button at any time while watch ing television programmes will switch the TV set be tween displaying the digital terrestrial television broad casting and its normal analogue broadcasting Information Banner Whenever you change chann...

Page 10: ...mperor s underpants and record their first pop song I More Change Day Navigate Change Time With RED GREEN buttons you can change sched ule time By pressing YELLOW BLUE you can ad vance the schedule backward forward of a day If you press INFO button you can see the detailed help information easily And by pressing INFO but ton again you can exit Help menu The starting time for EPG is the current tim...

Page 11: ... programmes can be viewed in a number of formats Press the WIDE button repeatedly to select between Auto or 16 9 When Auto is selected the format being displayed is determined by the picture being broadcast Please Note Menu size changes depending on the chosen image size IDTV Menu System The IDTV menu can only be shown when watching Digital terrestrial broadcasting Press the TV DTV button to turn ...

Page 12: ... by pressing or button Press the SELECT to activate rename feature SELECT i SELECT CHANNEL LIST 1 BBC ONE 1 BBC ONE 2 BBC TWO 3 ITV 8 4 Channel 4 5 BBC THREE 6 Teletext 7 BBC FOUR 8 Sky Travel 9 UKHistory 10 RTL Select Delete Edit Name Lock Favourites Function Select Channel Edit Name More Now pressing or button moves to the previous next character Pressing or button toggles the current character ...

Page 13: ... Search Installation Add New Channels First Time Installation Automatic Search Manual Search Automatic Search Automatic search is started by pressing the OK button in the auto search pop up menu All the ser vices are searched and a channel table is created automatically All channels found are stored in a sorted form with respect to their channel numbers Some services may not appear with the correc...

Page 14: ...on twice to highlight Configuration then press the SELECT button to display the Configura tion menu Press the M button to leave the menu Main Menu Channel List Installation Configuration Timers Language TV Setup Common Interface The various configuration functions are displayed in a list along with a quarter screen image of the currently selected channel You can select a function by high lighting ...

Page 15: ...rade is set to Disabled then this function will not work Search For New Version Manual upgrade Manual upgrade starts if the Search for New Ver sion item is highlighted by using or button and activated via pressing the SELECT button After Search for New Version is activated the IDTV tunes to each frequency that have been stored in its database and looks for the new software Software Upgrade Searchi...

Page 16: ...move freely between each setting using the or buttons The channel name is set using the or button to display the channel which broadcasts the programme The start time end time and date are each set with the digit buttons on the remote control in 24 hour for mat The frequency mode determines how often the receiver operates this event and is set with the or button to be either Once Daily or Weekly I...

Page 17: ... in the terminal cover at the left hand side of the TV from front view The CAM should be correctly inserted it is impos sible to insert fully if reversed The CAM or the TV terminal may be damaged if the CAM is forcefully inserted 3 Connect the TV to the mains supply switch on and then wait for few moments until the card is activated Some CAMs may require the following set up Please set the CAM by ...

Page 18: ...pressing button select Store Press or OK button to store the adjustments Stored will be displayed on the screen Sound Menu SOUND Volume Equalizer Balance Headphone Sound Mode Volume By pressing select Volume Press button to change the level of the Volume Equalizer By pressing select Equalizer Press button to change the Equalizer setting In equalizer menu the mode can be changed to Pop Rock Jazz Fl...

Page 19: ...ssing select Child Lock Press button to set the Child Lock on or off When on is selected the TV can only be controlled by the remote control handset In this case the control panel buttons will not work Hence if one of these buttons is pressed Child Lock On will be displayed on the screen when the Menu screen is not visible Language By pressing button select Language Use button to select the langua...

Page 20: ... a chosen programme select the programme and press the RED button The first letter of the selected name will be highlighted Press button to change that letter and button to select the other letters By pressing the RED button you can store the name Insert Select the programme which you want to insert by navigation buttons Press the GREEN button By navi gation buttons move the selected programme to ...

Page 21: ...utton select Sound System Press button to change the sound system to BG I L L DK Fine Tune By pressing button select Fine Tune Press button to adjust the tuning Search By pressing button select Search Press button to start program searching You can also enter the desired frequency via digit buttons when search item is highlighted Store By pressing button select Store Press or OK button to store th...

Page 22: ...mode can be changed by pressing the WIDE button You can change the screen size according to the picture aspect ratio Select the optimum one from the following ZOOM modes Note In YPBPR and HDMI modes while in 720p 1080i resolutions only FULL mode is available Auto When a WSS Wide Screen Signalling signal which shows the aspect ratio of the picture is in cluded in the broadcast signal or the signal ...

Page 23: ... easily Press the corresponding coloured button to access the page Special Teletext Functions To Display a page of text The view text services press To return normal viewing press again Programmes cannot be changed until text is cancelled To select a page press the number buttons or pro gram buttons P P To select index page press button To select superimposed over the programme on the screen press...

Page 24: ...res from devices such as a High Defi nition Satellite Receiver or DVD Player These devices must be connected via the HDMI socket or Compo nent Socket These sockets can accept either 720p or 1080i signals Note When it is desired to watch HDMI source with a DVI to HDMI cable in order to enable audio Audio Input which is located at the left side of the antenna input is to be used to get DVI device s ...

Page 25: ...nnect a Scart cable to the Scart socket of your decoder and to the special Scart socket of your video recorder Refer to the booklet of your video recorder Information for users applicable in European Union countries Produced after 13thAugust 2005 Waste electrical products should not be disposed of with household waste Please recycle where facilities exist Check with your Local Authorityor retailer...

Page 26: ...our dealer No Picture means that your TV is not receiving a transmission Have you selected the correct button on the remote control Try once more Sound You cannot hear any sound Did you perhaps inter rupt the sound pressing the button Sound is coming from only one of the speakers Is the balance set to one extreme See Sound menu Remote Control Your TV no longer responds to the remote control Perhap...

Page 27: ...N IN OUT IN OUT HEADPHONE AUDIO VIDEO SATELLITE RECEIVER ANTENNA CAMCORDER VHF UHF 75 Round 75 ohm coaxial cable Rear of TV Outdoor Aerial Connection Appendix A Aerial Connection ENG 40756W 1055UK 40 INCH 17MB22 UK IDTV VIRTUAL DOLBY WO PIP WO PC 50117255 p65 16 10 2007 09 16 26 ...

Page 28: ...esco store together with the original receipt as proof of purchase For assistance please call our Tesco Electrical Helpline on 0845 4566767 Video Input Audio Inputs Audio Line Outs Headphone For Service Use Only Power Cable HDMIInput SCART2 SCART1 Component Audio Inputs Component Video Inputs YpBpr RF PCAudio Input CISlot L R L R ENG 40756W 1055UK 40 INCH 17MB22 UK IDTV VIRTUAL DOLBY WO PIP WO PC ...

Page 29: ... connected to the terminal which is marked with the letter E or by the earth symbol or coloured green or green and yellow The wire which is coloured blue or black must be connected to the terminal which is marked with the letter N or coloured Black The wire which is coloured brown or red must be connected to the terminal which is marked with the letter L or coloured Red For continued protection ag...

Page 30: ......

Reviews: