


Playing back from External Equipment
Listening to FM Broadcasts
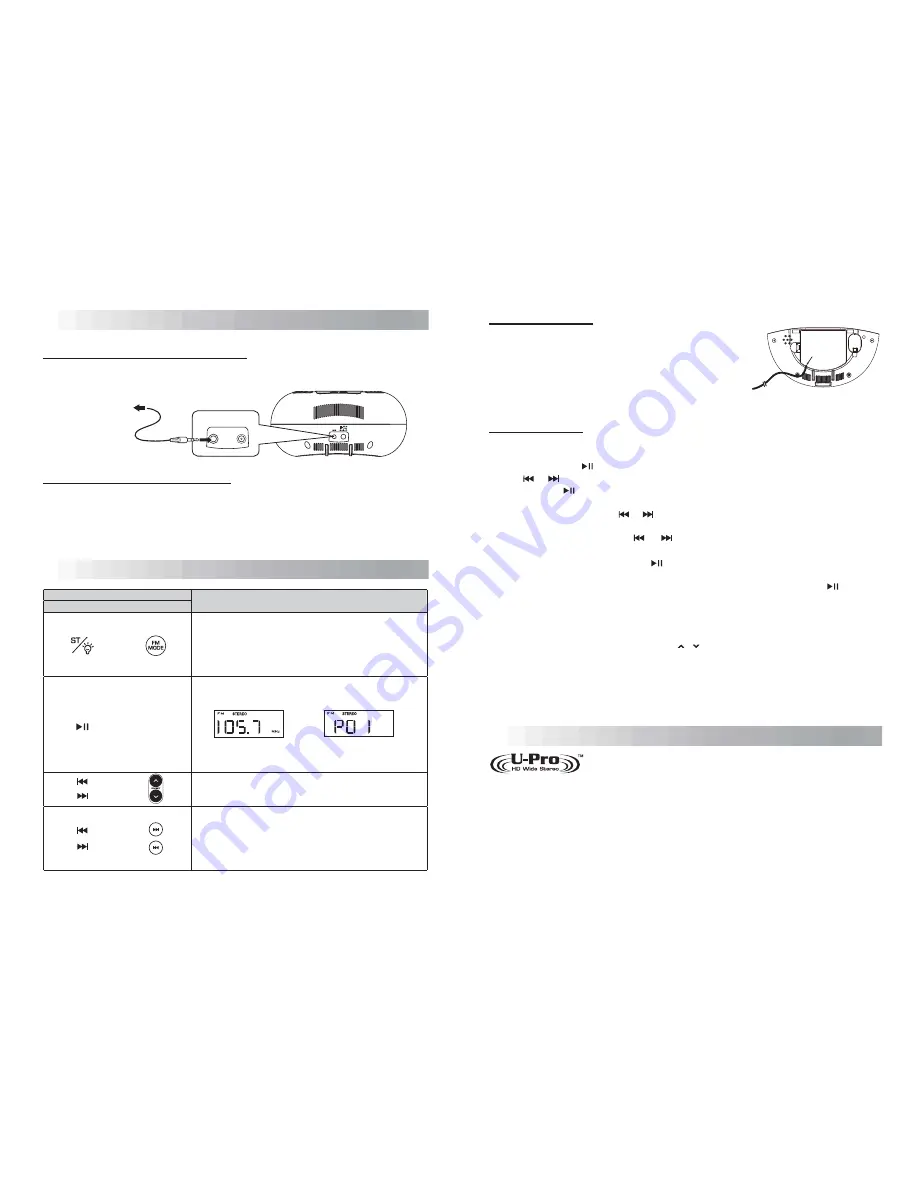
Connecting with an External Audio Device
Connect an external device to the AUX jack on the rear of the unit using a stereo mini plug cord (not
supplied) .
Listening to the External Audio Device
1. Turn the unit power on.
2. Select AUX mode with the
SOURCE
button.
3. Start playback on the external device.
Note:
Volume level will be shown on the display all along during the AUX source playback.
AUX
To audio output such as CD/
MD/digital audio player, etc.
Press the Button
Functions
Unit
Remote Control
•
Switch between channel display and frequency display.
Channel display is automatically switched to frequency display
after 3 seconds.
•
To save a channel, hold this button.
Select a channel from P01 to P20.
(The unit buttons can be used only when channel display is selected.)
Change frequency from 87.5MHz to 108.0MHz. (The unit
buttons can be used only when frequency display is selected.)
•
Hold for more than one second to activate the Auto
Scan function, and then release the button. The frequency will
be scanned automatically until a radio station is found. Or
press again to quit search while searching.
Channel display
Frequency display
.15.
.16.
/
Listening to FM Tuner
Stretch out the FM antenna, which is stored inside the battery
compartment for the unit, and locate the wire at the back of the unit
through the small hole of battery cover. You may need to move it
around to get the best reception.
Note:
Position the FM antenna as far away as possible from a TV, or
other radiation source.
Activating "U-Pro" Sound Effect
wire hole
"
U-Pro
" is a proprietary technology, designed specifically for an ultra-wide sound field for all digital music
systems. With exceptional life-like and natural sound reproduction of high definition and fidelity, this
portable audio system can provide you a superior personal entertainment in listening "High Definition Wide
Stereo" as if you place two speakers at wider remote distance to both sides than that they are actually
located at.
Press "
U-Pro
" button on the remote control to activate the sound effect. The "U-Pro" mark is displayed.
The U-Pro sound effect does not apply to FM tuner mode.
U-Pro
and the U-Pro symbol are registered trademarks of Beautiful Enterprise Co., Ltd.
On the Unit
1. Select FM Tuner mode with the
SOURCE
button, and switch to channel display (for example, P01 is shown
on the display) with " " button.
2. Use " "/ " " button to select the channel number (P01 to P20) to be set.
3. Press and hold " '', then the channel number starts blinking.
4. Use either of the below methods to tune the desired frequency.
A. Manual Tuning
- Briefly press " "/ " " button repeatedly to move frequency to frequency (87.5 MHz
to 108.0 MHz) until you find the desired station.
B. Auto Scanning
- Press and hold " "/ " " button until the frequency display starts flashing. The
frequency will be scanned automatically until a station is found.
5. Once the channel number blinks, press " " again to confirm the selection. The selected frequency will
then be stored with the preset channel number.
Note:
To confirm registration, select the saved channel number (P01 to P20), and press " " button to
display frequency.
On the Remote Control
1. Select FM Tuner mode with the
SOURCE
button.
2. Select a channel number to be set with
PRESET /
button.
3. Hold the
FM MODE
button, then channel number starts blinking.
4. Use the "Manual Tuning" or "Auto Scanning" method to tune the desired frequency when the channel
number display switches to the frequency display.
5. Once the channel number blinks, press
FM MODE
button again to confirm the selection. The selected
frequency will then be stored with the preset channel number.
Presetting Stations
Switch between FM stereo and monaural.
When there is too much static in an FM stereo broadcast, you can
reduce the static by switching to monaural reception. Press again
to switch back to stereo reception.
If the FM signal does not support stereo sound or the signal is not
strong enough, stereo function cannot be activated.
(see “Presetting stations”)
Not Available
Summary of Contents for IPC-W12
Page 1: ...Docking Station Alarm Clock for iPod ...
Page 12: ......
Page 13: ......
Page 14: ......
Page 15: ...ST C F SET TIMER PLAY BUZZER OFF SNOOZE SLEEP OFF 2 3 4 5 6 7 12 11 10 9 8 1 ...
Page 16: ......
Page 17: ......
Page 18: ......
Page 19: ......
Page 20: ......
Page 21: ......
Page 22: ......
Page 23: ......
Page 24: ......
Page 25: ......
Page 26: ......
Page 27: ......
Page 28: ......
Page 29: ......
Page 30: ......
Page 31: ......
Page 32: ......
Page 33: ......
Page 34: ......
Page 35: ......
Page 36: ......
Page 37: ......
Page 38: ......
Page 39: ......
Page 40: ......
Page 41: ......


