background image

7

AL2425CI

Audio connections (output)

●  DIGITAL AUDIO: Connect a suitable cable into the DIGITAL COAXIAL 

connection.

●  EARPHONE: To connect a headphone, insert the cable plug in the 

headphone jack. To prevent hearing damage, remember to adjust the 

volume to a comfortable level.

Video connections

The appliance has the following video INputs (in order of preference):

●  HDMI: Connect a suitable cable into the HDMI connection.

●  SCART: Connect a suitable cable into the SCART connection.

PC connections

The appliance has the following inputs to connect to your personal computer.

●  Audio connection: Connect a suitable cable into the AUDIO IN connection.

●  Video connection: Connect a suitable cable into the VGA connection.

Cable connection

●  Insert a suitable cable into the CABLE/AIR connection.

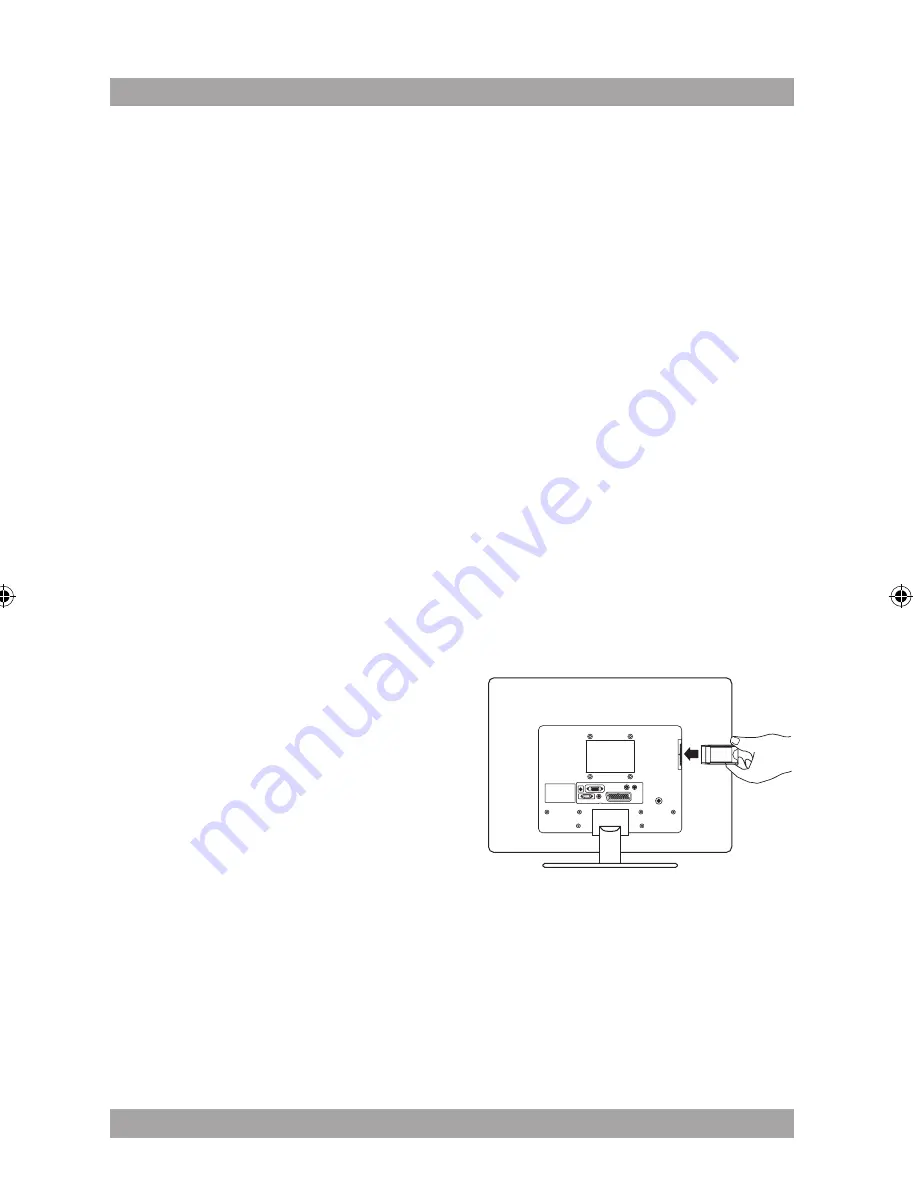
CI card connection for DVB-T

With a CI card installed, the appliance 

can be used for reception of 

scrambled services, for example pay 

channels. For further information, 

consult your provider.

●  Insert the CI card into the slot.

Summary of Contents for AL2425CI

Page 1: ...LED TV GB 2 NL 19 FR 37 ES 54 DE 71 EL 89 DA107 User manual Gebruiksaanwijzing Manuel de l utilisateur Manual de instrucciones Gebrauchsanleitung Brugsanvisning AL2425CI...

Page 2: ...king 4 2 2 Package contents 4 3 Installation 5 3 1 Mounting the foot 5 3 2 Wall mounting 6 3 3 Connecting random equipment 6 3 4 Connecting to the mains 8 3 5 Remote control 8 4 Functions 9 4 1 Remote...

Page 3: ...damage to the equipment is possible i A note gives additional information e g for a procedure General safety instructions 1 3 WARNING Do not put force on the appliance The appliance can fall and can c...

Page 4: ...in case it ever becomes necessary to return your product for service This is the only way to safely protect the product against damage in transit If you do dispose of the carton and the packing materi...

Page 5: ...rubber feet to prevent it from moving The feet are made from non migrating material specially formulated to avoid leaving any marks or stains on furniture However certain types of furniture polishes...

Page 6: ...g instructions supplied with the wall bracket Remove the socket from the appliance Hold the appliance in front of the wall bracket Align the screw holes with the holes in the socket Insert the screws...

Page 7: ...HDMI connection SCART Connect a suitable cable into the SCART connection PC connections The appliance has the following inputs to connect to your personal computer Audio connection Connect a suitable...

Page 8: ...3 5 Install batteries Remove the battery cover Insert the batteries matching the and polarity markings Re install the battery cover CAUTION Incorrect installation can cause battery leakage and corros...

Page 9: ...9 AL2425CI Functions 4 9 8 7 6 5 4 3 1 2 1 Remote sensor 2 LED indicator lamp 3 Power Standby button 4 Source button 5 Menu button 6 CH button 7 CH button 8 VOL button 9 VOL button...

Page 10: ...n 18 INFO button 19 VOL button 20 VOL button 21 INPUT button 22 EXIT button 23 Arrow buttons 24 OK button 25 S MODE button 26 P MODE button 27 MENU button 28 PROG button 29 PROG button 30 ENT button 3...

Page 11: ...display the setting on the screen press the INFO button 18 To select the desired picture mode User Mild Standard Dynamic press the P MODE button 26 To select the screen size AUTO 4 3 16 9 ZOOM1 ZOOM2...

Page 12: ...ded has to be connected TV setup menu operation 5 2 To change the initial settings The following actions have to be carried out with the remote control Press the MENU button 27 Press the left right ar...

Page 13: ...lly switch off ON TIME to set the time for the appliance to automatically switch on SLEEP TIMER to set the sleep timer 10 20 240 min OFF AUTO SLEEP the appliance automatically switches off if there is...

Page 14: ...e blue button again to re activate the settings for the current channel FAV Press the FAV button to add the channel to the favorites list Press the FAV button again to remove the channel from the favo...

Page 15: ...he GUIDE button 33 to open the programme guide To display the information of the programme currently broadcasted press the INFO button 18 Press the button once again to exit this function To display t...

Page 16: ...ource is selected Check volume or mute setting No picture Check if the TV is switched on and set to the correct A V input Check cables for connection problems No power Check if the power cord has been...

Page 17: ...ith foot 573 x 410 x 171 mm Weight 5 kg LED screen Parameter Value Diagonal size 58 cm 23 Ratio 16 9 Resolution 1920 x 1080 pixels Brightness 250 cd m2 Contrast ratio 1000 1 Response time 5 ms Viewing...

Page 18: ...electronic product By ensuring the correct disposal of this product you will help prevent potentially hazardous to the environment and to human health which could otherwise be caused by unsuitable was...

Page 19: ...het lezen van deze handleiding nog vragen Neemt u dan contact op met AKAI Benelux via 0900 3555333 Avez vous des questions apr s avoir lu ce manual Contactez AKAI Benelux par t l phone au 070 355505 w...

Reviews: