AirTest PT9250 & CO
2
Application Guide
2 of
12
1. Introduction To The PT9250
Hand Held CO
2
Sensor
Overview
The PT9250 is a versatile tool that can be used
by building owners and contractors to better
understand the operation of buildings and assess
their potential for energy savings using a CO
2
based ventilation control strategy. It can also be
a useful tool for checking the operation of existing
ventilation systems and the degree to which
ventilation is being delivered to individual zones
to meet occupant needs.
What’s Inside
Inside the TR9250 is a temperature sensor and a
unique infrared sensor that optically detects and
measures the concentration of carbon dioxide in
the air. Its operation is based on the same
principal used by infrared spectrometers typically
used in medical and scientific applications. The
LCD display on this versatile tool will provide a
direct indication of both CO
2
and temperature
concentrations. The hand held unit also
incorporates a powerful “smart” microprocessor
used to perform the complex task of analyzing
the CO
2
sample.
The microprocessor allows the sensor to data log
concentrations over time, to perform a self-
calibration, and to calculate and display
cfm/person ventilation rates (which are directly
related to CO
2
concentrations).
The
microprocessor also allows the TR9250 to be
connected to a PC where you can customize
information provided on the display, set data
logging preferences (like sampling time interval)
and view the results of a current or past
measurement that has been data logged. You
can also download the recorded CO
2
and
temperature data to a program like Windows®
Excel® for more detailed graphing and charting
options.
2. Quick Start Basics
Turning On The Hand Held Sensor
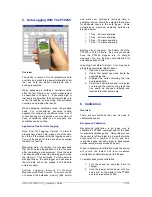
Plug the charger provided with the sensor into
the bottom of the TR9250 and allow it to charge
for at least 1.5 hours.
To power up the TR9250 you will have to hold
the power button down for approximately 10
seconds while the sensor performs a self-
diagnostic check.
Once you press the power button you will see
88.88 displayed on the upper display and –88.88
on the lower display for approximately 4 seconds
and then the screen will go blank for
approximately 2 seconds. Continue holding the
button until you see the word “test” on the lower
display. At this point, the TR9250 will continue
it’s self-diagnosis until readings on the upper
display reach 5000 ppm and all the LED’s have
been illuminated. Once this sequence is
completed the display will immediately begin to
display current readings. If the display goes blank
when you release the button, the internal battery
will need to be charged before you can use the
hand held sensor.
Turning Off The Hand Held Sensor
Press and hold the power button for 10 seconds.
During that time you will see the display cycle
through two modes. One mode is “
read
” and the
other mode is “
cal b
”. These functions will be
described later in this manual and are briefly
described below. When the display goes blank
you can remove your finger from the power
button.
“read”
This mode is used to change the outside
concentration used for the calculation of
ventilation rate to an actual outside measurement
rather than the assumed 400 ppm. Read mode
will be activated whenever the power button is
pressed during operation. The use of this button
is explained further in the next section.
“cal b”
This mode Is used for automatic
background calibration. When left in this mode
overnight in an unoccupied area, the unit will
calibrate itself so that the lowest level observed
during the period will be 400 ppm (typical outside
levels).


