

3
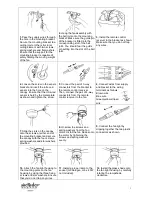
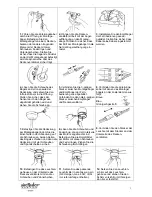
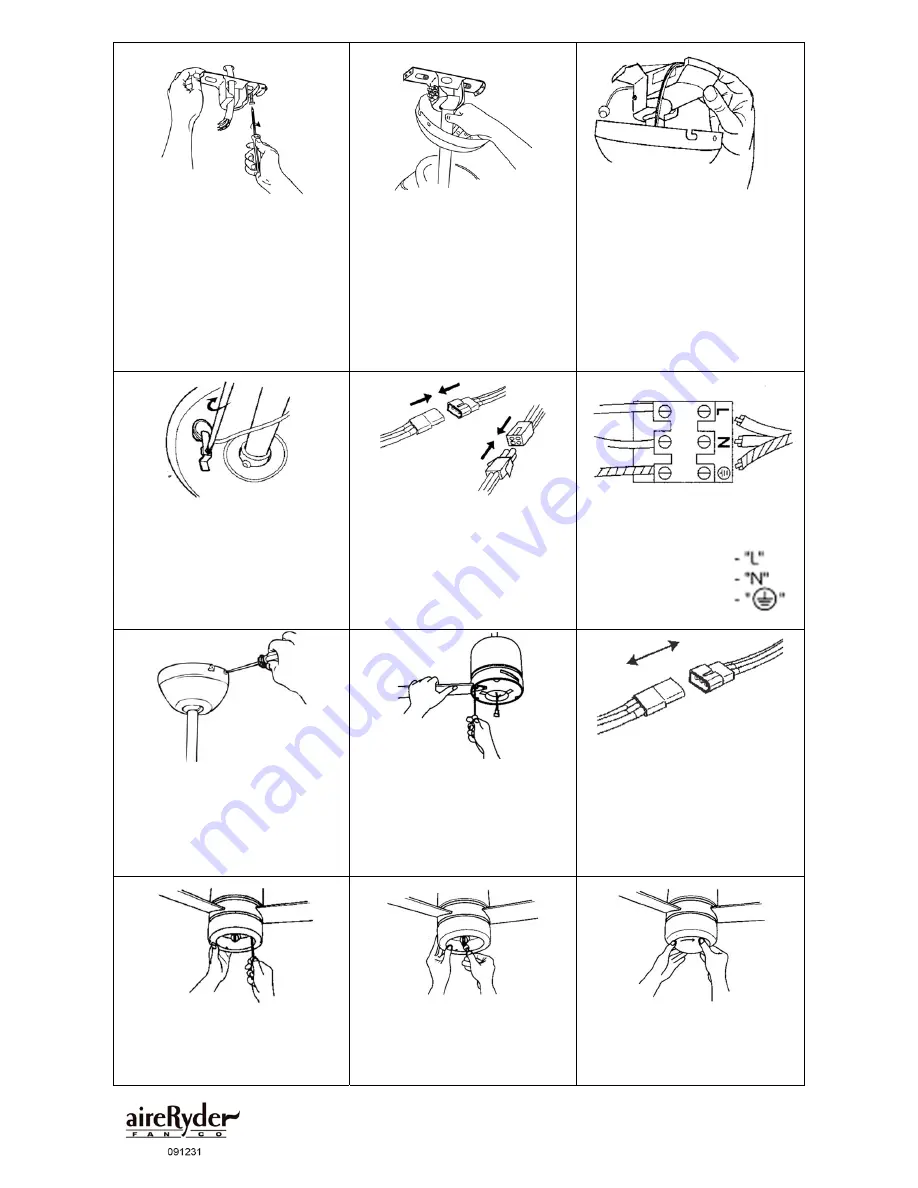
1.
Pass the supply wires through
the hole in the mounting bracket.
Secure the mounting bracket to a
ceiling joist or other structural
ceiling element with two screws,
spring washers and flat washers.
Ensure that the support for the
mounting bracket is capable of
safely holding the moving weight
of the fan.
2.
Hang the fan assembly with
the ball joint onto the mounting
bracket. Make sure the guide pin
of the bracket is fitted into the
corresponding slot of the ball
joint. You should feel the guide
pin setting into the slot of the ball
joint.
3.
Install the remote control
receiver in the bracket as shown.
Make sure that you do not trap
any wires.
4
. Loosen the screw in the sensor
bracket and insert the infra-red
sensor into the hole on the
canopy. Ensure that the infra-red
sensor is held by the metal plate
as shown and tighten the screw.
5
. Connect the pair of 3-way
connectors from the bracket to
the remote control receiver.
Then, connect the pair of 4-way
connectors from the remote
control receiver to the fan.
6.
Connect wires from supply
and bracket to the wiring
terminals as follows:
Brown wire
Blue wire
Green/yellow striped
wire
7.
Slide the slots on the canopy
onto the screws at either end of
the mounting bracket and secure
the canopy with the four screws,
spring washers and star washers
provided.
8.
Unscrew the screws and
spring washers from the fan
motor.
Install the fan blades onto
the motor by tightening the
screws and spring washers
evenly.
9.
Connect the fan light by
clipping together the two plastic
connectors as shown.
10
. Attach the fan light housing to
the mounting plate on the fan
housing by using the three fixing
screws and star washers. Ensure
that you do not trap any wires.
11
. Install a proper lamp to the
socket (G9 Halogen, max. 40W,
not included).
12.
Install the glass shade onto
the fan light housing by carefully
rotating the lampshade
clockwise.


