background image

basic oper

ations

basic oper

ations

15

basic oper

ations

basic oper

ations

Recording a voice clip

Press the Mode button and use the joystick to select 

the Voice ( 

 ) mode. Then press the center of the 

joystick to enter.  


Press the Record button to start recording. 


When you are done, press the Record button again 

to stop recording.

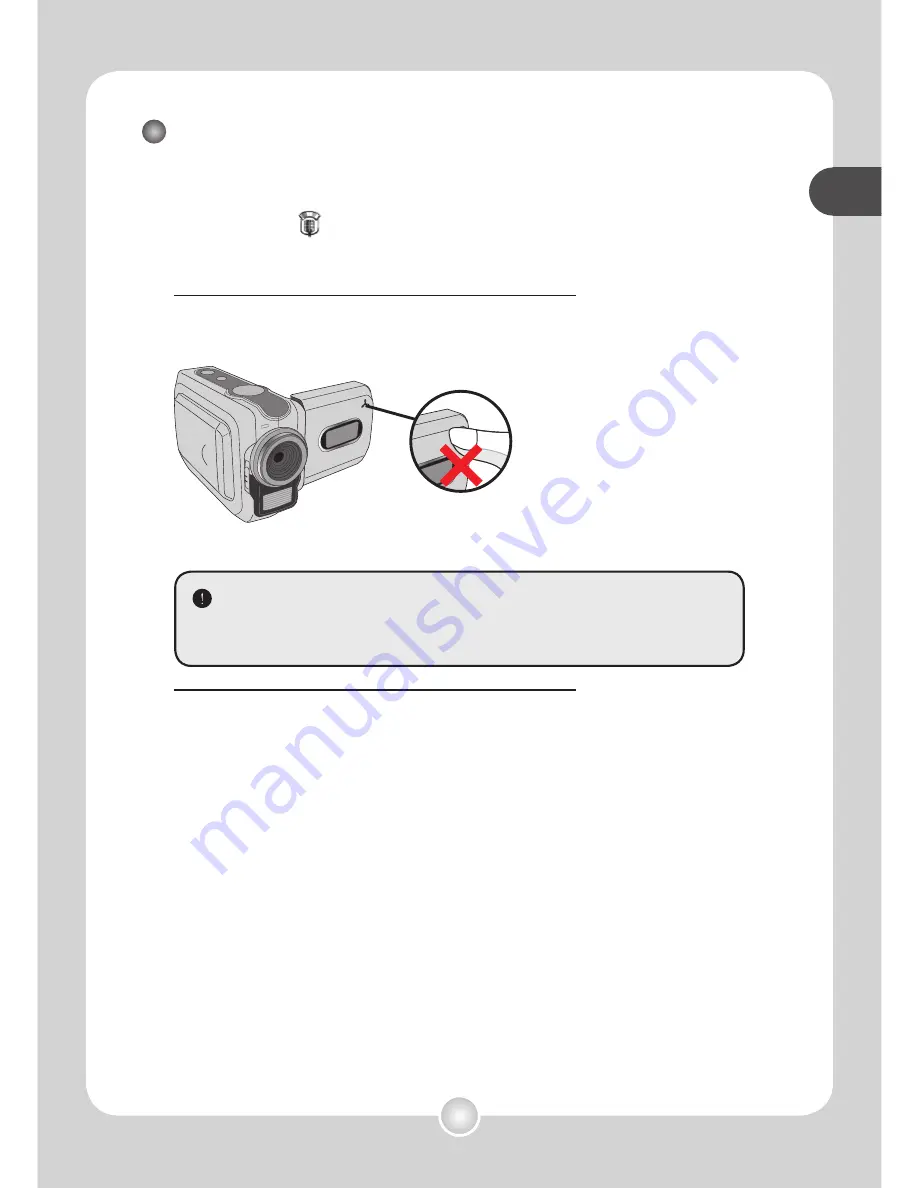
Avoid blocking the microphone

 Before or during recording, you can move the joystick toward left or 

right to adjust microphone sensibility, thus setting the sound volume 

of the recording.

Summary of Contents for Pocket DV5700

Page 1: ...English...

Page 2: ...or leave it in direct sunlight Doing so may damage the camera 4 Use the camera with care Avoid pressing hard on the camera body 5 For your own safety avoid using the camera when there is a storm or li...

Page 3: ...and language 12 Recording a video clip 13 Taking a still picture 15 Recording a voice clip 16 Playing back your recordings 17 Playing MP3 music 18 Connecting the camera to a TV 20 Advanced Operations...

Page 4: ...PC Camera 36 Installing the software 36 Starting the application 36 Using DV 5700 PC Camera 39 Addenda 42 Troubleshooting 42 Flicker Settings 45 Battery Life Indicator 45 Storage Capacity 46 System Me...

Page 5: ...ector Play Pause button Backward button LCD display USB connector Record button Joystick Menu button Mode button SD MMC card slot Strap hook Tripod socket Bottom view Power button Shutter button Front...

Page 6: ...reat the Li ion battery with care Keep the battery away from re or high temperature environment over 140 F or 60 C Do not drop the battery or try to disassemble it If the battery is not used for long...

Page 7: ...the charger Note that the metallic contacts must be aligned with the contacts in the charger Charging indicator Power indicator To a wall outlet Battery pack 3 The charging indicator turns red and th...

Page 8: ...with a write protect switch When the write protect switch is set to the Lock position the card will become non writable To ensure that the camera can operate normally you should set the write protect...

Page 9: ...wer button for 1 second to turn off the camera OR If the camera stays inactive for a long period of time it may automatically shut down due to the Auto Off setting See page 27 for more information If...

Page 10: ...wing positions 1 Normal position Normally the LCD panel is not rotated for the user to get a clear preview on the screen 2 Rotate the LCD panel The LCD panel can be rotated up to 180 degrees as indica...

Page 11: ...lution Number of recordings Selftimer Zoom ratio Storage medium 1 Video resolution Mode icon Flash mode 1 This icon will change according to the storage medium you are using internal memory memory car...

Page 12: ...ick to select the Date Time 30 item 4 Press the joystick or move the joystick toward right to enter the sub menu 5 Move the joystick left or right to shift between items Move the joystick up or down t...

Page 13: ...close ups The focus is adjustable during recording 2 Use the joystick to zoom in or zoom out the screen Adjust other settings if necessary For details on the white balance options see the Advanced Ope...

Page 14: ...basic operations 13 basic operations Recording a video clip continued 3 Press the Record button to start recording 4 Press the Record button again to stop recording 2 0 0008 00 00 07 Timer...

Page 15: ...only for close ups 2 Use the joystick to zoom in or zoom out the screen Adjust other settings if necessary For details on the ash mode and white balance options see the Advanced Operations section 3 P...

Page 16: ...ess the center of the joystick to enter 2 Press the Record button to start recording 3 When you are done press the Record button again to stop recording Avoid blocking the microphone Before or during...

Page 17: ...reen mode Use the joystick to move left or right Picture Zoom in out Use the joystick to move up or down Lock Release zoom ratio When the zoom ratio is greater than 1 0x press the center of the joysti...

Page 18: ...to your PC see page 31 2 Copy les to the camera After the camera is connected to the PC double click on My Computer and you will nd a removable disk Create a MP3 folder in the removable disk and then...

Page 19: ...P3 mode How to Action Shift between tracks Use the joystick to move up or down Or press the Forward button or Backward button Start playing Press the center of the joystick or the Play Pause button Pa...

Page 20: ...your video clips still pictures and audio recordings directly on your TV sharing them with your friends and family TV out Video Audio AV Mode TV 1 Turn on your TV and switch the TV to AV mode 2 Conne...

Page 21: ...ils on menu operations How to Action Bring up the menu Press the Menu button Move the highlight bar Use the joystick to move up or down Enter sub menu Con rm an item Press the center of the joystick E...

Page 22: ...ure resolution to 1280x960 Print up to 3x5 in photos or display on PC 3M Set picture resolution to 2048x1536 Print 4x6 in or 5x7 in photos 5M Set picture resolution to 2560x1920 Print up to 6x8 in pho...

Page 23: ...shady environments Fluorescent This setting is suitable for indoor recording with uorescent lamp lighting or environments with high color temperature Tungsten This setting is suitable for indoor reco...

Page 24: ...appears too bright or too dark A positive value indicates the image will be brighter than usual while a negative value makes the image dimmer Selftimer On Enable the selftimer After the selftimer is t...

Page 25: ...a displays images in sequence Only JPEG pictures and the rst frames of MPEG les will be displayed You can press the Enter button to stop the slide show Print One Print current image when connected wit...

Page 26: ...the MP3 mode Press the Menu button Item Description Delete One Delete current track Cancel Cancel action Menu items in Voice mode Power on Press the Mode button Enter the Voice mode Press the Menu bu...

Page 27: ...ttings reference see page 45 TV out NTSC Set TV system compatibility to NTSC This option is suitable for America Taiwan Japan and Korea areas PAL Set TV system compatibility to PAL This option is suit...

Page 28: ...wn when staying inactive for over 5 minutes Language Lets you select the language used for OSD Default Yes Restore factory defaults Note that your current settings will be overridden No Cancel action...

Page 29: ...a PicBridge compatible printer follow these steps 1 Power on the camera 2 Set the camera USB mode to Printer page 27 3 Open the connector cover and connect one end of the accessory USB cable to the c...

Page 30: ...his stage Shut down all other applications running on your computer If the autorun screen does not appear automatically double click on My Computer and then the CD ROM drive Then start the Setup exe p...

Page 31: ...not sure whether the codecs have been installed in your computer please click on Yes and follow the on screen instructions to complete the installation 5 Install Direct X 8 0 or above After the codec...

Page 32: ...ter Connecting the camera to your PC 1 Connect the USB cable to your computer Turn on your computer and then connect the accessory USB cable to the USB port of your computer Make sure the cable and th...

Page 33: ...r Windows XP users After the camera is connected to your computer a dialogue window will appear automatically Please select the item Open folder to view les using Windows Explorer and click OK For Win...

Page 34: ...to your pc 33 copying les to your pc Copying les to the PC continued 2 Double click on the DCIM le folder 3 Double click on the 100MEDIA le folder 4 Drag the target le into My Documents or the destina...

Page 35: ...pc copying les to your pc Viewing Playing les on your PC 1 Double click on My Documents or any other folder that stores your les 2 Double click on the desired le and the le will be opened by the progr...

Page 36: ...the camera to your computer a removable disk will appear in your computer The removable disk actually represents the storage medium of your camera In the disk you can nd all of your recordings Refer t...

Page 37: ...e you can press the Menu button to bring up the options menu Using PC Camera Installing the software The PC camera software is included in the camera driver and therefore you should install the driver...

Page 38: ...inue 3 During installation some users may need to insert a licensed 98SE CD into the CD ROM drive for copying the needed les 4 Follow the on screen instructions to complete the installation Notice for...

Page 39: ...ued 3 Launch DV 5700 program Double click the DV 5700 icon on the Desktop to start the program After the program starts you can begin to use the PC camera function If you cannot nd the program shortcu...

Page 40: ...Format Source Start Stop preview window Setting Open album Select video source Sub menu available To view pictures taken by DV 5700 PC Camera please click on to open the photo album Or as an alternate...

Page 41: ...rding click on the icon Taking a snapshot Click on the icon to take a snapshot Con guring Format options Color Space Select one of the following functions according to your needs RGB 24 This item is f...

Page 42: ...ness manually Quality If the network bandwidth is congested when using PC Camera slide the bar toward Faster Video to avoid this problem Con guring Flicker options If you take your camera abroad and f...

Page 43: ...ton to reactivate the display Can not take pictures or video clips when pressing the Shutter or Record button Out of memory Free some space from the SD MMC card or the internal memory The camera is re...

Page 44: ...tion during operation The camera encounters software failure Remove the battery pack and replace it into the compartment Then power on the camera The recorded pictures appear too blurred The focus is...

Page 45: ...ted to the PC via the USB cable before installing the driver Install the driver before plugging in the USB cable The TV screen does not display after connecting the camera to the TV The camera is not...

Page 46: ...his message will show up Please Change Batteries The battery life of the camera is low You should replace the batteries with new ones immediately Memory Full The storage memory is full and can not sto...

Page 47: ...rd 512MB 40 160 320 SD MMC card 1GB 80 320 640 Memory Still picture 5M 3M 1M Flash memory 8MB for storage 12 20 100 SD MMC card 128MB 140 240 1000 SD MMC card 256MB 280 480 2000 SD MMC card 512MB 560...

Page 48: ...tteries when the icon indicates low battery life Battery Life Indicator Still picture Video clip Number of shots Recording time minute 290 90 shoot every 30 seconds ash is on resolution is set to 2048...

Page 49: ...ls Max Output resolution 5 0 Mega 2560 x 1920 pixels Internal Memory 32MB DDR Ram for Processing 16MB Flash memory 8MB for Storage External Memory Built in SD MMC slot Max 1GB Digital Zoom 4X F N 2 8...

Page 50: ...ME 2000 XP CPU Pentium III or above System RAM 128MB or above Graphic Card 64MB 24 bit true color CD ROM speed 4x or above Software DirectX 8 0 or above and Windows Media Player Codecs Other USB conne...

Reviews: