Usage and Maintenance Instructions
Ver.3 09/2013 (2634)
3
2.
Extend the rollator fully , and check that the side bars are straight and level.
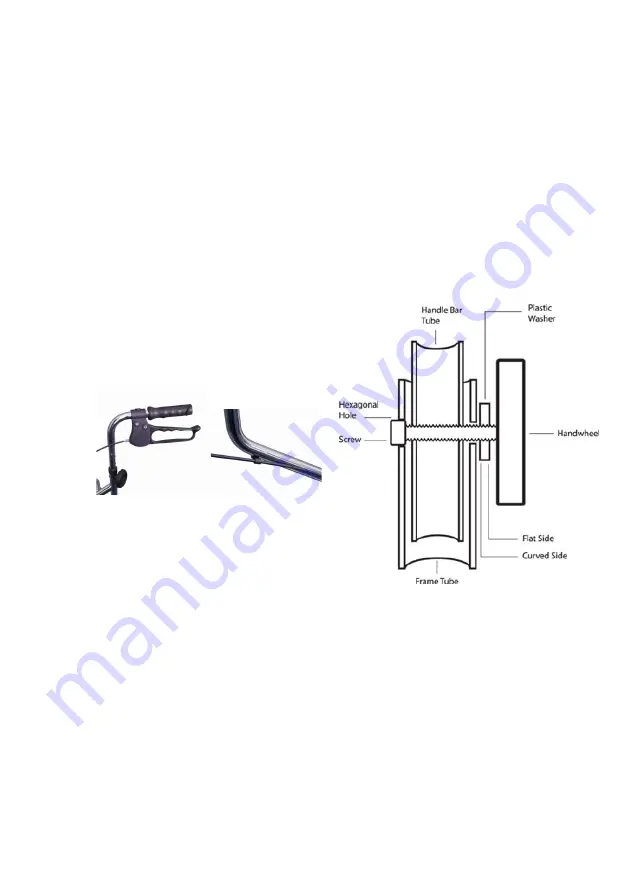
Carefully insert the brake assembly with pre-punched extension tube (Fig. 3) within
the frame.
3.
At the required height (there are several holes) insert the fixing screw through the
hexagonal hole in the frame, and pass through the hole in the handlebar tube,
place the curved plastic washer over the end of the screw, with the curved side
facing the tube. Fix the screw in place with the locking handwheel (Fig. 3b).
4.
Make sure that the handwheel is tightened sufficiently so that the brake tubes will
not move accidentally.
5.
After setting the height, check that both brakes are even in height and that the
rollator is sitting even onto the ground.
6.
Fix the brake cables into the integral brake cable ‘U’ clip welded onto the frame if
not already assembled (Fig. 3a).
7.
Prior to use make sure brakes are adjusted correctly and working properly. See
section ‘OPERATING THE BRAKES’ and ‘ADJUSTMENT’.
Fig. 3
Fig. 3a
Fig. 3b


