background image

 of 

5

23

ahead RC

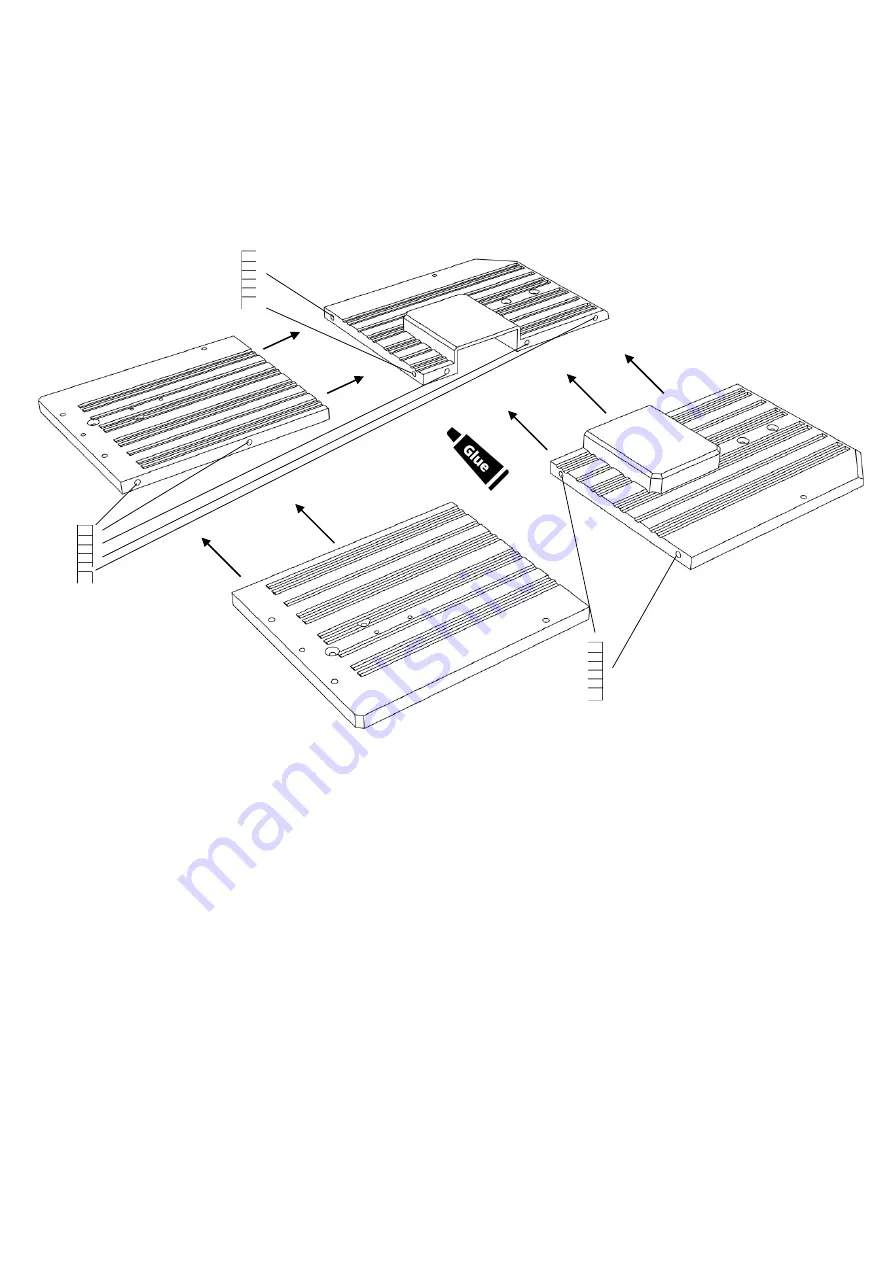
Combining the quarter split bed

2. Apply 

instant glue 
and push fit 

onto grub 

screws

1. Tighten the grub 

screws as much as 
possible

M4x20mm GS      x2

M4x20mm GS      x5

M4x20mm GS      x2

Summary of Contents for Crawler C23 Flatbed

Page 1: ...ahead RC Crawler C23 Flatbed Assembly Manual of 1 23 ahead RC ...

Page 2: ... 5mm Red LED x2 Hardware Hardware Quantity Check M3x10 Countersunk CS Screw 20 M3x10 Socket Head SH Screw 12 M3x15 Countersunk CS Screw 17 M3x15 Socket Head SH Screw 8 M3x20 Countersunk CS Screw 4 M3x20 Socket Head SH Screw 2 M3 Lock nut 4 M3 Washer 8 10mm outer diameter 2 M4x20 grub screw 13 Battery strap 20 25mm width 150 200mm length 1 of 2 23 ahead RC ...

Page 3: ...with the instructions Visualise a plan to assemble all the pieces Make sure you have all of the hardware and tools Be sure to have enough instant glue Dry fit all parts before painting and assembling Tip It will help to paint all of the parts before final assembly of 3 23 ahead RC ...

Page 4: ...of 4 23 ahead RC M4x20mm GS x5 Combining the half split bed 2 Apply instant glue and push fit onto grub screws 1 Tighten the grub screws as much as possible OR follow quarter split bed instructions below ...

Page 5: ...of 5 23 ahead RC Combining the quarter split bed 2 Apply instant glue and push fit onto grub screws 1 Tighten the grub screws as much as possible M4x20mm GS x2 M4x20mm GS x5 M4x20mm GS x2 ...

Page 6: ...3 ahead RC Combining the split TALL Headache rack M4x20mm GS x4 2 Apply instant glue and push fit onto grub screws 1 Tighten the grub screws as much as possible OR follow SMALL headache rack instructions below ...

Page 7: ...of 7 23 ahead RC M4x20mm GS x4 2 Apply instant glue and push fit onto grub screws 1 Tighten the grub screws as much as possible Combining the split SMALL Headache rack ...

Page 8: ...of 8 23 ahead RC Mounting the TALL headache rack M3x20mm CS x4 M3x15mm CS x4 ...

Page 9: ...of 9 23 ahead RC Mounting the SMALL headache rack M3x20mm CS x4 ...

Page 10: ...of 10 23 ahead RC Mounting the front cover M3x10mm SH x2 ...

Page 11: ...of 11 23 ahead RC M3x10mm CS x4 Repeat on the other side Mounting the fenders and side covers M3x10mm CS x12 M3x10mm SH x6 Repeat on the other side ...

Page 12: ...of 12 23 ahead RC Installing the front chassis mount Line up holes to prepare for mounting M3x15mm CS x4 ...

Page 13: ...of 13 23 ahead RC M3x20mm SH x2 Assembling the bumper M3x10mm SH x2 OR follow adjustable bumper mount instructions below Simply insert screws first no need to tighten yet ...

Page 14: ...of 14 23 ahead RC Mounting the bumper M3 washer x2 M3 nylon lock nut x2 OR follow adjustable bumper mount instructions below M3x10mm SH x2 ...

Page 15: ...of 15 23 ahead RC Installing the bumper accessories 5mm Orange LED 5mm Red LED 5mm White LED Repeat on the other side ...

Page 16: ...to the chassis 1 slide bumper mount into chassis rails 2 slide chassis mount onto the outside of the chassis rails and lineup slot with bumper mount holes 3 Drive screws through chassis mount slot into bumper mount M3x15mm SH x6 Repeat on the other side ...

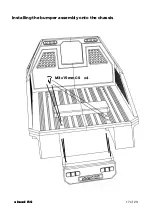
Page 17: ...of 17 23 ahead RC Installing the bumper assembly onto the chassis M3x15mm CS x4 ...

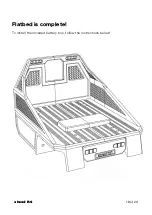
Page 18: ...of 18 23 ahead RC Flatbed is complete To install the included battery box follow the instructions below ...

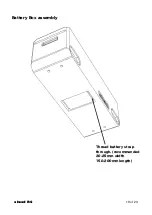
Page 19: ...of 19 23 ahead RC Battery Box assembly Thread battery strap through recommended 20 25mm width 150 200mm length ...

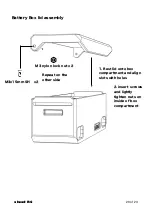
Page 20: ...RC Battery Box lid assembly M3x15mm SH x2 Repeat on the other side M3 nylon lock nut x2 1 Rest lid onto box compartment and align slots with holes 2 insert screws and lightly tighten nuts on inside of box compartment ...

Page 21: ...of 21 23 ahead RC Battery Box lid opening demo Hinged opening Slid opening ...

Page 22: ...of 22 23 ahead RC Battery Box bed mounting M3x10mm CS x4 ...

Page 23: ...fully complete Thank you for selecting ahead RC products If you have any questions or need help with the assembly please do not hesitate to contact us at aheadrc gmail com or visit us at www aheadrc com Best of luck with your build ...

Reviews: