170
mm
+-2
110
mm+-2
G
B
D
E
F
P
T
C
S
C
I
AgfaPhoto DC-600uw
9
5.2.1 Movie Mode
5.2.2 Self-timer
5.2.3 Macro Mode
5.2.4 Menu Mode
5.2.4.1 Video Size
5.2.4.2 EV
5.2.4.3 White Balance
5.2.4.4 Metering
5.2.4.5 Effect
5.2.4.6 OSD Info
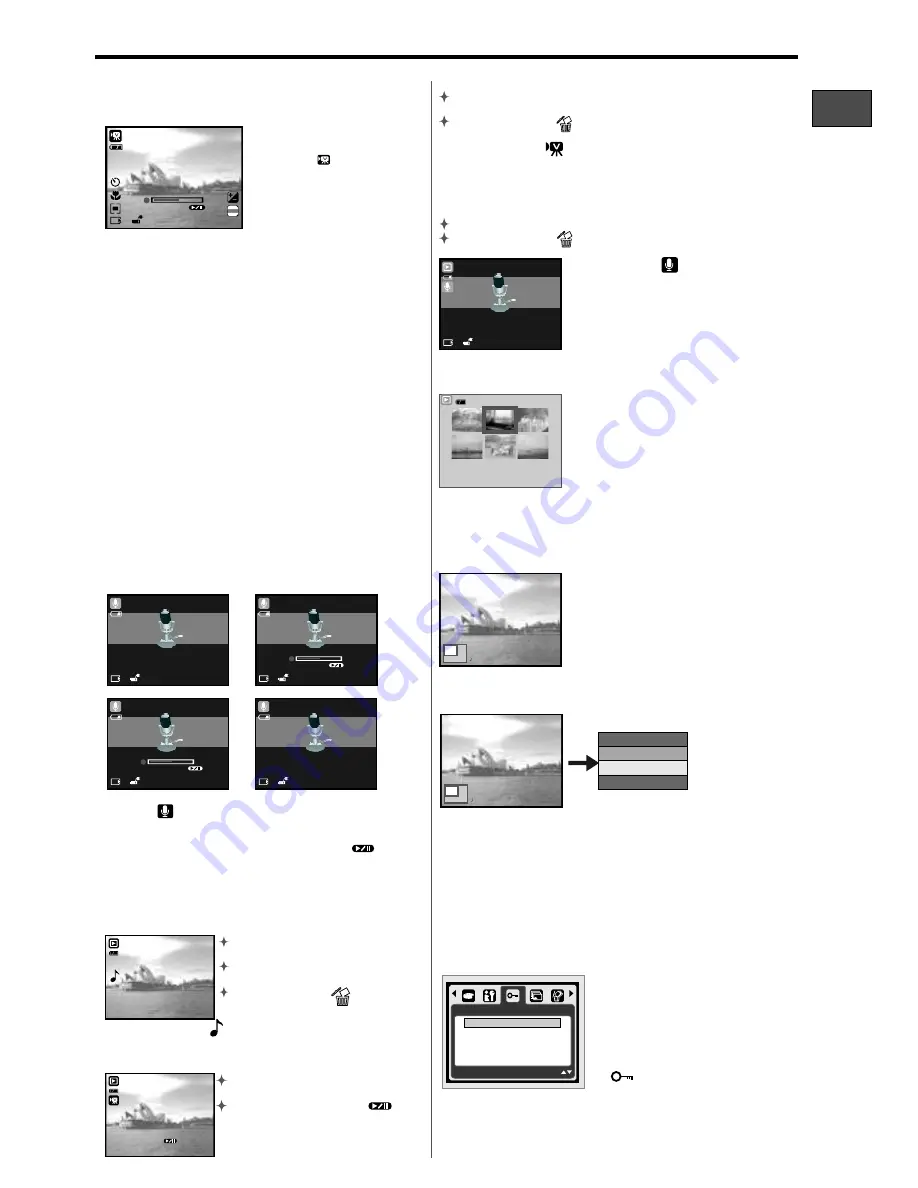
Press the Mode Button and then select Movie Mode.
Press refer to 3.4 Self-timer on Page 5.
Press refer to 3.9 Macro Mode on Page 6.
Press refer to 4.2.5 Menu Mode on Page 7.
The video size options are provided as follows:
640 (640 x 480)
320 (320 x 240)
Please refer to 4.2.5.3 EV on Page 7.
Please refer to 4.2.5.5 WB on Page 7.
Please refer to 4.2.5.6 Metering on Page 8.
Please refer to 4.2.5.9 Effect on Page 8.
Please refer to 4.2.5.11 OSD Info on Page 8.
5.2 Function Introduction
1. Press the Power Button
to turn on the camera.
2. Press the Mode Button
to change to Movie Clip
Mode(
).
3. Press the Shutter Button
to start or stop movie
recording.
4. Press the OK Button to
pause / resume during
recording.
6.0 Voice Recording Mode
Stand By
Start Recording
1. Press the Mode Button and select Voice Recording
Mode(
).
2. Press the Shutter Button to start the recording and
press the Shutter Button to stop the recording.
3. During recording, press the Play/Pause (
)
Button to put the recording on hold and press it
again to continue recording.
6.1 Voice Recording
5.0 DV Mode
Note:
The max. recording time for one video file is about
57 minutes only.
5.1 Movie Recording
Recording On Hold
Stop
7.0 Playback Mode
7.1 Playback of Still Image
Please press the Playback Button
to view the images taken.
Press the Right or Left Button to go
to the next or the previous image.
Press the Delete (
) Button to
delete the image.
Press the Playback Button to play
the Movie Clips.
Press the Play / Pause (
)
Button to play or pause the movie
clip when browsing a video file.
Press the Playback Button to browse the Audio Clips.
Press the Delete (
) Button to delete the Voice clip.
7.3 Playback of Voice Clip
7.2 Playback of Movie Clip
Note:
The icon (
) shows up when viewing a still
image with a voice memo (Please refer to Page 11).
Thumbnail Display is a convenient
tool for you to find the image you
took from the list. In Playback
Mode, you can press the Playback
Button to have Thumbnail Display.
7.4 Thumbnail Display
Note:
Note:
The icon (
) on the top left
of the LCD Monitor represents an audio
clip, not a still image or movie clip.
Please connect with PC by USB
cable to play the audio clip on PC.
(Press the Playback Button again or the OK Button to go
back to normal Playback display.) Select a file and press the
Tele Button to enlarge the selected image or file.
During Video Playback, press the Left Button for Rewind,
press the Right Button for Fast forward.
Press the Delete (
) Button to delete the movie clip.
The icon (
) on the top left of the LCD Monitor
represents a Movie clip, not a still image.
Note:
7.5 Enlargement
1.
.
(Depending on the original size of
image.)
Select a file and press the Tele Button
to enlarge the selected image or file.
2. Press and hold the Tele Button to
enlarge the image to up to 8.0X
3. Use the UP/DOWN/LEFT/RIGHT Button
to explore the image and check the focus.
4. Press and hold the Tele Button to return
the image to its normal size.
Enlargement
Enlargement
1. Select an image.
2. Press the Tele Button to select the size of the enlargement.
3. Press the Playback Button if you want to trim and save the
new image showing on the screen.
4. The camera will save the trimmed image after you confirm
the request.
7.5.1 Trimming
7.6.1 Protect
Set selected image(s)
with Protection
1.
ress the Menu
Button and select "Protect" and
"Select".
2. Press the OK Button to confirm
the request.
3. Select one image and press
the OK Button to lock the
image.
4. (
) will show on the LCD
monitor when the protection is
set.
In Playback Mode, p
7.6 Menu Mode
PAUSE ?
00:00:23
STANDBY
00:00:23
PAUSE ?
00:00:23
RECORD?
00:00:23
640
00:00:23
STANDBY
100-0021
PLAY?
100-0021
1
2
3
4
5
6
X 1.6
TRIMMING?
TRIM
CANCEL
CONFIRM :OK
Trimming
100-0021
PROTECT
SELECT
ALL
X 1.6
SET : OK
MOVE:
00:00:23
5. Press the OK Button again to cancel the protection.
G
B


