Assembly Instructions
PRS4024a
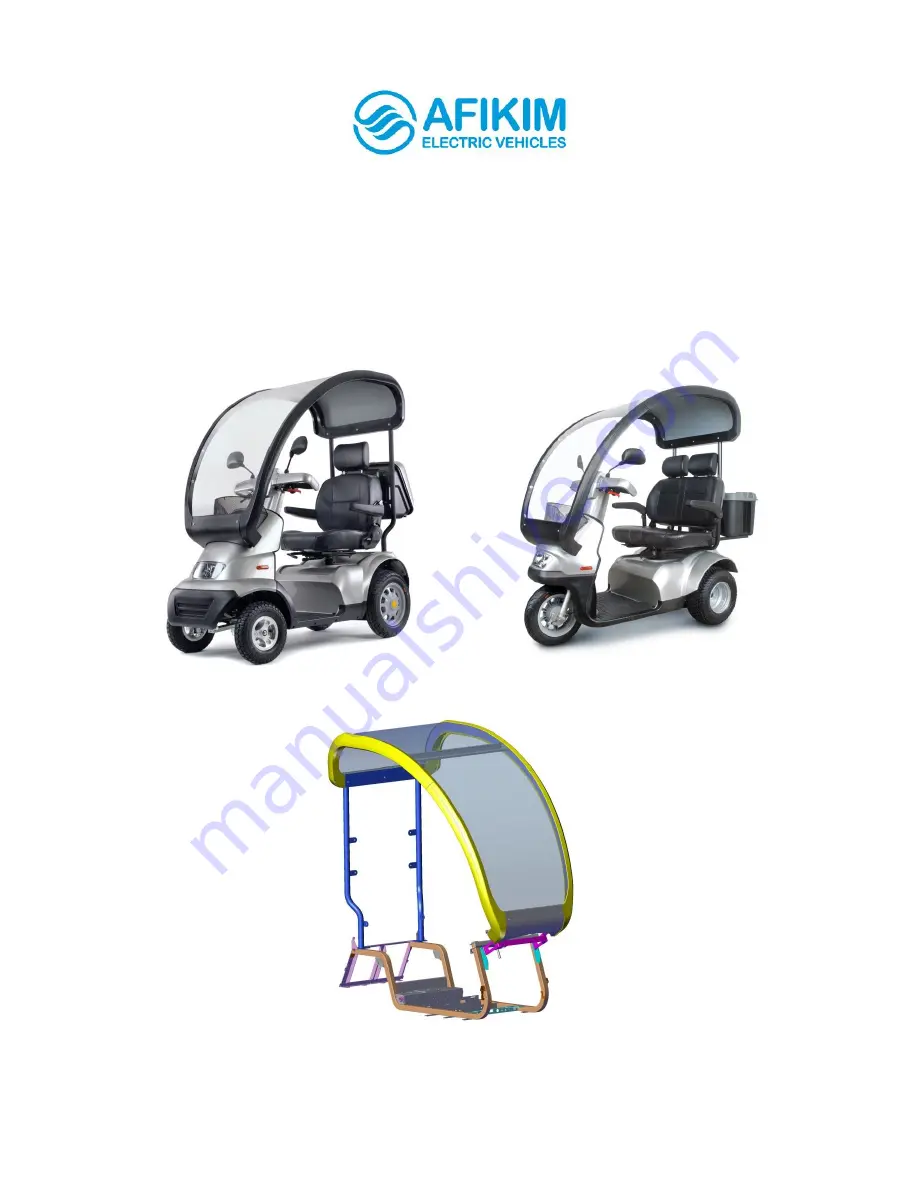
Roof Canopy for Breeze-S3 and Breeze-S4 Scooters
Afikim Electric Vehicles
Page 1: ...Assembly Instructions PRS4024a Roof Canopy for Breeze S3 and Breeze S4 Scooters Afikim Electric Vehicles...
Page 2: ...MBLING THE REAR FRAME 9 PART D RETURNING THE FRONT COVER TO SCOOTER 10 PART 1 ASSEMBLING THE BOTTOM BEAM 11 PART 2 ASSEMBLING THE TOP BEAM 12 PART 3 ASSEMBLING THE SIDE BEAMS 13 PART 4 ASSEMBLING THE...
Page 3: ...3 21 Canopy Part List...
Page 4: ...lips 3 Hexagon driver 4mm 4 For power screwdriver Recommendation a drive bit No PH2 Drill tool 6mm 5 Reversible Ratchet Spanner Size 10mm for M6 bolts 6 socket 13mm for M8 bolts 7 3M Safety Walk Rubbe...
Page 5: ...t and Battery Covers Page 6 B Part B Mounting the Inner Bracket Page 7 C Part C Assembling the Rear Frame Page 9 D Part D Returning the Front Cover to Scooter page 10 Assembly steps 1 Part 1 Assemblin...
Page 6: ...a Front cover b Seat c Battery Cover From the scooter 2 Cut bores in the front cover for the inner bracket Cut bores in the designated locations as shown A tool such as this DREMEL tool may be used t...
Page 7: ...7 21 Part B Mounting the Inner Bracket Mount the inner bracket as shown below Note You may need to pre drill 6mm the holes upon the scooter frame M6X16 NYLOCK M6 M6X16 NYLOCK M6...
Page 8: ...8 21 1 2 Slightly tighten bolts 3 place 320 2 mm and Tighten bolts securely...
Page 9: ...hown below 1 2 Three bolts anchor each frame base Tighten bolts securely After assembling the rear frame and the inner brackets the scooters will appear as shown After assembling the rear frame and th...
Page 10: ...10 21 Part D Returning the Front Cover to Scooter Reassemble the front cover onto the scooter Reassemble the a Front cover b Battery Cover c Seat Inner Brackets...
Page 11: ...ing a chassis as a jig fasten the bolts but do not fasten them strongly After assembly these bolts will be loosened to remove the canopy If assembling the canopy directly onto the scooter fasten these...
Page 12: ...e square neck bolts 2 Place the top beam assembly on the rear frame as shown LOOSLY Secure the top beam assembly to the rear frame with a hex socket screw Top Beam Cover Top Beam Top Beam Assembly Rea...
Page 13: ...hown below 1 At first LOOSLEY attach the side beams to the bottom beam and top beam Do NOT tighten the bolts 2 Secure the center beam between the two side beams Tighten the bolts securely on both side...
Page 14: ...lips by pressing down and shoving it in Note pre peel off a 100mm 4 of the protection film around the edge contours to avoid catching 2 Secure the sheets together by cello taping it on the upper side...
Page 15: ...mbly between the Top Beam Cover and the top beam 5 Tighten screws in their designated locations along the side beams Work from the back towards the front Note Don t over tighten leave sheet free 6 Aft...
Page 16: ...sis as a jig ensure that the chassis is secure so that the complete chassis will not be lifted up 8 Apply the rubber strip upon the assembly plastic sheets from edge to edge top to bottom Make sure to...
Page 17: ...e protection layear come upon the center beam Press the HP2 profile agenst the center beam firmly and evenly Make sure that the HP2 profile is in good contact Note Foam tape AC00198 will have the max...
Page 18: ...towards the front Caution Don t over tighten the M4 screws Tmax 2 2 Nm 18 5 lbf in 2 Fasten screws Ensure that each screw is properly centered in its housing Note use tool 2 on the tool table for the...
Page 19: ...21 4 Mount the front plate onto the front bracket 5 Fasten the screws of the front plate 6 Windshield clean instructions sticker Place the sticker on the inside of the windshild Hex socket button M6x...
Page 20: ...p Beam Assembly to the Rear Frame Secure the top beam assembly to the rear frame with three screws by Tool Table 3 from the interior of the canopy as shown Assembly of the canopy is completed Hex sock...
Page 21: ...g the Front and Battery Covers Part B Mounting the Inner Bracket Part C Assembling the Rear Frame Part D Returning the Front Cover to Scooter 2 On the chassis jig unscrew the bottom beam from the inne...