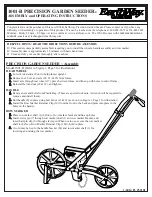
Sha er ne
Replacement
Ensure
that
rings
are
not
bent
and
bolt
holes
are
not
elongated.
Always
clean
all
ma ng
surfaces
free
of
dirt
and
contamina on.
1.
Assemble
the
roller
as
shown
below
with
the
ne
between
the
clamping
rings
with
washers
under
the
bolt
head
and
nut.
2.
Install
the
nes
in
the
orienta on
shown
below.
Note:
The
stamp
“AerWay”
on
the
ne
will
be
poin ng
towards
the
outside
of
the
AerWay.
See
the
diagram
below.
3.
The
moun ng
rings
are
indexed
around
the
roller
sha
so
the
nes
appear
in
a
spiral
pa ern
when
viewed
from
the
end
of
the
roller.
Be
sure
to
make
note
of
the
pa ern
on
each
roller
before
remov
‐
ing
the
old
nes
and
to
install
the
new
nes
in
that
same
pa ern.
Refer
to
page
13
for
details.
4.
Torque
the
locknut
to
90
Ft
‐
Lbs
then
con nue
turning
nut
an
addi onal
½
turn.
LEAN
OF
TINE
LEAN
OF
TINE
Front
View
XL
‐
AW75653
Rev
C
Amendments
and
errors
reserved
©
SAF
‐
HOLLAND
Canada
Limited
‐
Norwich
Facility
12
Tine
Replacement