


SILVER SOLDER
CLEVIS
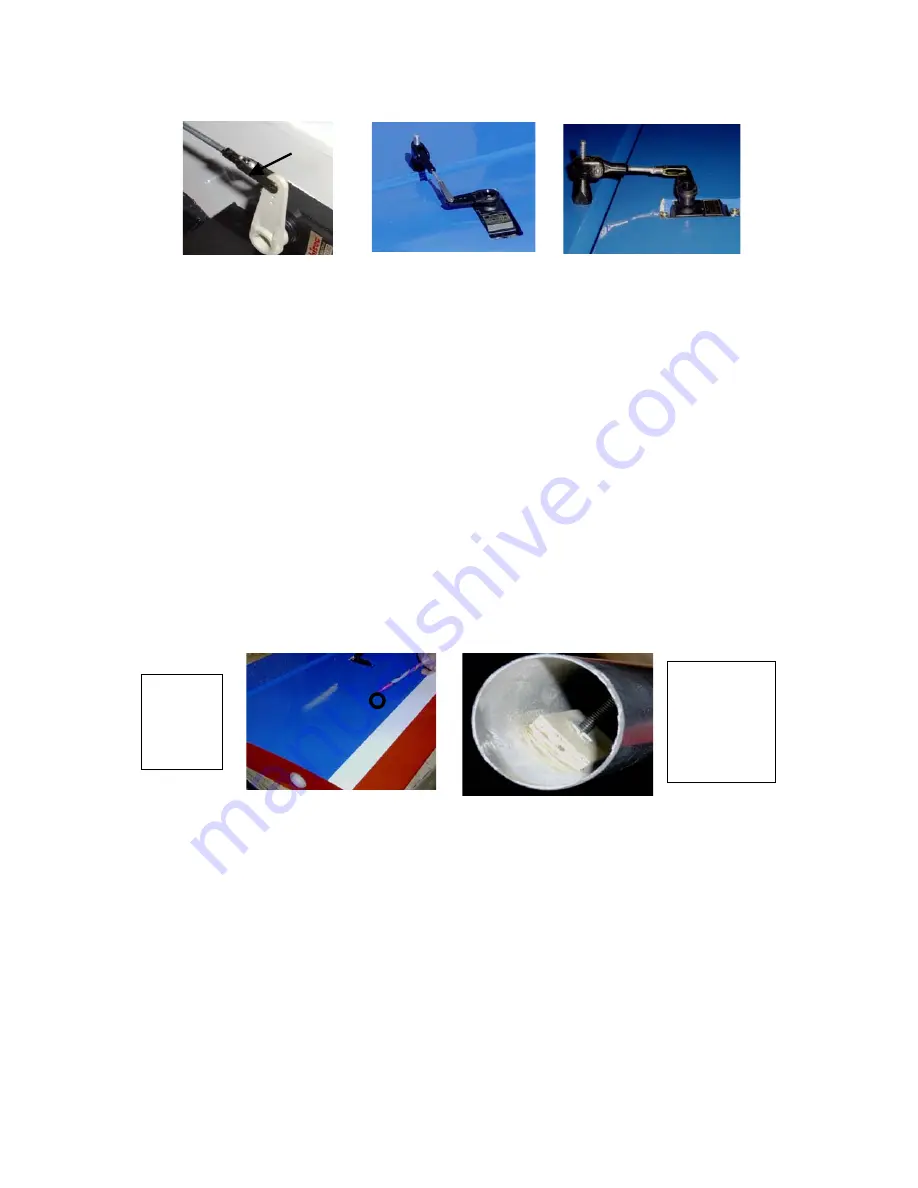
SERVO ARM AND CONTROL HORN AT 90 DEGREE
5)
It is best to have the linkage as far in on the servo arm as possible and as far away from the
control surface as possible. If you are setting up the plane for 3D style flying. We
recommend using larger after market servo arms. It is important not to be closer then 1” from
the control surface with your control horn. If you get to close to the control surface you may
develop flutter.
Special note
: Remember to center all servos prior to connecting linkages to
servo. This will eliminate any binding when the radio is turned on.
6)
Locate the hardwood dowel for the wing retainer bolt, located on the bottom of each wing.
Pre drill a 1/8” hole into the center of the dowel for the wing retainer bolt.
7)
Slide aluminum tube through fuse and center in the fuse. Secure tube in fuse so tube cannot
move. A hose clamp works well for this. Slide both wing panels onto tube and push tight
against the fuse.
8)
Drill and tap dowel and aluminum tube for 6-32 bolt.
Epoxy
hardwood in
wing tube
drill and tap
for 6-32 bolt
Wing
retainer
dowel
location
9)
Leaving the aluminum tube in one wing panel, with wing retainer bolt secured, at all times,
will enable you to always find the tapped hole for the bolt. Remove one wing panel and
centered on the location of the retainer bolt, epoxy hardwood into the end of the aluminum
tube. Drill and tap hardwood for 6-32 bolt. Repeat for other wing, remembering to keep tube
in one wing at all times. It will be necessary to round the top of the wooden block to fit inside
contour of aluminum tube.
5


