


Lock the AP
You can secure the AP using a Kensington
®
lock in the lock slot on the side of the device, or you can use a security bracket and a crosshead
screw or a security screw. Security brackets and screws can be ordered separately from Aerohive (not available in Brazil).
Aerohive recommends a variety of Kensington locks. For more information, contact your sales representative.
Connect the AP to the Network
Follow these steps to connect your AP650 or AP650X to standard AC wall socket and to the network.
1. Plug the AC power supply into the 12V port on the device and into a standard wall socket.
2. Connect an Ethernet cable to the RJ45 port and to a modem or other network device.
3. After the AP receives power, it automatically tries to get network settings and contact HiveManager. This process takes about five minutes.
When you see the AP listed on the
Devices
page in the
Monitor
section of the HiveManager GUI, the initial setup is complete and you can
begin managing the AP with HiveManager.
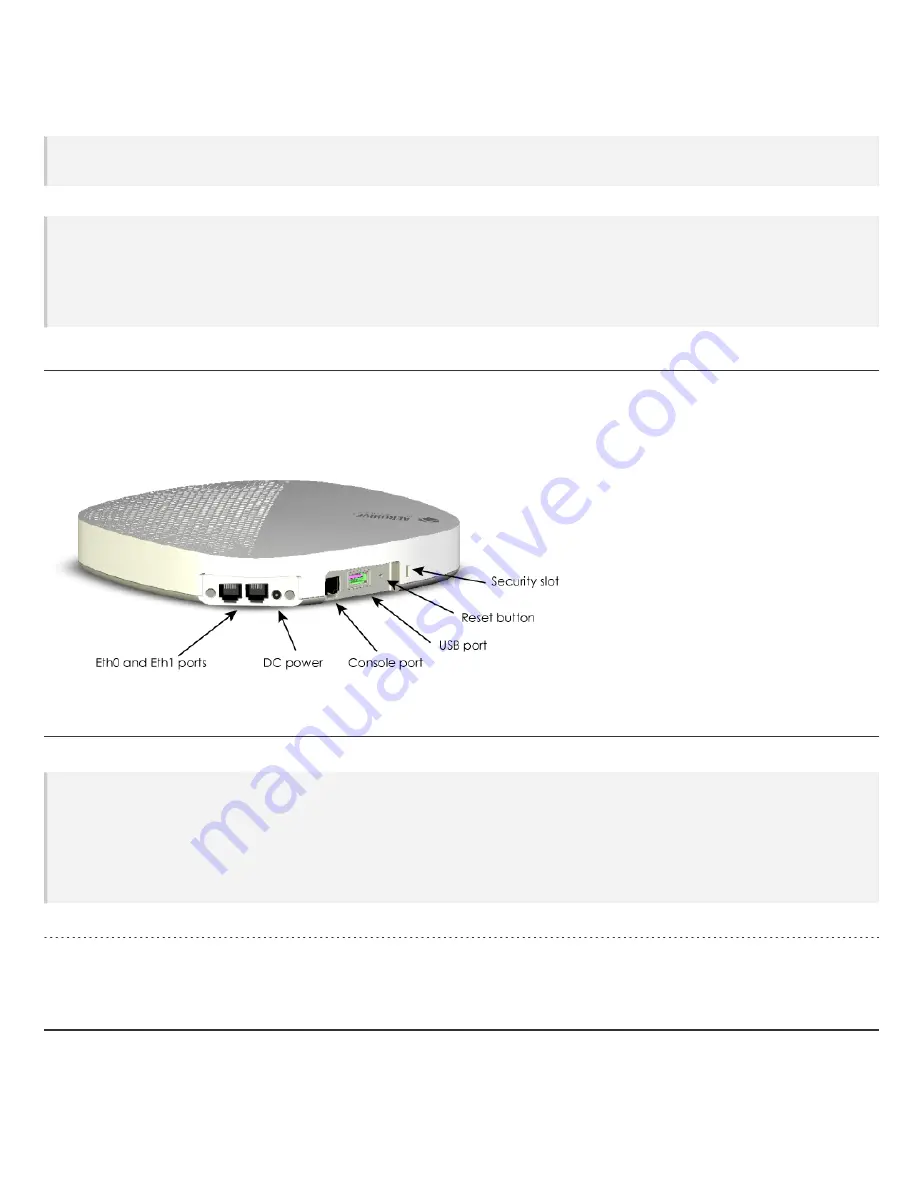
Hardware Components
You can see the hardware components of the AP650 and AP650X in the illustration below and read about them in the sections that follow. The illus-
tration shows an AP650 model. The components are the same for both models, except the AP650X has eight external antenna connectors.
Component Descriptions
Status Light
The status light conveys operational states for system power, firmware updates, Ethernet and wireless interface activity, and major alarms. The
AP650and AP650X have a rectangular status light on the top right corner of the chassis. At setup, this light cycles through the following
sequence:
l
Steady Amber
: The device is initializing.
l
Fast-blinking White
: The device is looking for a mesh neighbor from which to obtain a password.
l
Slow-blinking Amber
: The device is establishing a mesh connection
l
Steady White
: The device has successfully established a CAPWAP connection and is operating normally.
Ethernet Ports
The ETH0 port is autosensing 100/1000/2500G BASE-T/TX Mbps, with IEEE 802.3af- or 802.3at-compliant PoE, and requires Cat6 cable.
The ETH2 port is autosensing 10/100/1000 BASE-T/TX Mbps, with IEEE 802.3af- or 802.3at-compliant PoE.
Hardware Specifications
The following sections list radio, device, power, and environmental specifications for the AP650 and AP650X.
AP650 and AP650X Hardware User Guide
Page 5


