background image

26

H

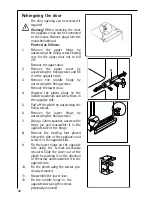
Rehingeing the door

The door opening can be reversed if
required.

Warning!

When reversing the door

the appliance may not be connected
to the mains. Remove plug from the
mains beforehand.

Procced as follows:

1.

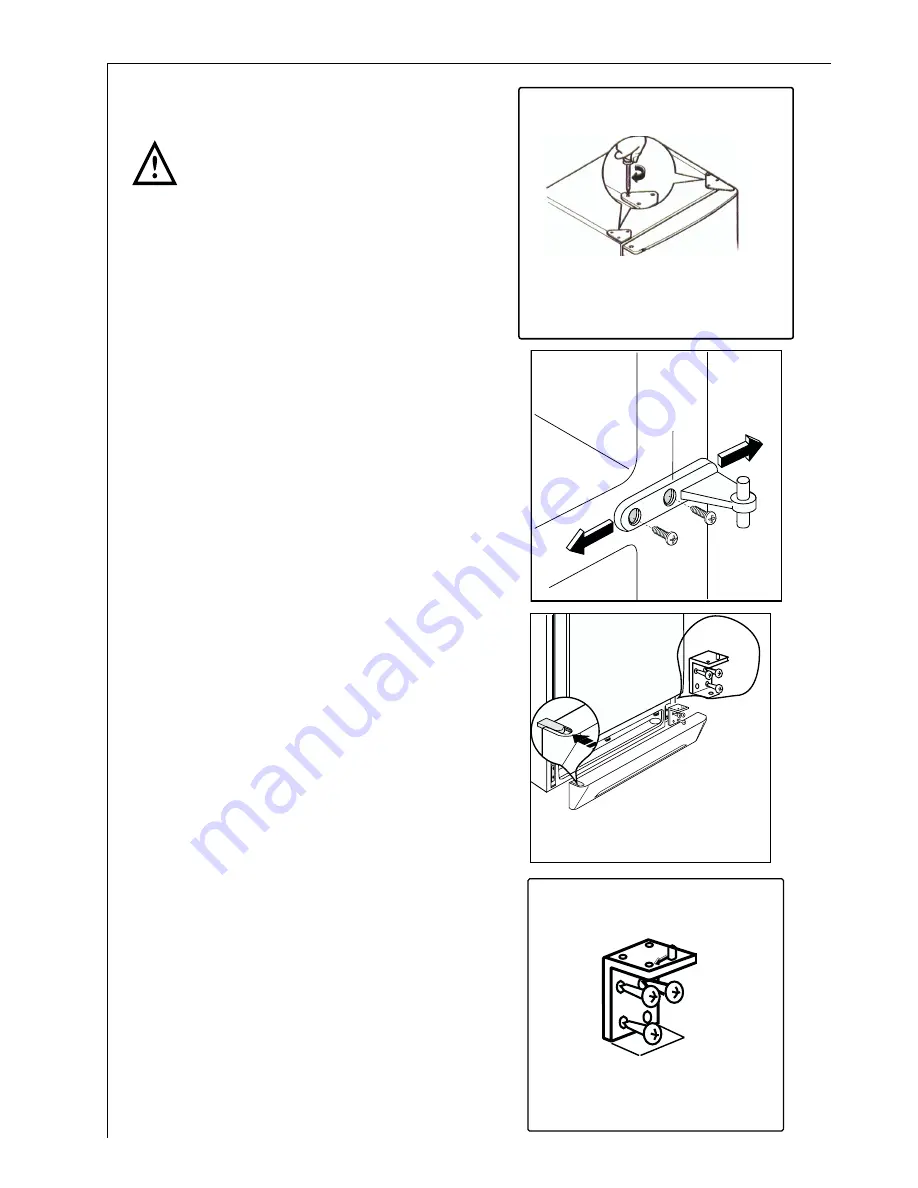
Remove the upper hinge by
unscrewing the fixing screws taking
care for the upper door not to fall
off. 
Remove the upper door.

2. 

Remove the upper cover by
unscrewing the fixing screws and fix
it in the opposite side.

3.

Remove the middle hinge by
unscrewing the fixing screws.
Remove the lower door.

4.

Unscrew the plastic plugs on the
middle crossbeam and screw them in
the opposite side.

5. 

Pull off the plinth by unscrewing the
fixing screws.

6. 

Remove the lower hinge by
unscrewing the fixing screws.

7. 

Using a 12mm spanner, unscrew the
hinge pin and reassemble it in the
opposite side of the hinge.

8. 

Remove the leveling foot placed
below the side of the appliance and
screw it in the opposite side.

9. 

Fix the lower hinge on the opposite
side using the screws previously
removed. Slide the cover out of the
plinth by pushing it in the direction
of the arrow and reassemble it in the
opposite side.

10. 

Fix the plinth using the screws pre-
viously removed.

11.

Reassemble the lower door.

12.

Fix the middle hinge in the
opposite side using the screws
previously removed. 

Summary of Contents for SANTO 70398-28 DT

Page 1: ...SANTO 70398 28 DT Dubbeldeurs koelautomaat Fridge freezer Gebruiksaanwijzing Operating Instructions ...

Page 2: ...ig Let op wordt de aandacht gevestigd op aanwij zingen die belangrijk zijn voor uw veiligheid of voor het juist functioneren van het apparaat Hier absoluut op letten Na dit symbool wordt uitleg gegeven over de bediening en het prak tisch gebruik van het apparaat Met het klaverblad worden tips en aanwijzingen voor een econo mischen milieuvriendelijk gebruik van het apparaat aangegeven Voor eventuee...

Page 3: ...g 9 Voor ingebruikname 9 In gebruik nemen en temperatuurregeling 10 Interieur 10 Legvlakken 10 Variable binnendeur 10 Flessenrek 11 Vochtigheidsregeling 11 De lade 12 Koelen van levensmiddelen 13 Invriezen en diepgevroren opslaan 13 Het maken van ijsblokjes 14 Diepvrieskalender 14 Ontdooiing van het toestel 15 Apparaat uitzetten 15 Reiniging en onderhoud 16 Tips om energie te besparen 17 Wat te do...

Page 4: ...tofcircuit de koelvloeistof Isobutan R600a een natuurlijk zeer milieuvriendelijk gas dat echter wel brandbaar is Bij het transport en het opstellen van het apparaat erop letten dat geen onderdelen van het koelvloeistofcircuit beschadigd worden Bij beschadiging van het koelvloeistofcircuit open vuur en brandhaarden absoluut vermijden het vertrek waar het apparaat staat goed ventileren Veiligheid va...

Page 5: ...tzetten en de stekker uit het stopcontact trekken of de zekering in de woning uitschakelen c q er uit draaien De stekker altijd aan de stekker zelf uit het stopcontact trekken nooit aan het snoer Bij storing Als er een storing aan het apparaat optreedt eerst in de gebruiks aanwij zing kijken onder Wat te doen als Als de daar gegeven aanwijzingen niet verder helpen zelf niet verder aan het apparaat...

Page 6: ... den afgegeven bij een verzamelpunt waar elektrische en elektronische apparatuur wordt gerecycled Als u ervoor zorgt dat dit product op de jui ste manier wordt verwijderd voorkomt u mogelijk negatieve gevolgen voor mens en milieu die zich zouden kunnen voordoen in geval van verkeerde afvalverwerking Voor gedetailleerdere informatie over het recyclen van dit product kunt u contact opnemen met de ge...

Page 7: ... zodat zich geen condens vormt aan de buitenkant van de apparaten Uw apparaat heeft lucht nodig Om veiligheidsredenen moet de ven tilatie zodanig zijn als aangegeven in Fig Attentie zorg ervoor dat de ventila tie openingen tijdens gebruik niet woden afgedekt Muur afstandshouders In het apparaat bevinden zich twee afstandshouders die in de bovenste hoeken aan de achter zijde geplaatst dienen te wor...

Page 8: ...t van het scharnier zit ten en plaats ze in de gaten waar eerst het scharnier zat 4 Verwijder de onderdeur 5 Haal het ventilatierooster weg dat met twee schroeven vast zit 6 Verwijder het onderste scharnier door de schroeven los te schroeven 7 Maak de scharnierpen los met behulp van een 12 mm steeksleutel en plaats het aan de andere kant van het scharnier 8 Zet het apparaat waterpas door de stelvo...

Page 9: ...schriften geïnstalleer de beschermcontactdoos vereist De contactdoos moet zodanig worden geïnstalleerd dat de steker altijd uit de contactdoos kan worden getrokken De elektrische zekering dient minstens 10 Ampère te zijn Indien het stopcontact bij een ingebouwd apparaat niet meer toegan kelijk is dient een maatregel in de elektrische installatie er voor te zorgen dat het apparaat van de stroom kan...

Page 10: ... de koelruimte niet bene den 0 C komt en zet de temperatuurregelaar tijdig op stand 3 of 4 terug Belangrijk Hoge omgevingstemperatuur bijv op hete zomerdagen en koude instelling van de temperatuurregelaar stand 5 tot 6 kunnen er voor zorgen dat de compressor continu werkt Zet in dat geval de temperatuurregelaar op een warmere stand stand 3 tot 4 Bij deze instelling wordt de compressor geregeld en ...

Page 11: ...ntila tiesysteem met sleuven verstelbaar met schuifje welke het mogelijk maakt de vochtigheid te regelen in de groentelade Het openen van de ventilatiesleuven kan m b v een schuifje geregeld wor den Schuifje rechts ventilatiesleuven geopend Als de ventilatiesleuven geopend zijn zorgt meer luchtcirculatie voor een lager vochtigheidsgehalte in de groente en fruitlade Schuifje links ventilatiesleuven...

Page 12: ...e stemmen Op de bodem van bovengenoemde lade bevindt zich een rooster dat ervoor zorgt dat de etenswaren die erin zitten niet in aanraking komen met het vocht dat zou kunnen ontstaan en dat in het onder ste gedeelte opgevangen wordt De lade kan verwijderd worden met behulp van de zijhandgrepen zoals aangeduid in de afbeelding en de binnenste onderdelen kun nen weggenomen worden om schoongemaakt te...

Page 13: ...iezenen en diepgevroren opslaan In uw koelapparaat kunt u diepvriesproducten bewaren en verse leven smiddelen zelf invriezen Attentie Voor het invriezen van levensmiddelen dient de temperatuur in de vrie sruimte 18 C of lager te zijn Let op het op het typeplaatje aangegeven vriesvermogen Het vries ver mogen is de maximale hoeveelheid verse waren die binnen 24 uur inge vroren kunnen worden Als er g...

Page 14: ...eds bevro ren waren omdat anders de bevroren artikelen kunnen ontdooien Voorzichtig Diepvriesartikelen niet met natte handen aanraken De handen kunnen daaraan vast vriezen 1 Plaats de in te vriezen levensmiddelen op het rek in dedipevriesvak Het maken van ijsblokjes 1 IJsbakje voor 3 4 met koud water vullen in de vriesruimte plaatsen en laten bevriezen 2 Om de ijsblokjes los te maken het ijsbakje ...

Page 15: ...e kranten 3 laat de deur openstaan 4 droog na het ontdooien het vriesvak zorgvuldig 5 draai de thermostaatknop in de gewenste stand of steek de steker weer in het stopcontact Na twee of drie uur kunt u de diepvriesprodukten weer terugplaatsen Belangrijk Gebruik voor het verwijderen van de rijp nooit metalen voorwerpen u zou uw koelkast kunnen beschadigen Geen voorwerpen of methodes gebruiken om he...

Page 16: ...et in contact brengen met apparaatonderdelen Geen schurende schoonmaakmiddelen gebruiken 1 Koel en diepvriesartikelen er uit halen Diepvriesartikelen in meerdere lagen kranten verpakken Alles afgedekt op een koele plaats leggen 2 Vriesvak voor het schoonmaken ontdooien zie hoofdstuk Ontdooien 3 Apparaat uitzetten en de stekker uit het stopcontact halen of de zeke ring uitschakelen c q er uitdraaie...

Page 17: ...en rooster aan de ach terzijde van het toestel schoon Wat te doen als Hulp bij storingen Het kan bij een storing om kleine defecten gaan die zelf u aan de hand van de volgende aanwijzingen kunt oplossen Voer zelf geen verdere werk zaamheden uit als de volgende informatie in concrete gevallen niet verder helpt Waarschuwing Reparaties aan het koelapparaat mogen alleen door geschoold personeel uitgev...

Page 18: ...ormaal het betreft geen storing Na het wijzigen van de tempe ratuurinstelling start de com pressor niet direct Water op de bodem van de koelruimte of op de leg vlakken Ontdooiwaterafvoer is ver stopt Dit onderdeel voorzichtig weg buigen Apparaat iets wegtrekken Stelvoetjes bijstellen De levensmiddelen zijn te warm Binnenverlichting werkt niet Het apparaat staat naast een warmtebron Temperatuur is ...

Page 19: ...kking weer monteren en de bevestigingsschroef aandraaien 7 De koelkast aanzetten D411 Doel normen richtlijnen Het koelapparaat is voor huishoudelijk gebruik bestemd en is met in acht neming van de voor deze apparaten geldende normen gemaakt Bij de fabricage zijn speciaal die maatregelen genomen die vereist zijn volgens de Duitse wet op de veiligheid van toestellen GSG volgens de Duitse voor schrif...

Page 20: ... appliance are stressed with a warning triangle and or with signal words Warning Caution Attention Please observe the following carefully Supplementary information regarding operation and practical applications of the appliance appear after this symbol Tips and notes concerning economical and environmentally sound use of the appliance are marked with the flower The operating instructions contain i...

Page 21: ...al Start Up 28 Starting up and temperature regulation 28 Interior Accessories 29 Storage shelves 29 Variable Inner Door 29 Bottle rack 29 Moisture regulator 30 Drawer 30 Fresh food refrigeration 31 Freezing and storing frozen food 31 Preparation of Ice Cubes 32 Freezing Calender 32 Defrosting 33 Switching off the appliance 33 Cleaning and Care 34 Energy Saving Tips 35 What to do if 35 Correcting M...

Page 22: ...utane R600a is contained within the refrigerant circuit of the appliance a natural gas with a high level of environmental compa tibility which is nevertheless flammable During transportation and installation of the appliance be certain that none of the components of the refrigerant circuit become damaged If the refrigerant circuit should become damaged avoid open flames and sources of ignition tho...

Page 23: ...e cream makers mixers etc Before cleaning the appliance always switch off the appliance and unplug it or pull the house fuse or switch off the circuit breaker When unplugging always pull the plug from the mains socket do not pull on the cable In case of malfunction If the a malfunction occurs on the appliance please look first in the What to do if section of these instructions If the information g...

Page 24: ...ackaging indicates that this product may not be treated as household waste Instead it shall be handed over to the applicable collection point for the recycling of electrical and electronic equipment By ensuring this product is disposed of correctly you will help prevent potential negative con sequences for the environment and human health which could otherwise be caused by inappropriate waste hand...

Page 25: ...ion next to a source of heat is unavoidable the following minimum clearances must be maintained at the sides of the appliance for electric cookers 3 cm for oil and coal fired ranges 30 cm If these clearances cannot be main tained a heat insulating pad is requi red between the cooker and the refrigeration appliance If the refrigeration appliance is installed next to another refrigerator or freezer ...

Page 26: ...s on the middle crossbeam and screw them in the opposite side 5 Pull off the plinth by unscrewing the fixing screws 6 Remove the lower hinge by unscrewing the fixing screws 7 Using a 12mm spanner unscrew the hinge pin and reassemble it in the opposite side of the hinge 8 Remove the leveling foot placed below the side of the appliance and screw it in the opposite side 9 Fix the lower hinge on the o...

Page 27: ...posite side and fix the screws starting from A Attention After having reversed the opening direction of the doors check that all the screws are properly tightened and that the magnetic seal adheres to the cabinet If the ambient temperature is cold i e in Winter the gasket may not fit perfectly to the cabinet in that case wait for the natural fitting of the gasket or accelerate this process by heat...

Page 28: ... Prior to Initial Start Up Please clean the appliance interior and all accessories prior to initial start up see section Cleaning and Care Starting up and temperature regulation Insert the plug of the connection lead into the plug socket with protecti ve earth contact When the refrigerator compartment door is opened the internal lighting is switched on The temperature selector knob is located on t...

Page 29: ...osition to ensure fruit and vegetables stay fresh lon ger The remaining storage shelves can be adjusted to various heights Pull the storage shelf forward until it can be tipped up or down and remo ved To insert at a different height use the same procedure in reverse Variable Inner Door The door compartments can be pulled up and removed and inserted at other positions as needed D338 Bottle rack Pla...

Page 30: ... be removed for cleaning purposes Moisture regulator The drawer incorporates a device with slits adjustable by means of a sliding lever which makes it possi ble to regulate the temperature in the vegetable drawer s The ope ning in the ventilation slots can be adjusted with the slider Right slider Ventilation slots opened With the ventilation slots open more air circulation results in a lower air m...

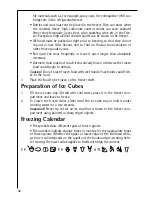
Page 31: ...ust not be kept in the refrigerator Freezing and storing frozen food You can use your freezer for freezing fresh food yourself Important The temperature in the freezer compartment must be 18 C or colder before freezing food Please observe the freezing capacity given on the rating plate The free zing capacity is the maximum quantity of fresh food that can be frozen within a period of 24 hours If yo...

Page 32: ...otherwise the frozen food could begin to defrost Caution Do not touch frozen food with wet hands Your hands could free ze to the food 1 Place the food to be frozen on the freezer shelf Preparation of Ice Cubes 1 Fill the ice cube tray 3 4 full with cold water place it in the freezer com partment and leave to freeze 2 To loosen the frozen cubes either bend the ice cube tray or hold it under running...

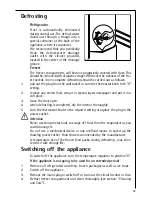
Page 33: ...ll place 3 leave the door open 4 when defrosting is completed dry the interior thoroughly 5 turn the thermostat knob to the required setting or raplace the plug in the power socket Attention Never use sharp metal tools to scrape off frost from the evaporator as you could damage it Do not use a mechanical device or any artificial means to speed up the thawing process other than those recommended by...

Page 34: ...llow such substances to come into contact with appliance parts Do not use any abrasive cleansers 1 Remove frozen food and the food from the refrigerator Wrap frozen food in several layers of newspaper Store it in a cool place well covered 2 Defrost the freezer compartment prior to cleaning see Defrosting sec tion 3 Switch the appliance off and remove the plug from the mains or switch off or turn o...

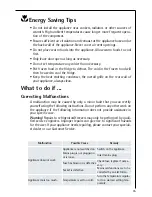
Page 35: ... A malfunction may be caused by only a minor fault that you can rectify yourself using the following instructions Do not perform any other work on the appliance if the following information does not provide assistance in your specific case Warning Repairs to refrigerators freezers may only be performed by quali fied service engineers Improper repairs can give rise to significant hazards for the us...

Page 36: ... compressor starts after a period of time This is normal no error has occurred The compressor does not start immediately after changing the temperature setting If necessary carefully bend the component out of the way Move the appliance slightly Readjust the feet See the Cleaning and Care section Water on the floor or on sto rage shelves Water drain hole is blocked Malfunction Possible Cause Remedy...

Page 37: ...erator back into opera tion D411 Regulations Standards Guidelines This appliance was designed for household use and was manufactured in accordance with the appropriate standards The necessary measures in accordance with appliance safety legislation regulations GSG accident prevention regulations for refrigeration appliances VBG 20 and the regu lations of the German Society of Electrical Engineers ...

Page 38: ......

Page 39: ......

Page 40: ...AEG Hausgeräte GmbH Postfach 1036 D 90327 Nürnberg http www aeg hausgeraete de Copyright by AEG Wijzigingen voorbehouden Subject to change without notice 2223 399 03 08 07 ...

Reviews: