18
GB
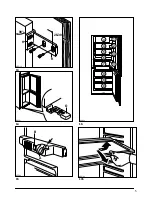
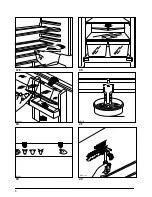
(Fig. 16)
to obtain free freezing space.
Note for test centres:
Stacking diagrams for determination of freezing
capacity and warm-up time can be requested direct
from the manufacturer.
Icemaking
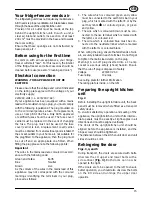
Fill the ice-tray 3/4 full with cold water, place it in
storage compartments (8) or (9), and allow it to
freeze. The ice-cubes can be easily loosened by
twisting the ice-tray or by holding it for a short time
under running water. To ensure that you always
have stocks available, the ice-cubes can be stored
in the ice-box in the freezer compartment.
Storing frozen food in the
freezer compartment and the
do's and don'ts of
storing frozen food
Once the freezing process is completed, deep-
frozen storage takes place in the temperature range
below -18
°
C.
For storage of already frozen food, it is imperative to
note the storage time specified by the manufacturer
on the packaging. Make sure that only packaged
food is stored in the freezer, since unpackaged food
will soon dry out when exposed to the extreme cold.
With the exception of spirits and drinks containing a
higher percentage of alcohol, beverages in glass
bottles, particularly soft drinks containing carbon
dioxide, juices, beer, wine, etc., should not be stored
in the freezer. When the contents freeze, the glass
bottles will crack or even burst.
Never handle deep-frozen food with wet hands.
Your hands could easily become frozen to the food.
Never use the freezer as a means of cooling hot
meals, since this causes heavy frost formation
inside and an increase in electricity consumption.
Cold-pack accumulator
(Some models only)
In the event of a power cut, the cold pack accumula-
tors (the cold pack accumulator) will prolong the
storage of frozen food by a few hours.
For safety reasons (in some models), during transport,
the cold-pack accumulators are placed (the cold pack
accumulator is placed) in the bottom drawer of the
freezer compartment.
To use them efficiently, place the frozen cold-pack
accumulators on top of frozen foods in the top drawer.
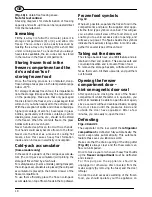
Frozen food symbols
Fig. 19
Wharever possible, separate the frozen food in the
compartments and place the supplied rider oppo-
site the food type symbol concerned. This will give
you a better overall view of the food stored, will
enable you to avoid excessive door opening, and
will save you power. The figures beside the symbols
indicate the maximum storage time in months alto-
gether for several types of frozen food.
Taking out the drawers
The storage baskets have an antitilt feature and are
retained in their end position. This assures safe and
convenient insertion and removal of frozen food.
To remove the storage baskets, withdraw them as
far as their catch, tilt them upwards, and pull them
out forwards.
Opening the freezer
compartment door -
hint on magnetic door seal
After opening and closing the door of the freezer
compartment whilst the latter is in operation, you
will not immediately be able to open the door again,
since a vacuum will have developed inside, keeping
the door closed until the pressures inside and
outside the door have equalized. After a few
minutes, you can easily re-open the door.
Defrosting
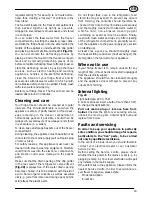
Figs. 20 and 21
The evaporator on the rear wall of the
refrigerator
compartment
is defrosted fully automatically. The
water evaporates automatically. This automatic
feature thus saves you laborious work.
Make sure that the drain opening of the drip gutter
(Fig. 20)
is always clear and the thaw water can
flow out unimpeded.
Once to twice a year or whenever heavy frost builds
up the
freezer compartment
must be defrosted
and cleaned.
F o r t h i s p u r p o s e t h e a p p l i a n c e s h o u l d b e
unplugged or otherwise disconnected from the
mains supply (by removing the fuse) and the door
left ajar.
In order to avoid excessive warming of the frozen
food, you should operate your the appliance on


