

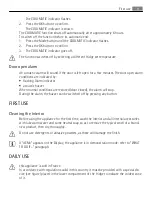
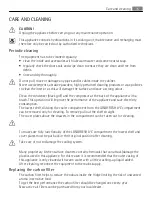


• Regularly examine the drain in the refrigerator for defrosted water. If necessary, clean
the drain. If the drain is blocked, water will collect in the bottom of the appliance.
Installation
For electrical connection carefully follow the instructions given in specific paragraphs.
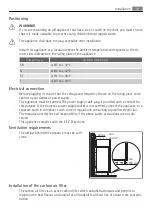
• Unpack the appliance and check if there are damages on it. Do not connect the appli-
ance if it is damaged. Report possible damages immediately to the place you bought it.
In that case retain packing.
• It is advisable to wait at least four hours before connecting the appliance to allow the oil
to flow back in the compressor.
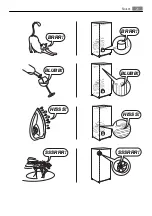
• Adequate air circulation should be around the appliance, lacking this leads to overheat-
ing. To achieve sufficient ventilation follow the instructions relevant to installation.
• Wherever possible the back of the product should be against a wall to avoid touching or
catching warm parts (compressor, condenser) to prevent possible burn.
• The appliance must not be located close to radiators or cookers.
• Make sure that the mains plug is accessible after the installation of the appliance.
• Connect to potable water supply only.
4)
Service
• Any electrical work required to do the servicing of the appliance should be carried out by
a qualified electrician or competent person.
• This product must be serviced by an authorized Service Centre, and only genuine spare
parts must be used.
Environment Protection
This appliance does not contain gasses which could damage the ozone layer, in either its
refrigerant circuit or insulation materials. The appliance shall not be discarded together
with the urban refuse and rubbish. The insulation foam contains flammable gases: the ap-
pliance shall be disposed according to the applicable regulations to obtain from your local
authorities. Avoid damaging the cooling unit, especially at the rear near the heat exchang-
er. The materials used on this appliance marked by the symbol are recyclable.
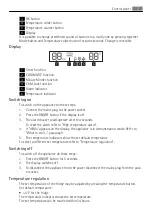
CONTROL PANEL
1
2
3
4
5
6
1
ON/OFF button
2
Mode button
4) If a water connection is foreseen.
6
Control panel
Summary of Contents for S93000KZM0
Page 21: ...BRRR BRRR BLUBB BLUBB HISSS HISSS SSSRRR SSSRRR Noises 21 ...
Page 43: ...CLICK CLICK BRRR BRRR BLUBB BLUBB HISSS HISSS Geräusche 43 ...
Page 66: ...AEG AEG AEG www aeg com shop 66 ...
Page 67: ...68 71 74 74 79 80 82 84 84 86 88 67 ...
Page 68: ... 68 ...
Page 69: ... R600a 1 2 3 4 5 6 16 17 18 16 17 69 ...
Page 70: ... 19 18 Frost Free 19 70 ...
Page 71: ... 1 2 3 4 5 6 1 ON OFF 2 Mode 3 OK 4 5 6 Mode 5 6 2 4 3 1 1 2 COOLMATIC 3 Minute Minder 4 71 ...
Page 74: ...3 COOLMATIC dEMo 74 ...
Page 75: ... 1 2 3 CLEANAIR CONTROL LONGFRESH C L E A N A I R C O N T R O L 75 ...
Page 76: ... LONGFRESH LONGFRESH 0 C 0 C 0 C 45 90 LONGFRESH 0 C 3 LONGFRESH 0 C 50 90 76 ...
Page 77: ...Longfresh 0 C 5 1 10 7 4 3 2 77 ...
Page 78: ... 1 21 14 10 7 1 1 1 1 21 20 14 10 8 7 5 1 0 C 0 C 78 ...
Page 79: ... 0 C 0 C 0 C 0 C 15 30 79 ...
Page 80: ... LONGFRESH 0 C 80 ...
Page 81: ... LONGFRESH 0 C 1 2 1 2 81 ...
Page 82: ... 20 20 82 ...
Page 83: ... COOLMATIC dEMo dEMo OK 10 83 ...
Page 84: ... 1 2 3 1855 545 575 230 240 50 84 ...
Page 85: ...SN 10 C 32 C N 16 C 32 C ST 16 C 38 C T 16 C 43 C 50 mm min 200 cm2 min 200 cm2 85 ...
Page 86: ... 1 1 2 3 2 4 BRRR HISSS CLICK BLUBB CRACK SSSRRR OK CLICK CLICK 1 2 86 ...
Page 87: ...BRRR BRRR BLUBB BLUBB HISSS HISSS SSSRRR SSSRRR 87 ...
Page 88: ...CRACK CRACK 88 ...
Page 89: ...89 ...
Page 90: ...90 ...
Page 91: ...91 ...


