background image

Appliance Description

818 14 00-01/4

19

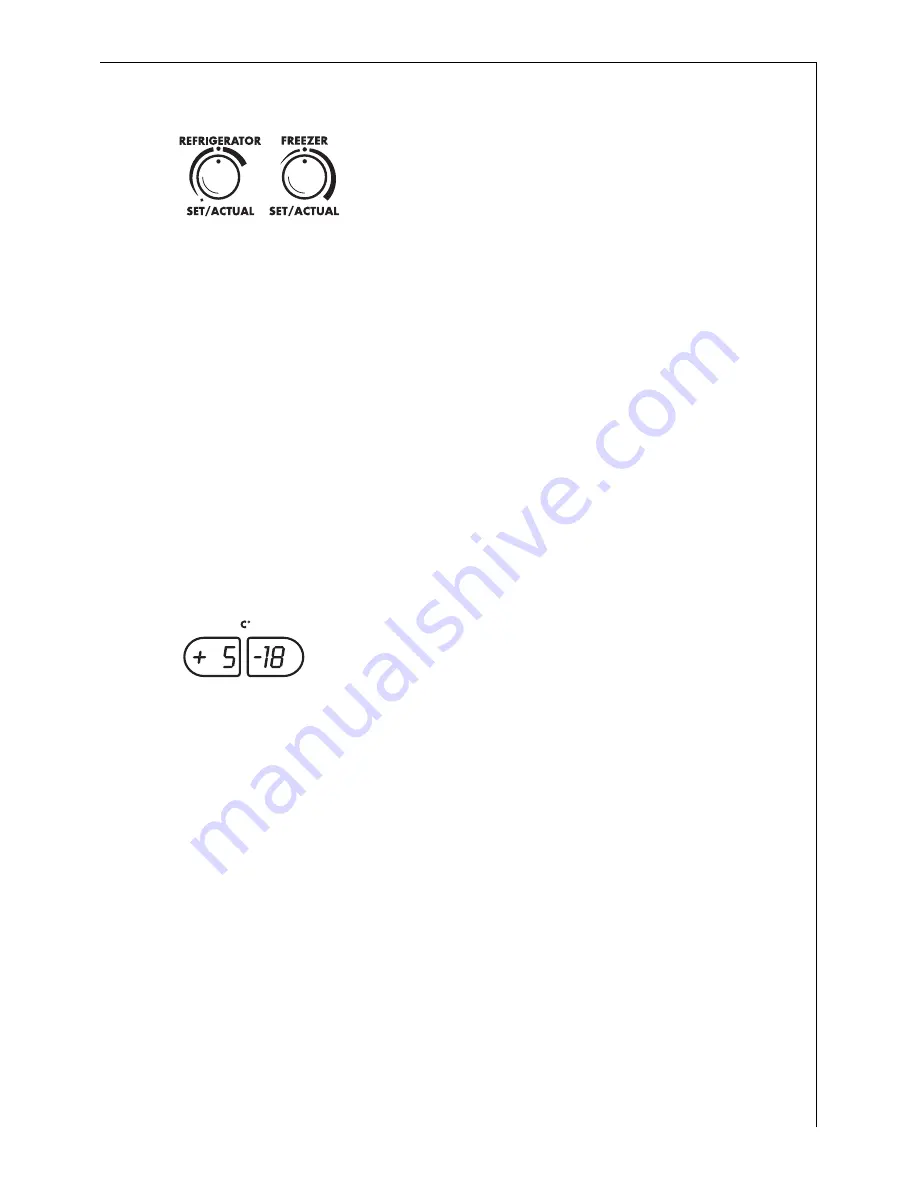
Temperature Regulator

To adjust the temperature of the refrigerator or 
freezer compartment the regulator button must 
be freed from its recessed position.

Briefly pressing on the respective temperature regulator button frees 
it from its recessed position.

Pressing on the respective temperature regulator button returns it to 
its recessed position.

SET means:
With temperature regulator button freed from the recessed position; 
the required temperature (SET temperature) can be adjusted in incre-
ments of 1

°

C.

ACTUAL means:
With temperature regulator button in recessed position; temperature 
display indicates the refrigerator or freezer compartment temperature 
(ACTUAL temperature). 

Temperature Displays

The temperature displays shows several types of 
information.

In normal operation the refrigerator or freezer compartment tempe-
rature is displayed (ACTUAL temperature). The temperature regulator 
must be in its recessed position.

During temperature adjustment, the temperature selected will flash 
in the display (SET temperature).

If a malfunction has occurred the temperature display alternately 
indicates:

the current refrigerator or freezer compartment temperature 
(ACTUAL temperature) as well as

an error message. 
The error message is coded (e.g. F1, F2, etc.) and assists the service 
technician in diagnosing the fault. If the temperature can no longer 
be registered, only the error code is displayed.

Summary of Contents for OKO_SANTO 3150-6KG

Page 1: ...ÖKO_SANTO 3150 6KG ÖKO_SANTO 3274 6KG Electronic Refrigerator Freezer Combination Operating Instructions 818 14 00 01 4 ...

Page 2: ...al words Warning Caution Important Please observe the following carefully 0 This symbol guides you step by step in the operation of the appliance 3 Supplementary information regarding operation and practical applications of the appliance appear after this symbol 2 Tips and notes concerning economical and environmentally sound use of the appliance are marked with the cloverleaf Explanations of the ...

Page 3: ...ppliance Alignment 10 Electrical Connection 11 Reversing the Door 12 Appliance Description 16 View of Appliance 16 Freezer tray with Cold Accumulation Block 17 Control Panel 18 Temperature Regulator 19 Temperature Displays 19 Prior to Initial Start Up 20 Initial Start Up 21 Temperature Adjustment 22 Refrigerator 22 Freezer Compartment 22 FAST CHILL FAST FREEZE 23 FAST CHILL 23 FAST FREEZE 23 Switc...

Page 4: ...ezing 31 Frozen Storage 32 Preparation of Ice Cubes 32 Storage Goods Symbols Freezing Calendar 33 Defrosting 33 The refrigerator is defrosted automatically 33 Freezer Compartment Defrosting 33 Hints and Tips 35 Normal Operating Sounds 35 Food Storage 35 Energy Saving Advice 35 Maintenance and Cleaning 36 Internal Cleaning 36 External Cleaning 36 Replace light bulb 37 Something not Working 38 Techn...

Page 5: ...a cable available from your local Service Force Centre Any electrical work required to install this appliance should be carried out by a qualified electrician or competent person Parts which heat up should not be exposed Whenever possible the back of the appliance should be close to a wall but leaving the required distance for ventilation as stated in the installation instructions The appliance sh...

Page 6: ...ause frost freezer burns if consumed straight from the freezer compartment Do not remove items from the freezer compartment if your hands are damp wet as this could cause skin abrasions or frost freezer burns Bottles and cans must not be placed in the freezer They can burst when the contents freeze Manufacturers recommended storage times should be adhered to Refer to relevant instructions Maintena...

Page 7: ...paper Please dispose of the packaging with due care for the environment Old Appliances When disposing of your old appliance Make the appliance unusable by cutting off the cable and remove any door catches to ensure small children cannot be trapped inside Help to keep your country tidy use an authorised disposal site Appliance Transport Two persons are required for transport of the appliance There ...

Page 8: ...hed Before Use Packaging 0 Remove all adhesive tape and packaging from the interior of the appliance 3 Any remnants of adhesive can be removed with white spirit 0 Remove the transport protection pieces and pull off the adhesive tape 0 Wash the inside of the appliance with lukewarm water with a little bicarbonate of soda added 5 ml to 0 5 litre of water Do not use soap or detergent as the smell may...

Page 9: ...ted by the ambient temperature The appliance should therefore not be exposed to direct sunlight not be installed next to radiators cookers or other sources of heat only be installed at a location whose ambient temperature corre sponds to the climate classification for which the appliance is desi gned The climate classification can be found on the rating plate which is located at the left on the in...

Page 10: ...hanging cabinet a clearance of at least 10 cm between the top of the appliance and the cabinet above it must be maintained Please check whether after installing your appliance and especially after reversing the door the door seal seals tightly A badly fitting door seal may lead to heavy frosting and a higher power consumption see also Something not working Appliance Alignment 0 The appliance level...

Page 11: ...ured in accordance with the follow ing code Green and Yellow Earth Blue Neutral Brown Live As the colours of the wires in the mains lead of this appliance may not correspond with the coloured markings indentifying the termi nals in your plug proceed as fol lows 1 The wire coloured green and yellow must be connected to the terminal marked with the letter E or by the earth sym bol or coloured green ...

Page 12: ...zer compartment door and remove the plinth to the front Move the door bearing cover on the plinth from the left to the right 0 Close the freezer compartment door Open the fridge compart ment door and unscrew the retai ning screw for the self closing mechanism on the top of the freezer compartment door 0 With the freezer compartment door closed remove the cross head screws from the lower door beari...

Page 13: ...r compartment door carefully to the front and place on one side 0 Unscrew the centre door bearing 0 Remove the fridge compartment door carefully to the front and place on one side 0 Unscrew the retaining screw for the self closing mechanism on the bottom of the fridge compart ment door 0 Move the upper bearing pivot to the left ...

Page 14: ...ining holes with the hole cover pins 0 Fasten the self closing mechanism to the bottom left of the fridge compartment door 0 Carefully slide the fridge com partment door onto the top bea ring pivot and close 0 Slide the centre door bearing into the bottom left of the fridge com partment door and fasten to the housing ...

Page 15: ... left of the freezer compartment door 0 Carefully slide the freezer com partment door onto the centre bearing pivot and close 0 Place the lower door bearing with the bearing pivot in the lower left of the freezer compartment door and fasten 0 Open the freezer compartment door and fit the plinth ...

Page 16: ... Door storage compartments Variable storage box Bottle compartment bottle rack Fruit and vegetable drawers Shelves Freezer drawer only for storage When defrosting the bottom drawer also serves as a water collecting vessel Freezer drawer for storage and freezing Freezer tray Rating plate depending on model upper or lower left ...

Page 17: ... accumulation block 3 In the event of power failure or a malfunction of the appliance the cold accumulation block will increase the hold over period by several hours The block may also be used in a cool bag to keep the temperature of food down during transportation Berries for example can be pre frozen on the freezer tray Advantage The berries are not squeezed and maintain their natural form The f...

Page 18: ...rature regulator for refrigerator 6 Temperature display for refrigerator 7 Temperature display for freezer compartment 8 Temperature regulator for freezer compartment 9 FAST FREEZE indicator light yellow 10 FAST CHILL FREEZE button FAST CHILL for intensive cooling in the refrigerator FAST FREEZE for fast freezing in the freezer compartment 11 Warning indicator light red 12 WARNING OFF button see s...

Page 19: ...on temperature display indicates the refrigerator or freezer compartment temperature ACTUAL temperature Temperature Displays The temperature displays shows several types of information In normal operation the refrigerator or freezer compartment tempe rature is displayed ACTUAL temperature The temperature regulator must be in its recessed position During temperature adjustment the temperature selec...

Page 20: ...onnecting the appliance to the mains and putting it into ope ration for the first time leave the appliance to stand for 30 minutes if it was transported upright After transport on its side the appliance must be left to stand for 4 hours before putting it into operation This is necessary to allow the oil to flow back into the compressor Otherwise the compressor may be damaged 0 Please clean the app...

Page 21: ... thereafter 0 Set the refrigerator to the desired temperature see section Tempera ture Adjustment 3 Goods to be refrigerated can be loaded immediately after switching on because the storage temperature in the refrigerator is quickly reached Freezer Compartment Start Up 0 Press freezer compartment ON OFF button The green power indicator for the freezer compartment lights up The freezer compartment ...

Page 22: ...perature Refrigerator 3 A storage temperature of about 5 C in the refrigerator is generally considered to be sufficiently cold Freezer Compartment 3 18 C is considered to be safe for the storage of frozen food 0 After temperature adjustment press the temperature regulator back into its recessed position The temperature display is switched back to indicate the current refrig erator or freezer compa...

Page 23: ...ure of 2 C is automati cally selected The FAST CHILL function will stop automatically after a period of 6 hours At the end of this period the display will show the the originally SET temperature 0 You can stop the FAST CHILL function manually at any time by follo wing the above steps which are required for starting the FAST CHILL function FAST FREEZE The FAST FREEZE function provides for quick fre...

Page 24: ... switched off independ ently of one another 0 To switch off press and hold the ON OFF button for about 5 seconds A so called count down is started in the temperature display which counts backwards from 5 to 0 When 0 is reached the appliance switches off Illumination at the temperature display goes off If the appliance is not to be used for an extended period 0 Switch appliance off by pressing and ...

Page 25: ...ccumulation of odours and mould 0 To activate the stand by mode first press temperature regulator for refrigerator so that it is freed from its recessed position 0 Turn temperature regulator anticlockwise as far as possible Indicated temperature in the temperature display is increased in 1 increments up to 10 C The 10 C value is followed by 15 C The refrigerator is now in the energy saving stand b...

Page 26: ...n 5 C may be caused by frequent door opening for long periods of time loading with large quantities of warm foods high ambient temperature an error of the appliance The audible warning can be switched off with the WARNING OFF but ton Both warning display and audible warning are automatically switched off when the actual temperature in the refrigerator and or the freezer compartment falls to 4 C wa...

Page 27: ...but ton Function Errors If the appliance electronics have detected a technical malfunction which has to be corrected by a service technician both optical and acoustic warnings are activated In addition the respective temperature display alternately indicates an error message error codes F1 through F7 and the current storage temperature actual temperature Note An appliance malfunction which is indi...

Page 28: ...he storage shelf forward until it can be tipped up or down and removed 0 To insert at a different height use the same procedure in reverse Adjustment for tall items 0 Remove the front half of the two part vario glass storage shelf and insert it at a different level Space is then gained for storage of tall items on the storage shelf below Bottle rack Place bottles in the rack with the bottleneck to...

Page 29: ...ed up and removed and inserted at other positions as needed Drawers and Compartments Vario drawers set The two large fruit and vegetable drawers can be divided with an adjus table partition not included with all models Bottle Holder not included with all models Some models are equipped with a bottle holder in the bottle compart ment This is used to prevent individ ual bottles from falling over and...

Page 30: ...f water in the centre of the said shelf with a thermometer inside 0 Leave the fridge door closed overnight and check the temperature first thing in the morning 0 At this point the temperature should read no more than 5 C if it does you need to adjust the temperature regulator to a colder setting For further information on keeping food cool and safe a guide published by the Ministry of Agriculture ...

Page 31: ...nto meals may not under any circumstances be frozen a second time 0 For freezing the maximum capacity press the FAST CHILL FREEZE but ton 24 hours prior to freezing or 4 to 6 hours for smaller quantities Yellow indicator lights up 3 The FAST CHILL FREEZE button need not be pressed for freezing of small quantities of up to 3 kg 0 All foods must be packed air tight prior to freezing so that they do ...

Page 32: ...ckaged frozen goods so that they do not dry out or lose their flavour and so that no flavour contamination of other frozen goods can occur Please observe maximum storage times and expiry dates of frozen goods 2 When possible store frozen goods separately according to type in draw ers The models are provided with index tabs which can be attached to the drawers In order to identify the contents of i...

Page 33: ...sed on economical energy use and the maintenance of a constant temperature Defrosting cycles are started more or less often depend ing on the degree of moisture accumulation Because the greatest accumulation of moisture occurs when the door is open the frequency of defrosting cycles is determined by frequency and duration of door opening The water collects in the discharge trough at the back wall ...

Page 34: ...eserve for the interruption in operation Caution Do not touch frozen goods with wet hands Hands can freeze to the goods 0 Remove frozen goods pack them in several layers of newspaper cover them and store them in a cool place e g in a refrigerator 0 Switch off refrigerator and freezer and remove plug from the mains or switch off or turn out the circuit breaker or the fuse 0 Remove all the drawers R...

Page 35: ... store food uncovered Keep the time between buying chilled food and placing it in your freezer as short as possible Do not push food together too much try to allow air to circulate around each item 2 Energy Saving Advice Do not install the appliance close to sources of heat such as a cooker dishwasher or radiator Locate the appliance in a cool well ventilated room and make sure that the air openin...

Page 36: ...warm water and bicarbonate of soda 5 ml to 0 5 litre of water Rinse and dry thoroughly 1 Warning Do not use detergents abrasive powders highly perfumed cleaning products wax polishes or cleaning products containing bleach or alcohol 0 Regularly check the door seals and wipe clean to ensure they are clean and free from debris External Cleaning 0 Wash the outer cabinet with warm soapy water 1 Warnin...

Page 37: ...k Before replacing the light bulb switch off the appliance and remove the mains plug Light bulb specifications halogen lamp 220 240 V max 25 W fitting E 14 0 To switch the appliance off press and hold both ON OFF buttons for about 5 seconds 0 Unplug the mains plug 0 To change the light bulb undo the cross head screw and remove the light bulb cover downwards 0 Change the defective light bulb 0 Refi...

Page 38: ...dicates an error F1 F2 etc Switch the audible warning off by pressing the WARNING OFF button Please make a note of the indicated error and inform the service department Do not open the appliance door again Red warning display flashes two temperatures are indicated alternately by the temperature display Please refer to the section Control and Information Systems Interior illumination does not funct...

Page 39: ...red for in guarantee service calls Excessive build up of frost If the door seal is not airtight probably after changing over the door hinges apply warm air to the non sealing area using a hair dryer set to a gentle heat do not use a fan heater for this purpose This will make the rubber more supple and allow it to revert to its original shape Noise Refer to Normal Operating Sounds The compressor do...

Page 40: ... on the base of the appliance at the rear The task of the compressor is to draw in vaporised refrigerant from the evaporator to compress it and to pass it on to the condenser Condenser The condenser normally has the form of a grid The refrigerant com pressed in the compressor is liquefied in the condenser During this process heat is released to the surrounding air at the surface of the condenser T...

Page 41: ...ed modification or attempted repair commercial use or failure to observe requirements and recommendations set out in the instruction book This guarantee does not cover such parts as light bulbs removable parts of glass or plastic 3 Should guarantee repairs be necessary the purchaser must inform the nearest customer service office manufacturer s service or authorised agent AEG reserves the right to...

Page 42: ...ur new home is within the European Community EC or European Free Trade Area The product is installed and used in accordance with our instructions and is only used domestically i e a normal household The product is installed taking into account regulations in your new country Before you move please contact your nearest Customer Care Centre listed below to give them details of your new home They wil...

Page 43: ...ocal AEG Service Force Centre by telephoning 08705 929 929 Help us to help you Please determine your type of enquiry before writing or telephoning When you contact us we need to know 1 Your name address and post code 2 Your telephone number 3 Clear and concise details of the fault 4 Date of purchase 5 This information can be found on the rating plate in the interior of the appliance at the left Cu...

Page 44: ...AEG Hausgeräte GmbH Postfach 1036 D 90327 Nürnberg http www aeg hausgeraete de Copyright by AEG 818 1400 01 4 1299 ...

Reviews: