background image

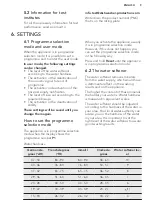
German de-

grees (°dH)

French degrees

(°fH)

mmol/l

Clarke de-

grees

Water softener lev-

el

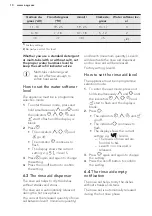
11 - 14

19 - 25

1.9 - 2.5

13 - 17

3

4 - 10

7 - 18

0.7 - 1.8

5 - 12

2

<4

<7

<0.7

< 5

2)

1) 

Factory setting.

2) 

Do not use salt at this level.

Whether you use a standard detergent

or multi-tabs (with or without salt), set

the proper water hardness level to

keep the salt refill indicator active.

Multi-tabs containing salt

are not effective enough to

soften hard water.

How to set the water softener

level

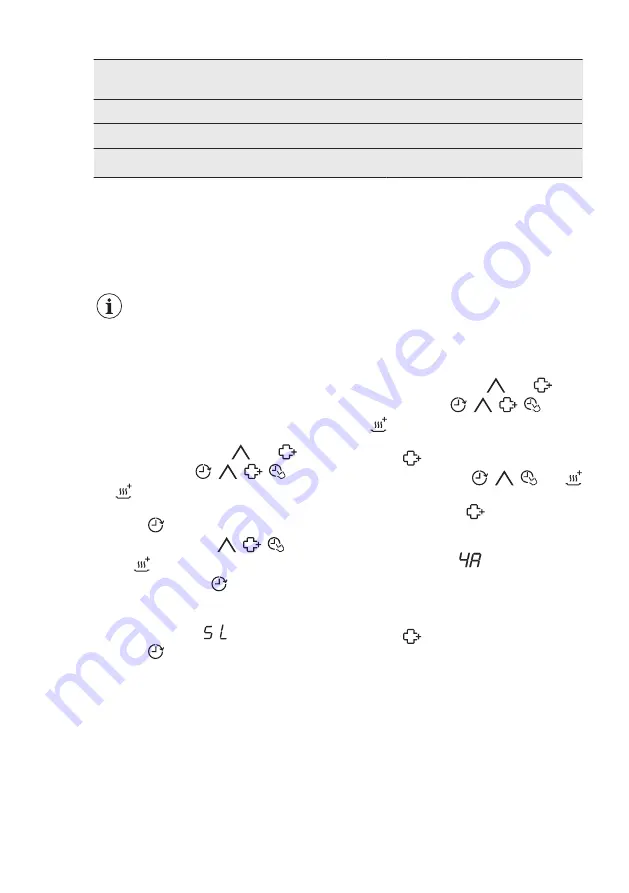
The appliance must be in programme

selection mode.

1.

To enter the user mode, press and
hold simultaneously 

 and 

 until

the indicators 

 and

 start to flash and the display is

blank.

2.

Press 

.

• The indicators 

 and

 go off.

• The indicator 

 continues to

flash.

• The display shows the current

setting: e.g. 

 = level 5.

3.

Press 

 again and again to change

the setting.

4.

Press the on/off button to confirm

the setting.

6.3 

The rinse aid dispenser

The rinse aid helps to dry the dishes

without streaks and stains.
The rinse aid is automatically released

during the hot rinse phase.
You can set the released quantity of rinse

aid between level 1 (minimum quantity)

and level 6 (maximum quantity). Level 0

will deactivate the rinse aid dispenser

and no rinse aid will be released.
Factory setting: level 4.

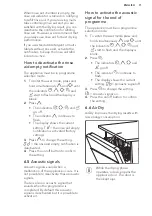
How to set the rinse aid level

The appliance must be in programme

selection mode.

1.

To enter the user mode, press and
hold simultaneously 

 and 

 until

the indicators 

 and

 start to flash and the display is

blank.

2.

Press 

.

• The indicators 

 and 

go off.

• The indicator 

 continues to

flash.

• The display shows the current

setting: e.g. 

= level 4.

– The levels of rinse aid are

from 0A to 6A.

– Level 0 = no rinse aid is

released.

3.

Press 

 again and again to change

the setting.

4.

Press the on/off button to confirm

the setting.

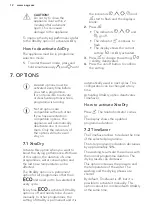
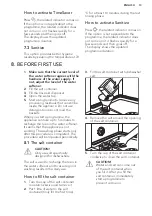
6.4 

The rinse aid empty

notification

The rinse aid helps to dry the dishes

without streaks and stains.
The rinse aid is automatically released

during the hot rinse phase.

www.aeg.com

10

Summary of Contents for FD660VP

Page 1: ...USER MANUAL EN User Manual 2 Dishwasher DE Benutzerinformation 24 Geschirrspüler FD660VP ...

Page 2: ...ery best from it Visit our website for Get usage advice brochures trouble shooter service information www aeg com webselfservice Register your product for better service www registeraeg com Buy Accessories Consumables and Original spare parts for your appliance www aeg com shop CUSTOMER CARE AND SERVICE Always use original spare parts When contacting our Authorised Service Centre ensure that you h...

Page 3: ... the appliance door when it is open Children shall not carry out cleaning and user maintenance of the appliance without supervision 1 2 General Safety This appliance is intended to be used in household and similar applications such as farm houses staff kitchen areas in shops offices and other working environments by clients in hotels motels bed breakfast and other residential type environments Do ...

Page 4: ...upply If not contact an electrician Always use a correctly installed shockproof socket Do not use multi plug adapters and extension cables Make sure not to cause damage to the mains plug and to the mains cable Should the mains cable need to be replaced this must be carried out by our Authorised Service Centre Connect the mains plug to the mains socket only at the end of the installation Make sure ...

Page 5: ...n the dishes The appliance can release hot steam if you open the door while a programme operates Do not put flammable products or items that are wet with flammable products in near or on the appliance 2 5 Service Contact the Authorised Service Centre to repair the appliance We recommend only the use of original spare parts When you contact the Authorised Service Centre ensure that you have the fol...

Page 6: ...hat is displayed on the floor below the appliance door When the programme starts a red light comes on and stays on for the duration of the programme When the programme is completed a green light comes on When the appliance has a malfunction the red light flashes The Beam on Floor goes off when the appliance is deactivated When AirDry is activated during the drying phase the projection on the floor...

Page 7: ...ile the programme operates Salt indicator It is always off while the programme operates 5 PROGRAMMES Programme Degree of soil Type of load Programme phases Options P1 1 Normal soil Crockery and cutlery Prewash Wash 50 C Rinse Dry Sanitize TimeSaver XtraDry P2 2 All Crockery cut lery pots and pans Prewash Wash from 45 C to 70 C Rinse Dry Sanitize XtraDry P3 Heavy soil Crockery cut lery pots and pan...

Page 8: ...he baskets It automatically ad justs the temperature and the quantity of water the energy consumption and the programme duration 3 With this programme you can wash a load with fresh soil It gives good washing results in a short time 4 This is the most silent programme The pump works at a very low speed to decrease the level of noise Because of the low speed the programme duration is long 5 1 Consu...

Page 9: ...ogramme number P1 When you activate the appliance usually it is in programme selection mode However if this does not happen you can set the programme selection mode in the following way Press and hold Reset until the appliance is in programme selection mode 6 2 The water softener The water softener removes minerals from the water supply which would have a detrimental effect on the washing results ...

Page 10: ... The rinse aid dispenser The rinse aid helps to dry the dishes without streaks and stains The rinse aid is automatically released during the hot rinse phase You can set the released quantity of rinse aid between level 1 minimum quantity and level 6 maximum quantity Level 0 will deactivate the rinse aid dispenser and no rinse aid will be released Factory setting level 4 How to set the rinse aid lev...

Page 11: ... Press to change the setting the rinse aid empty notification is deactivated 4 Press the on off button to confirm the setting 6 5 Acoustic signals Acoustic signals sound when a malfunction of the appliance occurs It is not possible to deactivate these acoustic signals There is also an acoustic signal that sounds when the programme is completed By default this acoustic signal is deactivated but it ...

Page 12: ...y on 7 1 XtraDry Activate this option when you want to boost the drying performance With use of this option the duration of some programmes water consumption and the last rinse temperature can be affected The XtraDry option is a permanent option for all programmes other than and need not to be selected at every cycle Every time is activated XtraDry option is off and needs to be chosen manually In ...

Page 13: ...t a programme to remove any processing residuals that can still be inside the appliance Do not use detergent and do not load the baskets When you start a programme the appliance can take up to 5 minutes to recharge the resin in the water softener It seems that the appliance is not working The washing phase starts only after this procedure is completed The procedure will be repeated periodically 8 ...

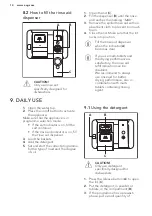
Page 14: ...or better drying performance also in combination with multi tablets containing rinsing agent 9 DAILY USE 1 Open the water tap 2 Press the on off button to activate the appliance Make sure that the appliance is in programme selection mode If the salt indicator is on fill the salt container If the rinse aid indicator is on fill the rinse aid dispenser 3 Load the baskets 4 Add the detergent 5 Set and...

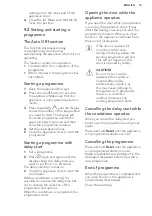
Page 15: ...ble to increase the delay time but not to change the selection of the programme and options When the countdown is completed the programme starts Opening the door while the appliance operates If you open the door while a programme is running the appliance stops It may affect the energy consumption and the programme duration When you close the door the appliance continues from the point of interrupt...

Page 16: ... appliance with the use of appliance cleaner which is particularly suitable for this purpose Detergent tablets do not fully dissolve with short programmes To prevent detergent residues on the tableware we recommend that you use the tablets with long programmes Do not use more than the correct quantity of detergent Refer to the instructions on the detergent packaging 10 3 What to do if you want to ...

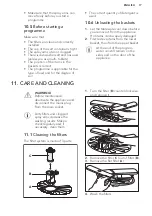
Page 17: ...e tableware cool down before you remove it from the appliance Hot items can be easily damaged 2 First remove items from the lower basket then from the upper basket At the end of the program water can still remain on the sides and on the door of the appliance 11 CARE AND CLEANING WARNING Before maintenance deactivate the appliance and disconnect the mains plug from the main socket Dirty filters and...

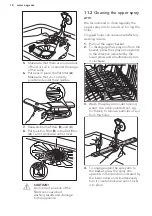
Page 18: ...ommend to clean regularly the upper spray arm to avoid soil to clog the holes Clogged holes can cause unsatisfactory washing results 1 Pull out the upper basket 2 To disengage the spray arm from the basket press the spray arm upwards in the direction indicated by the lower arrow and simultaneously turn it clockwise 3 Wash the spray arm under running water Use a thin pointed tool e g toothpick to r...

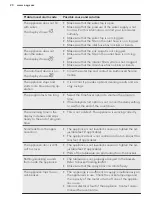
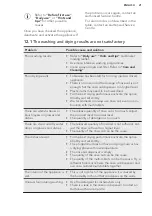
Page 19: ...ation Before you contact an Authorised Service Centre check if you can solve the problem by yourself with the help of the information in the table WARNING Repairs not properly done may result in serious risk to the safety of the user Any repairs must be performed by qualified personnel With some problems the display shows an alarm code The majority of problems that can occur can be solved without ...

Page 20: ...he TimeSaver option to shorten the program time If the delayed start option is set cancel the delay setting or wait for the end of the countdown The remaining time in the display increases and skips nearly to the end of program time This is not a defect The appliance is working correctly Small leak from the appli ance door The appliance is not levelled Loosen or tighten the ad justable feet if app...

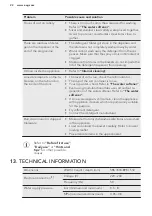
Page 21: ...tion with multi tablets There are whitish streaks or bluish layers on glasses and dishes The release quantity of rinse aid is too much Adjust the rinse aid level to a lower level The quantity of detergent is too much There are stains and dry water drops on glasses and dishes The released quantity of rinse aid is not sufficient Ad just the rinse aid level to a higher level The quality of the rinse ...

Page 22: ... door The level of salt is low check the refill indicator The cap of the salt container is loose Your tap water is hard Refer to The water softener Even using multi functional tabs use salt and set re generation of the water softener Refer to The water softener If lime scale deposits still remain clean the appliance with appliance cleaners which are particularly suitable for this purpose Try diffe...

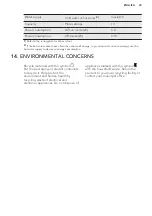
Page 23: ...ls aeolian energy use the hot water supply to decrease energy consumption 14 ENVIRONMENTAL CONCERNS Recycle materials with the symbol Put the packaging in relevant containers to recycle it Help protect the environment and human health by recycling waste of electrical and electronic appliances Do not dispose of appliances marked with the symbol with the household waste Return the product to your lo...

Page 24: ...nicht vorhanden sind Nehmen Sie sich ein paar Minuten Zeit zum Lesen um seine Vorzüge kennen zu lernen Besuchen Sie uns auf unserer Website um Sich Anwendungshinweise Prospekte Fehlerbehebungs und Service Informationen zu holen www aeg com webselfservice Ihr Produkt für einen besseren Service zu registrieren www registeraeg com Zubehör Verbrauchsmaterial und Original Ersatzteile für Ihr Gerät zu k...

Page 25: ...erwendet werden wenn sie durch eine für ihre Sicherheit zuständige Person beaufsichtigt werden oder in die sichere Verwendung des Geräts eingewiesen wurden und die mit dem Gerät verbundenen Gefahren verstanden haben Kinder dürfen nicht mit dem Gerät spielen Halten Sie alle Wasch und Reinigungsmittel von Kindern fern Halten Sie Kinder und Haustiere vom geöffneten Gerät fern Kinder dürfen keine Rein...

Page 26: ...as Gerät nicht mit einem Wasser und oder Dampfstrahl Die Lüftungsöffnungen im Gerätesockel falls vorhanden dürfen nicht von einem Teppichboden blockiert werden Das Gerät muss mit den mitgelieferten neuen Schläuchen an die Wasserversorgung angeschlossen werden Alte Schläuche dürfen nicht wiederverwendet werden 2 SICHERHEITSANWEISUNGEN 2 1 Montage Entfernen Sie das gesamte Verpackungsmaterial Montie...

Page 27: ...n bis es sauber austritt Stellen Sie sicher dass es keine sichtbaren Wasserlecks während und nach dem ersten Gebrauch des Gerätes gibt Der Wasserzulaufschlauch verfügt über ein Sicherheitsventil und eine Ummantelung mit einem innenliegenden Netzkabel WARNUNG Gefährliche Spannung Drehen Sie sofort den Wasserhahn zu und ziehen Sie den Netzstecker aus der Steckdose wenn der Wasserzulaufschlauch besch...

Page 28: ...Unterer Sprüharm 4 Filter 5 Typenschild 6 Salzbehälter 7 Lüftungsschlitze 8 Klarspülmittel Dosierer 9 Reinigungsmittelbehälter 10 Besteckkorb 11 Unterkorb 12 Oberkorb 3 1 Beam on Floor Der Beam on Floor ist ein Lichtstrahl der unterhalb der Gerätetür auf den Boden projiziert wird Nach dem Start des Programms leuchtet der rote Lichtstrahl auf und bleibt während der gesamten Programmdauer eingeschal...

Page 29: ...nitize 6 Taste TimeSaver 7 Taste XtraDry 8 Taste Reset 9 Kontrolllampen 4 1 Kontrolllampen Kontrolllam pe Beschreibung Kontrolllampe Programmende Kontrolllampe Klarspülmittel Sie erlischt während des Programmbetriebs Kontrolllampe Salz Sie erlischt während des Programmbetriebs 5 PROGRAMME Programm Verschmutzungs grad Beladung Programmphasen Optionen P1 1 Normaler Ver schmutzungs grad Geschirr und ...

Page 30: ...mutzungs grad Geschirr und Besteck Vorspülen Hauptspülgang 50 C Klarspülgang Trocknen XtraDry 1 Dieses Programm gewährleistet den wirtschaftlichsten Wasser und Energieverbrauch für normal ver schmutztes Geschirr und Besteck Dies ist das Standardprogramm für Prüfinstitute 2 Das Gerät erkennt den Verschmutzungsgrad und die Anzahl der Geschirrteile in den Körben Es stellt dann automatisch die Wassert...

Page 31: ...rammwahlmodus befindet kann ein Programm eingestellt und der Benutzermodus aufgerufen werden Im Benutzermodus können folgende Einstellungen geändert werden Die Stufe des Wasserenthärters gemäß der Wasserhärte Ein und Ausschalten des Signaltons für das Programmende Ein und Ausschalten der Klarspülmittelnachfüllanzeige Klarspülmittelstufe gemäß der erforderlichen Dosierung Ein oder Ausschalten von A...

Page 32: ...7 5 46 52 8 29 36 51 64 5 1 6 4 36 45 7 23 28 40 50 4 0 5 0 28 35 6 19 22 33 39 3 3 3 9 23 27 5 1 15 18 26 32 2 6 3 2 18 22 4 11 14 19 25 1 9 2 5 13 17 3 4 10 7 18 0 7 1 8 5 12 2 4 7 0 7 5 1 2 1 Werkseitige Einstellung 2 Verwenden Sie kein Salz bei diesen Werten Benutzen Sie ein herkömmliches Reinigungsmittel oder Multi Reinigungstabletten mit oder ohne Salz stellen Sie die korrekte Wasserenthärte...

Page 33: ...4 Klarspülmittelnachfüllanzeige Das Klarspülmittel ermöglicht das Trocknen des Geschirrs ohne Streifen und Flecken Das Klarspülmittel wird automatisch während der heißen Spülphasen abgegeben Ist das Klarspülmittelfach leer wird die Klarspülmittelnachfüllanzeige eingeschaltet und weist darauf hin dass Klarspülmittel nachgefüllt werden sollte Wenn Sie Multi Reinigungstabletten verwenden die Klarspül...

Page 34: ...r Einstellung Signalton ist eingeschaltet 4 Drücken Sie die Taste Ein Aus zur Bestätigung der Einstellung 6 6 AirDry AirDry verbessert die Trocknungsergebnisse bei einem geringeren Energieverbrauch Während der Trockenphase wird die Gerätetür durch eine Vorrichtung geöffnet Die Tür bleibt dann einen Spaltbreit geöffnet VORSICHT Versuchen Sie nicht die Gerätetür innerhalb der ersten 2 Minuten nach d...

Page 35: ...espeichert und wird automatisch verwendet Sie können diese Konfiguration jederzeit ändern Durch das Einschalten der Option XtraDry wird TimeSaver ausgeschaltet So schalten Sie XtraDry ein Drücken Sie Die entsprechende Kontrolllampe leuchtet auf Das Display zeigt die aktualisierte Programmdauer an 7 2 TimeSaver Mit dem TimeSaver können Sie die Dauer des gewählten Programms verkürzen Die Programmdau...

Page 36: ... dauern das Filterharz des Wasserenthärters zu regenerieren Das Gerät scheint nicht zu arbeiten Die Spülphase startet erst nach Abschluss dieses Vorgangs Dieser Vorgang wird regelmäßig wiederholt 8 1 Salzbehälter VORSICHT Verwenden Sie nur Spezialsalz für Geschirrspüler Das Salz wird für die Regenerierung des Filterharzes im Wasserenthärter und zur Erzielung guter Spülergebnisse im täglichen Gebra...

Page 37: ...leistung zufriedenstellend ist kann die Klarspülernachfüllanzeige ausgeschaltet werden Für eine bessere Trocknungsleistung empfehlen wir stets Klarspülmittel zu verwenden auch wenn Sie Multi Reinigungstabletten benutzen die Klarspülmittel enthalten 9 TÄGLICHER GEBRAUCH 1 Öffnen Sie den Wasserhahn 2 Drücken Sie die Taste Ein Aus um das Gerät einzuschalten Stellen Sie sicher dass sich das Gerät im P...

Page 38: ...Stellen Sie die verfügbaren Optionen ein 5 Schließen Sie die Gerätetür um das Programm zu starten Starten eines Programms mit Zeitvorwahl 1 Wählen Sie ein Programm 2 Drücken Sie die Taste wiederholt bis im Display die gewünschte Zeitvorwahl angezeigt wird zwischen 1 und 24 Stunden Die Kontrolllampe der Zeitvorwahl leuchtet auf 3 Schließen Sie die Gerätetür um den Countdown zu starten Während des C...

Page 39: ...Sie darauf dass das Geschirr sich weder berührt noch von anderem Geschirr verdeckt wird Sie können Geschirrspülreiniger Klarspüler und Salz separat oder Kombi Reinigungstabletten z B 3in1 4in1 All in 1 verwenden Befolgen Sie die Anweisungen auf der Verpackung Stellen Sie je nach Beladung und Verschmutzungsgrad das passende Programm ein Mit dem Programm ECO erhalten Sie den wirtschaftlichsten Energ...

Page 40: ...der nicht berühren Ordnen Sie Besteck und kleine Gegenstände in den Besteckkorb ein Ordnen Sie leichte Gegenstände im Oberkorb an Achten Sie darauf dass diese nicht verrutschen können Vergewissern Sie sich dass sich die Sprüharme ungehindert bewegen können bevor Sie ein Programm starten 10 5 Vor dem Starten eines Programms Kontrollieren Sie folgende Punkte Die Filter sind sauber und ordnungsgemäß ...

Page 41: ...einigen Sie die Filter 5 Achten Sie darauf dass sich keine Lebensmittelreste oder Verschmutzungen in oder um den Rand der Wanne befinden 6 Setzen Sie den flachen Filter A wieder ein Stellen Sie sicher dass er korrekt unter den beiden Führungen eingesetzt wurde 7 Bauen Sie die Filter B und C wieder zusammen 8 Setzen Sie den Filter B in den flachen Filter A ein Drehen Sie ihn nach rechts bis er einr...

Page 42: ... Verunreinigungen aus den Öffnungen des Sprüharms mit einem spitzen Gegenstand z B einem Zahnstocher 4 Um den Sprüharm wieder am Korb einzurasten drücken Sie den Sprüharm nach oben in Richtung des unteren Pfeils und drehen Sie ihn gleichzeitig entgegen dem Uhrzeigersinn bis er einrastet 11 3 Reinigen der Außenseiten Reinigen Sie das Gerät mit einem weichen feuchten Tuch Verwenden Sie ausschließlic...

Page 43: ...ufen werden muss Störung und Alarmcode Mögliche Ursache und Abhilfe Das Gerät lässt sich nicht einschalten Vergewissern Sie sich dass der Netzstecker in die Netz steckdose eingesteckt ist Vergewissern Sie sich dass im Sicherungskasten keine Sicherung ausgelöst hat Das Programm startet nicht Achten Sie darauf dass die Gerätetür geschlossen ist Wenn die Zeitvorwahl eingestellt ist brechen Sie diese ...

Page 44: ...ingt bis kurz vor die Pro grammende Zeit Dies ist keine Störung Das Gerät arbeitet ordnungsge mäß Aus der Gerätetür tritt ein wenig Wasser aus Das Gerät ist nicht ausgerichtet Schrauben Sie die Schraubfüße weiter hinein oder weiter heraus falls vor handen Die Gerätetür ist nicht mittig zur Wanne positioniert Stellen Sie den hinteren Fuß ein sofern vorhanden Die Gerätetür ist schwer zu schließen Da...

Page 45: ...enstellende Trocknungsergebnisse Das Geschirr stand zu lange im geschlossenen Gerät Es ist kein Klarspülmittel vorhanden oder die Klarspül mittelmenge ist nicht ausreichend Stellen Sie den Klarspülmittel Dosierer auf eine höhere Einstellung Kunststoffteile müssen eventuell mit einem Tuch ab getrocknet werden Schalten Sie die Option XtraDry ein und stellen Sie AirDry ein um die beste Trocknungsleis...

Page 46: ... Schaumbil dung während des Spülgangs Verwenden Sie ausschließlich speziell für Geschirrspü ler bestimmte Reinigungsmittel Der Klarspülmittel Dosierer hat ein Leck Wenden Sie sich an den autorisierten Kundendienst Rostspuren am Besteck Das Spülwasser enthält zu viel Salz Siehe Wasseren thärter Silber und Edelstahlbesteck wurden zusammen ein geordnet Ordnen Sie nicht Silber und Edelstahlbe steck zu...

Page 47: ...dass nur spülmaschinenfestes Ge schirr im Gerät gespült wird Laden und entladen Sie den Korb vorsichtig Siehe Broschüre zum Beladen der Körbe Ordnen Sie empfindliche Gegenstände im Oberkorb an Siehe Vor der ersten Inbetriebnahme Täglicher Gebrauch oder Tipps und Hinweise bezüglich anderer möglicher Ursachen 13 TECHNISCHE DATEN Abmessungen Breite Höhe Tiefe mm 596 818 898 550 Elektrischer Anschluss...

Page 48: ...en entsprechenden Recyclingbehältern Recyceln Sie zum Umwelt und Gesundheitsschutz elektrische und elektronische Geräte Entsorgen Sie Geräte mit diesem Symbol nicht mit dem Hausmüll Bringen Sie das Gerät zu Ihrer örtlichen Sammelstelle oder wenden Sie sich an Ihr Gemeindeamt www aeg com 48 ...

Page 49: ...DEUTSCH 49 ...

Page 50: ...www aeg com 50 ...

Page 51: ...DEUTSCH 51 ...

Page 52: ...www aeg com shop 117886541 A 262017 ...

Reviews: