English
35
EC4835_IM
26.04.16
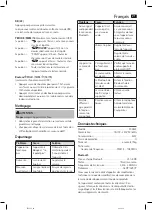
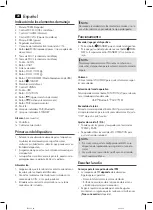
9 MIC 1 jack (microphone input)
10 MIC 2 jack (microphone input)
11 AUX IN port
12 LIGHT button
13 Wire antenna
14 FOLD. / 10 / M. button
15 FOLD. / 10 / M. button
16 P-MODE / MEM. button (USB playback mode)
17 STANDBY button
18 Loudspeaker membranes
19 TUNING control
20 USB port
21 FUNCTION button
22
button (next music file)
23
button (previous music file)
24 PAIR button (Pairing)
25 Display
26 PAIR indicator lamp (Bluetooth)
27 STANDBY indicator lamp
Delivery scope
(not shown)
1x Microphone
1x Mains cable
First Use of the Device
• Choose a suitable location for the device. Suitable loca-
tions are dry, even and antislip surfaces on which you may
operate the device easily.
• Make sure there is proper ventilation for the device!
• Sensitive surfaces such as the display may be protected
by plastic foil. Remove this foil.
Power Supply
1. Make sure the grid voltage corresponds to the figures on
the rating plate.
2. Connect the supplied power cord with the AC IN ~
connection on the back.
3. Insert the mains plug to a properly installed socket.
NOTE:
Disconnect from mains power supply during longer periods
of non-use.
General Operation
Switch the Device on / off
• Press the STANDBY button to turn the device on.
• To turn off the device, press the STANDBY button
again. The control lamp STANDBY (27) lights up red.
NOTE:
After approx. 15 minutes without signal or with very poor
signal, the device will automatically switch to standby.
Volume
Use the VOLUME control (3) to adjust the volume as desired.
Select the operating mode
Repeatedly press the FUNCTION button (21) to select the
desired operating mode.
USB Bluetooth AUX FM
Switching on the light
Repeatedly press the LIGHT button to select a lighting mode
for the front speakers. The setting “OFF” deactivates this
function.
Sound settings (1 / 5 / 6)
• You can adjust treble and bass with the controls TREBLE
and BASS.
• The EQ OPERATION controls can be used to set an
individual sound.
NOTE
:
• If necessary, adjust the EQ settings on your playback
device in order to generate a better sound.
• The settings with the controls do not influence the
acoustic sound of the microphone.
Listening to the Radio
Hints for FM Reception
• The FM reception
depends
on the location.
Follow the steps below:
-
Fully unwind the wire antenna.
-
If necessary, change the position of the wire antenna to
improve the reception.
• Depending on the location, some station may not be
received in your region or only with interference. This is
not
a malfunction of the device!
Scan FM Stations
1. Repeatedly press FUNCTION button until the display
shows “FM”.
2. You have two possibilities to look for and store radio
stations.
Automatic station scan:
Important!
Any previously stored radio stations will be
overwritten.
Press and hold the /SCAN button (8) for approx.
3 seconds. The device is searching the complete FM
frequency band for radio stations. The stations found are
stored ascending by frequency.
Searching for radio stations manually:
Turn the TUNING control (19) until you have found the
radio station that you are looking for.
Storing stations:
1. Search for the desired radio station with the TUNING
control (19).

