background image

Operating Instructions

26

residual heat appears in the display?

Check whether 
– the cooking zone was only used for a short period and is therefore 

not hot enough.

If the cooking zone is hot, call AEG customer service.

.... a cooking zone cannot be switched off?

Check whether 
– the touch fields are partially covered by a damp cloth or liquid.
– the lock is activated. 

.... a cooking zone cannot be switched on?

Check whether 
– the lock is activated. 

.... 

f

 is shown in the display?

Check whether the cooking zone has been overheated.
This indicator lights up to show overheating, electronic faults or for 
safety reasons. Contact AEG Customer Service.

If you call in customer service to resolve a problem caused by incorrect 
operation of the appliance, the customer service engineer's visit will 
not be free of charge, even during the warranty period.

Summary of Contents for C65030K

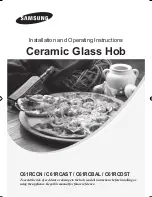
Page 1: ...C65030K Ceramic Glass Hob Installation and Operating Instructions ...

Page 2: ...ossible new owners of the appliance The following symbols are used in the text 1 Safety instructions Warning Information concerning your personal safety Important Information on how to avoid damaging the appliance 3 Information and practical tips 2 Environmental information 1 These numbers indicate step by step how to use the appliance 2 3 Printed on environmentally friendly paper Thinking ecologi...

Page 3: ...L sensor field 11 Switching on the Appliance 11 Switching Off the Appliance 12 Cooking Zone Selection 12 Heat Setting Selection and 13 Switching off a cooking zone 13 Residual Heat Indicator 14 Cooking with the automatic warm up function 15 Cooking without the automatic warm up function 16 Locking Unlocking the Control Panel 17 Timer 18 Uses tables and tips 20 Pans 20 Advice on cooking with and wi...

Page 4: ... 4 Service Spare parts 27 Warranty conditions 29 Installation Instructions 30 Technical Data 30 Regulations Standards Directives 31 Safety Instructions for the Installer 32 Electrical Connection 33 Assembly 35 ...

Page 5: ...e warranty is void in the event of damages Flush mounted appliances may only be operated following installa tion in suitable installation cabinets and workplaces which conform to the relevant standards This ensures sufficient protection against contact for electrical units as required by the VDE Association of German Electrical Engineers If your appliance malfunctions or if fractures cracks or spl...

Page 6: ...ts that fall on the cooking surface can damage it Do not use cast iron pans or pans with a rough burred or damaged base Scratching may occur if the pans are slid across the surface Do not place any pans on the hob frame Scratching and damage to the paint may occur Make sure that no acidic liquids e g vinegar lemon or descaling agents are spilt onto the hob frame since these cause dull spots If sug...

Page 7: ...ppliance properly Please follow the national and regional regulations and material identification material separation refuse collection waste disposal sites Information on disposal The appliance must not be disposed of with household rubbish You can obtain information about collection dates or public refuse disposal sites from your local refuse department or council Warning Before disposing of old...

Page 8: ... Off switch the appliance has a separate mains switch with which the mains sup ply to the appliance can be completely switched on and off with one touch Displays Digital displays show information about selected heat set tings functions activated and any possible residual heat in the appro priate cooking zone Safety cut out A safety cut out ensures that all cooking zones switch off automatically af...

Page 9: ...Operating Instructions 9 Appliance assembly Hob surface and control panel features ...

Page 10: ...switched on and j after they have cooled down The rings are switched off at 3 If one or more cooking zones switch off before the times indicated see section What to do if Cancelling the Safety Cut out To cancel the activated safety cut out the appliance must be switched off and then on again using the ON OFF n sensor field After this the cooking zones are again ready for use Switching Off for Othe...

Page 11: ...perate the TOUCH CONTROL sensor field place your finger from above flat onto the required field until the appropriate displays come on or go out or the required function is carried out Switching on the Appliance The entire appliance is switched on using the On Off n sensor field Touch the On Off sensor field for approx 2 seconds The digital displays will show j and the decimal point will flash 3 O...

Page 12: ... entire hob is switched off any residual heat is shown with an h for Hot in the digital display for the appropriate cooking zones Cooking Zone Selection To select the required cooking zone touch the corresponding sensor field for approx one second A zero with a decimal point will light up in the appropriate cooking zone display window 3 The decimal point indicates that settings may only be made fo...

Page 13: ...required cooking zone must be selected by touching the appropriate sensor field before adjusting the heat setting The decimal point in the display shows which cooking zone has been selected Switching off a cooking zone 0 1 Select the required cooking zone with the cooking zone sensor fields 2 Touch sensor fields and simultaneously to switch off or turn sen sor field back to zero 3 A cooking zone m...

Page 14: ...f the residual heat indicator only goes out when the cooking zone is cold 2 You can use the residual heat for melting and keeping food warm 1 Important As long as the residual heat indicator is illuminated there is a risk of burns 1 Important If the power supply is interrupted the h symbol will also go out and information about residual heat will no longer be available However it is still possible...

Page 15: ...zone will work for a specific time on full power and then switch automatically to the selected heat setting The duration of the automatic warm up function depends on the heat setting selected 1 Select the required cooking zone with the cooking zone sensor fields Touch sensor field until it reaches the required heat to The set heat setting will be displayed first After five seconds a auto matic war...

Page 16: ...oil over as a result of the extra burst of heat from the automatic warm up Cooking without the automatic warm up function If you wish to use the cooking zone without automatic warm up select the required heat setting with the 0 1 Switch on the appliance and select the desired cooking zone using the cooking zone selection buttons 2 Touch sensor field to select the required heat setting from to 3 Yo...

Page 17: ...so suitable as a child safety feature 0 1 Touch the o sensor field until the control indicator comes on 2 To release the lock touch the o sensor field again continuously until the control indicator goes out 3 Child safety feature If the hob is completely switched off using the On Off sensor field while the lock is on then the lock will still be active when the hob is switched on again To reactivat...

Page 18: ... in the display 3 Using the or sensor fields set or adjust the required period of time until the zone is to switch off automatically eg 15 minutes After a few seconds the timer will start automatically and will show how much time remains before it will switch off In addition the Timer active display for the relevant cooking zone will light up e g the top left control indicator corresponds to the r...

Page 19: ... the timer is not already being used for 1 or more cooking zones No cooking zone may be selected in this case The cooking zone sensor field with the decimal point in the display must therefore be touched again so that the decimal point goes out Set the time as described above Ending the timer function prematurely There are two ways of switching off the timer early Switching off the cooking zone an...

Page 20: ...he surface When cold pan bases are normally bowed slightly inwards concave They should never be bowed outwards convex If you wish to use special types of pan e g a pres sure cooker simmering pan wok etc please observe the manufacturer s instructions 2 Energy saving tips You can save valuable energy by observing the following points Always position pots and pans before switching on the cooking zone...

Page 21: ...ishes with large amounts of liquid cooking with pressure cookers very large quantities of soup stew with more than 2 litres of liquid General notes 3 When cooking without the automatic warm up function we recom mend the use of a high heat setting to warm up the food using the and then leave the dish to finish cooking at an appropriate lower heat setting You can use the heat setting for keeping foo...

Page 22: ... warm up function the warm up time can be selected as required Cooking Process Examples of Usage 9 Warming up Frying Deep fat frying Warming up large amounts of liquid boiling pasta browning meat browning goulash pot roast 8 4 5 Fast frying Steaks pieces of loin potato fritters fried sausages pancakes doughnuts 7 3 5 6 2 5 Frying Schnitzel cutlets liver fish rissoles fried eggs 5 8 5 Boiling Boili...

Page 23: ...g a commercially available glass ceramic or stainless steel cleaner such as Hob Brite Light Soiling 0 1 Wipe the glass ceramic surface with a damp cloth and a little washing up liquid 2 Then rub dry with a clean cloth Remnants of cleaner must not be left on the surface 3 Thoroughly clean the entire glass ceramic cooking surface once a week with a commercially available glass ceramic or stainless s...

Page 24: ...n 3 If the cooking zone on which some thing has melted has already cooled down warm it up again for cleaning Scratches or dark marks on the glass ceramic surface caused for exam ple by a pan base with sharp edges cannot be removed However they do not impair the function of the hob Hob Frame 1 Important Do not put vinegar lemon juice or scale removers on the hob frame otherwise dull spots will appe...

Page 25: ...ll an approved electrician the appliance has been properly switched on the control indicators in the control panel are on the correct cooking zone has been switched on the cooking zones are set to the desired heat setting for cooking see section Cooking the cooking zones have been switched off by the safety switch see section Safety functions the cooking zones cannot be switched on Check whether t...

Page 26: ... a damp cloth or liquid the lock is activated a cooking zone cannot be switched on Check whether the lock is activated f is shown in the display Check whether the cooking zone has been overheated This indicator lights up to show overheating electronic faults or for safety reasons Contact AEG Customer Service If you call in customer service to resolve a problem caused by incorrect operation of the ...

Page 27: ...the fault 4 Prior to the telephone call it is important that you make a note of the following appliance code num bers that are given on the rating plate The rating plate is located on the underneath side of the hob PNC code 9 digits S No code 9 digits We recommend that you record the code numbers here so that you always have them to hand 5 Date of purchase Please note that it will be necessary to ...

Page 28: ...formation on AEG products please contact our Customer Care Department by letter or telephone at the address below or visit our website at www aeghome co uk Customer Care Department AEG Domestic Appliances 55 77 High Street Slough Berkshire SL1 1DZ Tel 08705 350350 Call may be recorded for training purposes ...

Page 29: ...s both labour and materials 5 Repairs carried out under guarantee do not extend the guarantee period for the appli ance Parts removed during guarantee repairs become the property of AEG 6 The purchaser s statutory rights are not affected by this guarantee European Guarantee If you should move to another country within Europe then your guarantee moves with you to your new home subject to the follow...

Page 30: ...ot cover any damage that may occur Technical Data Appliance Dimensions Cut Out Dimensions Power Consumption Width 570 mm Depth 500 mm Height 49 mm Width 560 mm Depth 490 mm Corner radius R3 Front left cooking zone ø 210 mm 2300 W Back left cooking zone ø 145 mm 1200 W Back right cooking zone ø 180 mm 1800 W Front right cooking zone ø 145 mm 1200 W Heating Element Voltage 230 V Total Connected Load...

Page 31: ...ting to the operating features of electric cookers for household use EN 55014 2 VDE 0875 part 14 2 EN 55014 VDE 0875 part 14 12 93 EN 61000 3 2 VDE 0838 part 2 EN 61000 3 3 VDE 0838 part 3 relating to basic requirements for electro magnetic compatibility protection EMC This appliance complies with the following EU Directives 73 23 EWG dated 19 02 1973 Low Voltage Directive 89 336 EWG dated 03 05 1...

Page 32: ...ed underneath the hob The installation must guarantee shock protection The kitchen unit in which the appliance is fitted must satisfy the sta bility requirements of DIN 68930 For protection against moisture all cut surfaces are to be sealed with a suitable sealant On tiled work surfaces the joints in the area where the hob sits must be completely filled with grout On natural artificial stone or ce...

Page 33: ...e or one with a higher grade must be used as the mains connecting cable The connection must be carried out as shown in the diagram The con necting links should be fitted according to the appropriate connection diagram The earth lead is connected to terminal x The earth lead must be longer than leads carrying electric current The cable connections must be made in accordance with regula tions and th...

Page 34: ...Installation Instructions 34 Connecting Diagram ...

Page 35: ...Installation Instructions 35 Assembly ...

Page 36: ...Installation Instructions 36 Removal min 5 mm min 25 mm ...

Page 37: ...37 ...

Page 38: ...38 ...

Page 39: ...39 ...

Page 40: ...AEG Hausgeräte GmbH Postfach 1036 D 90327 Nürnberg http www aeg hausgeraete de Copyright by AEG 319 528 600 A 0601 00 ...
Reviews: