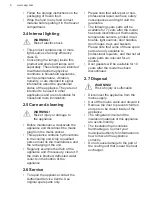
3.5 Door reversibility
Please refer to the separate document
with instructions on installation and door
reversal.
CAUTION!
At every stage of reversing
the door protect the floor
from scratching with a
durable material.
4. CONTROL PANEL
1
2
4
3
2
5
2
4
2
3
2
1
7
6
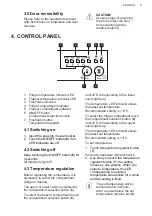
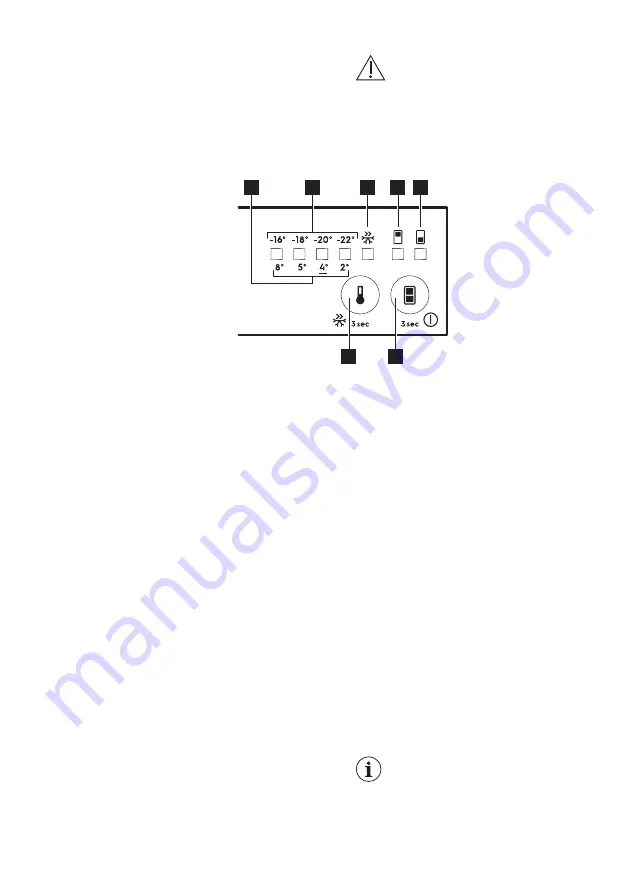
1. Fridge temperature indicator LED
2. Freezer temperature indicator LED
3. Frostmatic indicator
4. Fridge compartment indicator
5. Freezer compartment indicator
6. ON/OFF button
Compartment selection button
7. Frostmatic button
Temperature regulator
4.1 Switching on
1. Insert the plug into the wall socket.
2. Touch the ON/OFF button (6) if all
LED indicators are off.
4.2 Switching off
Keep touching the ON/OFF button (6) for
3 seconds.
All indicators light off.
4.3 Temperature regulation
Before regulating the temperature, it is
necessary to select the compartment
(fridge or freezer).
The upper or lower cavity is selected by
the compartment selection button (6).
To select the freezer compartment touch
the compartment selection button (6)
until LED corresponding to the lower
cavity lights up.
The temperature LED indicator shows
the latest set temperature.
Recommended setting is -18°C.
To select the fridge compartment touch
the compartment selection button (6)
until LED corresponding to the upper
cavity lights up.
The temperature LED indicator shows
the latest set temperature.
Recommended setting is +4°C.
To set temperature:
1. Touch temperature regulator button
(7).
Current temperature indicator blinks.
2. Any time you touch the temperature
regulator button (7), the setting
moves by one position. When you
select a temperature, the LED
corresponding to selected
temperature value blinks for a while
and the setting is fixed.
The set temperature will be
reached within 24 hours.
After a power failure the set
temperature remains stored.
ENGLISH
9
Summary of Contents for AIK2405L
Page 43: ......


