background image

24

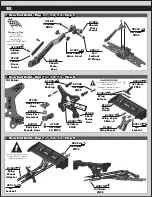
:: Wheels / Tires / Body - Misc. - Step 2

:: Wheels / Tires / Body - Misc. - Step 3

Painting Tips:

Your kit comes with a clear polycarbonate 

body.  You will need to prep the body before 

you can paint it.  Wash the inside thoroughly 

with warm water and liquid detergent. Dry 

the body using a clean, soft, lint-free cloth.  

Install the window masks on the inside of the 

body. (R/C cars get painted from the inside).  

Using high quality masking tape, apply tape 

to the inside of the body to create a design. 

Spray (either rattle can or airbrush R/C 

specific paint) the paint to the inside of the 

body (prefferably dark colors first, lighter 

colors last).  

NOTE: use ONLY paint that is recommended 

for use with (polycarbonate) plastics.  If you 

do not, you can destroy the polycarbonate 

body!!!

After painting, cut the body along the trim 

lines. Make sure to drill or use a body reamer 

to make the holes for the body mounts and 

antenna!

Install wheel nuts with the 

serrated edge 

towards the wheel.

!

81082

Wheel Nuts, 

17mm 

(Blue)

x4

2208

Body Clip

81583

RC8B4e

Body

x2

81583

Nose 

Cone

31531

3x6mm

BHCS

Summary of Contents for 80946

Page 1: ...AssociatedElectrics com ...

Page 2: ...nce around gearbox assembly New aluminum steering rack designed around the updated front end geometry is lightweight and durable New steering bellcrank nuts are longer to reduce drag from the steering rack under flex Updated steering servo linkage features a new heavy duty threaded ball and steel screw joint New A and B blue aluminum suspension arm mounts are shaped to interlock with the RC8B4 cha...

Page 3: ...crews M3 Nut 91477 M3 Alum Locknut Blue 31550 M3 Locknut Black 25215 M3 Locknut w Flange 25612 FT 3mm Locknuts Blue 25392 FT M4 Locknut Blue 31551 M4 Locknut Serrated 91738 Nuts lock plain 5x8x2 5mm 8680 5x10x4mm 91560 6x10mm 31404 6x13x5mm flanged 91559 8x16x5mm 91564 8x16x5mm flanged 91565 Ball Bearings 2 5x6mm 31520 2 5x8mm 31521 2 5x18mm 81259 3x6mm 31531 3x8mm 31532 3x10mm 25211 3x12mm 89202 ...

Page 4: ...c 25 Droop Settings 26 Back Cover Notes There is a 1 1 hardware foldout page in the front of the manual To check the size of a part line up your hardare with the correct drawing until you find the exact size Each part in the foldout has a number assigned to it for ordering replacement parts Associated Electrics Inc 21062 Bake Parkway Lake Forest CA 92630 http www RC10 com http twitter com Team_Ass...

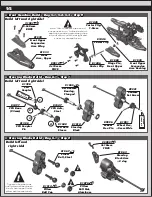
Page 5: ...12mm 81380 Pin 2 5x12mm 81380 Diff Sun Gear 20T HTC 81008 15mm Outdrive 81008 15mm Outdrive 81380 Diff Planet Gear 10T HTC 81380 Diff Crosspin 81381 Diff Shim 3 6x12x0 12mm 81381 Diff Shim 6x8x0 20mm 81381 Diff Shim 6x8x0 20mm 91564 8x16x5 Bearing 91564 8x16x5 Bearing 81379 Diff Case 81009 Diff Ring Gear 42T 81385 Outdrive O Ring 5 8x1 9mm 81385 Outdrive O Ring 5 8x1 9mm x4 x4 x2 81380 Diff Sun Ge...

Page 6: ...0 12mm x4 x4 x2 6588 black grease 6588 black grease Align pin with groove in sun gear 81380 Pin 2 5x12mm 81008 15mm Outdrive Center Diff 81381 Diff Shim 6x8x0 20mm 91564 8x16x5 Bearing 81379 Diff Case 81385 Outdrive O Ring 5 8x1 9mm Racer s Tip Fill diff above the cross pins below the planet gears as shown 6 81380 Diff Sun Gear 20T HTC 6588 black grease 6588 black grease 81008 15mm Outdrive Center...

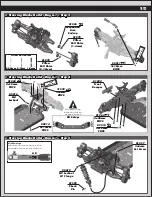
Page 7: ...3 5x33 5mm Front 81185 O Ring Spacer 81160 Shock Body 30 5mm Front 81161 Shock Body 39 5mm Rear 81185 Shock Body O Ring 81173 TiN Shock Shaft 3 5x42 5mm Rear 89278 2 6x6mm Washer 89215 2 5mm Shock Piston Locknut x2 Install pistons taper down Align pin with groove in sun gear 81380 Pin 2 5x12mm 81380 Diff Sun Gear 20T HTC 81384 Diff Gasket 6588 black grease 89208 3x14mm FHCS x4 Diff Fluid Center Di...

Page 8: ...ck Fluid 81453 Bladder Stiff 81512 Shock Rod End 81452 RC8B3 2 Shock Cap 81512 Shock Cap Insert 91492 2x4mm BHCS 91492 Gasket Racer s Tip Use green slime 1105 to lube the o rings before installation 81453 Bladder Stiff 81512 Shock Cap Insert Compress shock shaft fully Let shock fluid bleed from cap then tighten cap For more rebound do not compress shock shaft as far before tightening the shock cap...

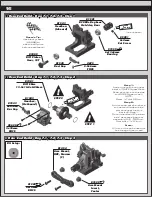
Page 9: ... 81562 Turnbuckle Ball Shouldered 81521 Rod End 4mm Offset 81521 Rod End 4mm 89526 4x50mm Turnbuckle 25 00mm 0 98 Left Turnbuckle Right Turnbuckle Set aside until page 19 16 00mm 0 62 81562 Turnbuckle Ball 81521 Rod End 5mm Offset 81521 Rod End 5mm 81562 Turnbuckle Ball Shouldered 89299 Steel Turnbuckle 5x44mm Left Turnbuckle Right Turnbuckle 11 50mm 0 45 6260 25 40mm Turnbuckle 81521 Steering Lin...

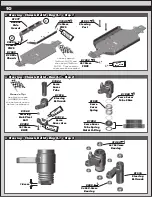
Page 10: ...ing Nut O Ring 81516 Steering Bellcrank 81516 Steering Bellcrank x2 x4 Racer s Tip Use black grease 6588 to lube the bellcrank halves before installation 89202 3x12mm BHCS 81562 Steering Link Pivot Ball 6588 black grease 1596 thread lock 1596 thread lock 81091 Steering Post 81262 4x10mm FHCS x2 x2 81569 RC8B4e Chassis 81577 RC8B4e Side Guards 25201 3x8mm FHCS 31540 3x5mm FHCS x8 x2 Loosely attach ...

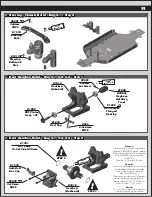
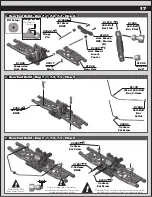
Page 11: ...1009 Diff Pinion Gear 12T x2 1596 thread lock 25620 3x10mm SHCS 81381 Diff Shim 13 5x15 8x0 20mm x2 81510 Gearbox Outboard STEP 2 STEP 1 81510 Anti Roll Bar Cap 6588 black grease Step 1 Add shims on the ring gear side to TIGHTEN gear mesh Subtract shims on this side to LOOSEN gear mesh NOTE Start 1x Thick 0 2mm Step 2 Add or subtract shims here to finalize diff side to side play once gear mesh is ...

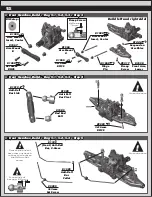
Page 12: ...85 Anti Roll Bar Collet 81129 Front Anti Roll Bar 2 2mm 81260 4x14mm BHCS x2 81520 Arm Mount Insert Center 81567 Arm Mount B x2 Kit Setup 81585 Anti Roll Bar Pivot 81512 Anti Roll Bar Link 81585 Rod End Ball x2 Note direction Note direction 89203 3x16mm BHCS x2 Build left and right side 81260 4x14mm BHCS x2 x2 x2 81566 Arm Mount A 81060 Hinge Pin 81446 Suspension Arm Shim 81528 Front Arm Lower 893...

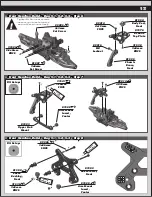
Page 13: ...3 Upper Link Mount 81502 Shock Tower Front x2 x2 81524 Body Post Front 31532 3x8mm BHCS 81525 Chassis Brace Front 81576 RC8B4e Top Plate 81520 Arm Mount Insert Center 81520 Arm Mount Insert Center 89226 3x26mm SHCS 81508 Shock Bushing Front x2 x2 x2 x2 Kit Setup Kit Setup 1 2 3 4 5 31521 2 5x8mm BHCS 31530 3x5mm BHCS 25225 3x3mm Set Screw x2 x2 x2 81257 3x6mm Set Screw x2 Tighten 3x6mm set screws ...

Page 14: ...nged 81514 Steering Block 89221 5x4mm Set Screw 81081 Wheel Hex 0mm Wide 89096 Wheel Hex Pin 81328 CVA Coupler Pin 81547 CVA Axle Steel 81548 CVA Axle Sleeve 81328 CVA Coupler 81497 CVA Bone 93mm Build left and right side 81514 Pillow Ball Cap 81063 Steering Block Arm 2 deg x2 81070 Pillow Ball Nut Aluminum 25202 3x10mm FHCS 81067 Pillow Ball Steel x2 x2 x2 Tighten pillow ball nut until pillow bal...

Page 15: ...81524 Front Bumper x2 x2 For attaching steering link to steering rack 25612 M3 Locknut W Flange 81509 Shock Pin 81257 3x6mm Set Screw 1596 thread lock 81262 4x10mm FHCS 31532 3x8mm BHCS 89216 M4 Locknut x2 x2 89214 4x12mm FHCS Pillow Ball Shims 0 35mm 0 7mm 1 4mm 81056 Suspension Arm Endcap x2 81072 Pillow Ball Shim 1 4mm 81072 Pillow Ball Shim 0 35mm 25211 3x10mm BHCS x2 Kit Setup 1 1 2 2 3 3 1 5...

Page 16: ...9 Diff Pinion Gear 12T x2 1596 thread lock Racer s Tip Use black grease 6588 to lube the diff pinion before installation not included 81260 4x14mm BHCS x2 81520 Arm Mount Insert Center 81454 Arm Mount HRC Narrow C x2 Step 1 Add shims on the ring gear side to TIGHTEN gear mesh Subtract shims on this side to LOOSEN gear mesh NOTE Start 1x Thick 0 2mm Step 2 Add or subtract shims here to finalize dif...

Page 17: ...81512 Anti Roll Bar Link 81585 Rod End Ball x2 81060 Hinge Pin x2 81446 Suspension Arm Shim 81260 4x14mm BHCS 81455 Arm Mount HRC Narrow D x2 81520 Arm Mount Insert Center x2 89317 Droop Screw 2308 3x18mm BHCS x2 25225 3x3mm Set Screw 31521 2 5x8mm BHCS x2 x2 81257 3x6mm Set Screw x2 Tighten 3x6mm set screws just enough to still allow the anti roll bar to move freely Rear Anti Roll Bar Gap 5mm Ant...

Page 18: ...1552 Wing Angle Shim 2 81553 Wing Buttons 81553 Wing Black 25215 M3 Locknut x2 x2 x2 x2 25189 3x22mm BHCS 25612 M3 Locknut W Flange 81525 Chassis Brace Mount 81525 Chassis Brace Rear 89214 4x12mm FHCS x2 25215 M3 Locknut 81552 Wing Mount Adapter x4 x2 89214 4x12mm FHCS 89454 3x12mm SHCS x4 x4 Refer to previous step 8 for wing height position CHOOSE ONE Fin adds straight line stabilization Button a...

Page 19: ... Screw 81081 Wheel Hex 0mm Wide 89096 Wheel Hex Pin 25215 3x6mm Set Screw x2 25612 M3 Locknut w Flange 81545 Rear Hub Shim 1 0mm 81545 Rear Hub Shim 2 5mm 81545 Rear Hub Shim 1 5mm 81076 Hub Hinge Pin 1 5 9 6 t h r e a d l o c k 25612 M3 Locknut w Flange 89204 3x24mm BHCS 25211 3x10mm BHCS 89216 M4 Locknut 81264 4x20mm FHCS 89214 4x12mm FHCS x4 x2 x2 25612 M3 Locknut W Flange 81509 Shock Pin 81257...

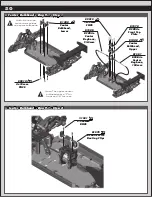
Page 20: ...e 104mm 81580 RC8B4e Center Dogbone 93 5mm 81572 RC8B4e Wire Routing Clips 31521 2 5x8mm BHCS x2 x2 89212 3x30mm FHCS 89214 4x12mm FHCS x4 x4 81448 Center Bulkhead Lower 81448 Center Bulkhead Upper x2 x2 Note Do not use brake rotor guides on center bulkheads Note The upper center bulkheads have F for front and R for rear ...

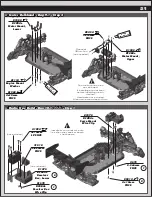
Page 21: ...ded not included Fan motor and pinion not included If installing a fan attach before installing motor mounts Hardware not included Maximum screw depth 4mm Install servo mount wire clip 1st then the receiver box to the chassis 41094 3x14mm LP SHCS 31518 2 5x4mm FHCS 89214 4x12mm FHCS 4675 2 5x6mm FHCS 81572 RC8B4e Servo Mount Wire Clip 81572 RC8B4e Receiver Box Wire Clip 81572 RC8B4e Receiver Box L...

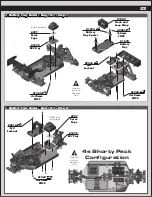
Page 22: ...25211 3x10mm BHCS 23T 25T Spline Count Printed here 4675 2 5x6mm FHCS 81572 RC8B4e Receiver Box Upper x3 To build RC8B4e for use with two 2s shorty battery packs in a saddle configuration follow the steps below To build RC8B4e for use with onme 4s shorty battery pack continue to Battery Tray Build Bag 12 1 Step 2 2s Shorty Pack Configuration 1596 thread lock ...

Page 23: ...y Tray 81574 Battery Tray Spacer x4 x2 81262 4x10mm FHCS x4 Use 2s shorty battery only 4s Shorty Pack Configuration Configuration 6727 Servo Tape 81572 ESC Tray ESC not included 81262 4x10mm FHCS x4 89216 M4 Locknut 89216 M4 Locknut x4 x2 6727 Servo Tape 81572 ESC Tray 81262 4x10mm FHCS x2 not included Use 4s shorty battery only ...

Page 24: ...ign Spray either rattle can or airbrush R C specific paint the paint to the inside of the body prefferably dark colors first lighter colors last NOTE use ONLY paint that is recommended for use with polycarbonate plastics If you do not you can destroy the polycarbonate body After painting cut the body along the trim lines Make sure to drill or use a body reamer to make the holes for the body mounts...

Page 25: ... sections It will also give less off throttle steering Rear Droop Increasing rear droop loosen droop screws will increase traction in bumpy sections but will reduce high speed stability Remember to never loosen the screws beyond the FULL DROOP setting Decreasing rear droop tighten droop screws will increase stability in high speed sections but will reduce stability in bumpy sections Setup Sheets T...

Page 26: ......

Reviews: