2 USB-4630 Startup Manual
LED Definitions
Attaching the DIN-rail Bracket
Advantech’s USB DAQ modules come with a bracket that
facilitates industry standard DIN-rail mounting. To attach,
simply place the bracket firmly on the back, and secure it by
attaching the two screws into the holes shown below.
Attaching Optional Wallmount Bracket
(Part number: 1960004544)
To attach the wallmounting bracket, remove all 4 rubber
pads on the rear of the module, and secure it by attaching
the two screws into the holes shown below.
Attaching Optional VESA Bracket
Part number: 1960005788)
Use the VESA bracket to mount your module to VESA-
ready appliances, such as Advantech’s TPC series. To
attach, remove all 4 rubber pads on the back, and secure it
by attaching the two screws into the holes as shown below.
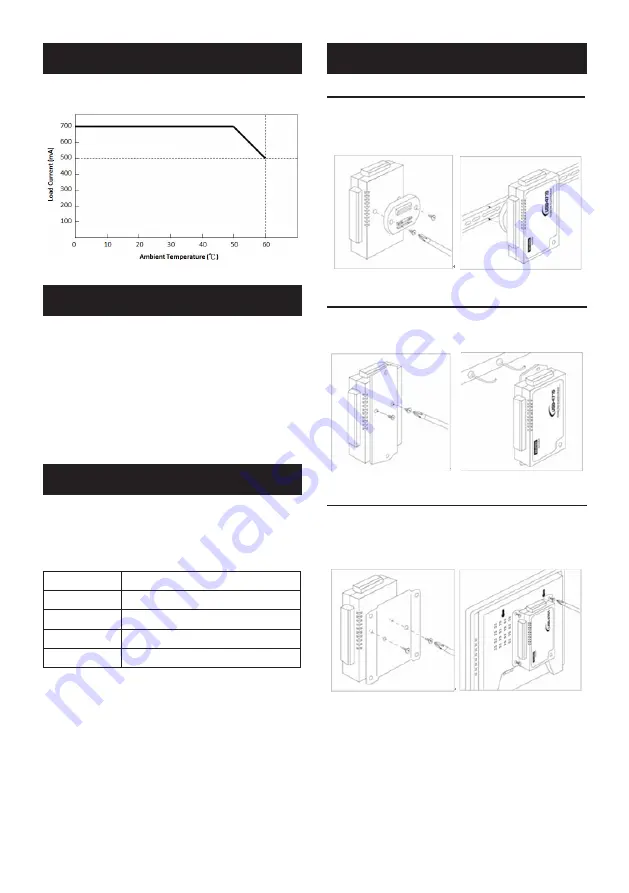
(2) Refer to the following “Derating Curve” for loads current
using USB bus power.
You can install the USB-4630 module in any USB port.
Follow the steps below to install the module on your system:
1. Touch the metal part on the surface of your computer
to neutralize the static electricity that might be in your
body.
2. Plug your USB module into the selected USB port. Hold
the module only by its edges. Plug the module firmly
into place. Use of excessive force must be avoided;
otherwise the module might get damaged.
The USB Module is equipped with an LED indicator to show
the current status of the device. When you plug the USB de-
vice into the USB port, the LED indicator will blink five times
and then stay lit to indicate that it is on. Please refer to the
following table for detailed LED indicator status information.
LED Status
Description
ON (Blue)
Device ready for work with USB 3.0
ON (Green)
Device ready for work with USB 2.0
ON (Red)
Over-current
OFF
Device not ready to work
Mounting Kit Assembly
Specifications (Cont.)
Hardware Installation


