


22
PCA-6176 User's Manual
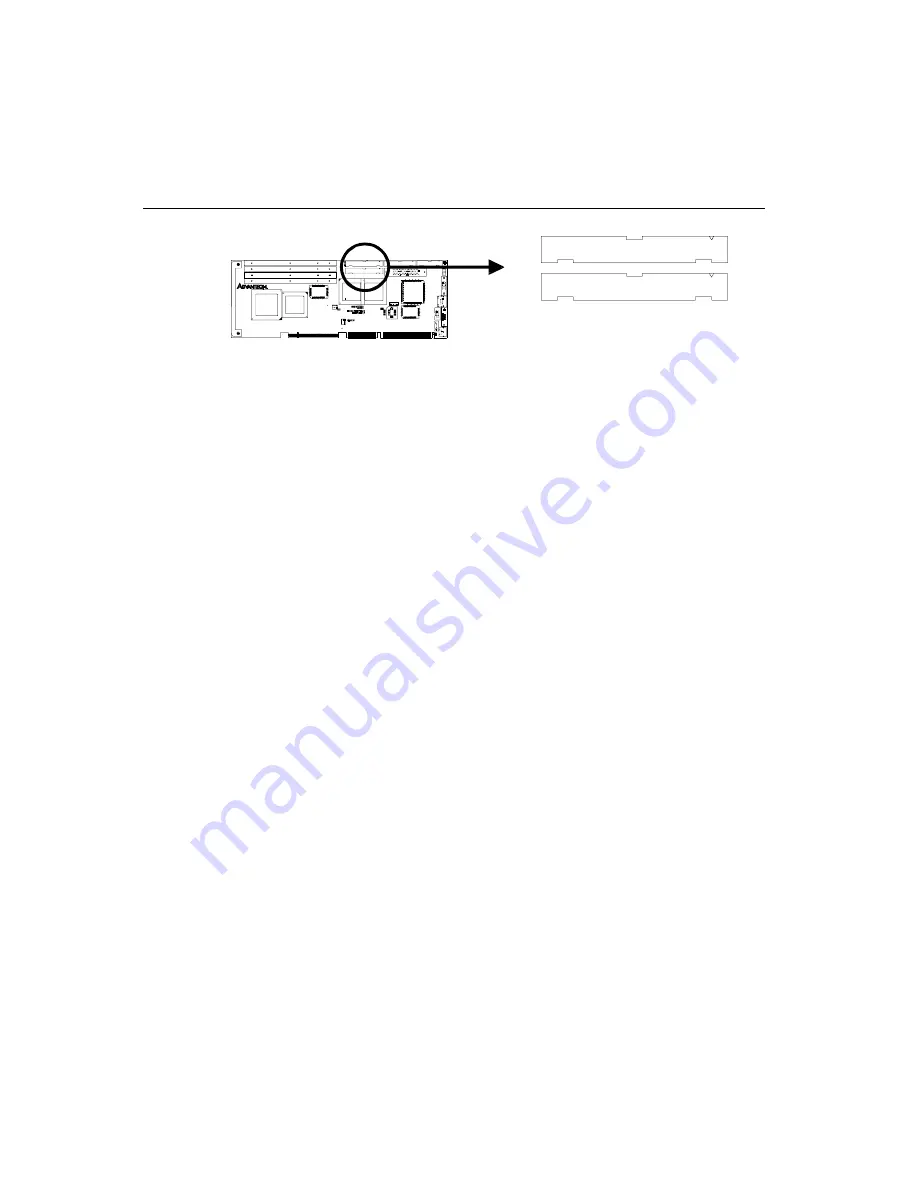
2.1
Primary (CN1) and Secondary (CN2) IDE
Connectors
You can attach up to four IDE (Integrated Device Electronics) drives
to the PCA-6176’s internal controller. The primary (CN1) and
secondary (CN2) connectors can each accommodate two drives.
Wire number 1 on the cable is red or blue and the other wires are
gray. Connect one end to connector CN1 or CN2 on the CPU card.
Make sure that the red/blue wire corresponds to pin 1 on the
connector (in the upper right hand corner). See Chapter 1 for help
finding the connector.
Unlike floppy drives, IDE hard drives can connect in either position
on the cable. If you install two drives to a single connector, you will
need to set one as the master and one as the slave. You do this by
setting the jumpers on the drives. If you use just one drive per
connector, you should set each drive as the master. See the
documentation that came with your drive for more information.
Connect the first hard drive to the other end of the cable. Wire 1 on
the cable should also connect to pin 1 on the hard drive connector,
which is labeled on the drive circuit board. Check the documentation
that came with the drive for more information.
Connect the second hard drive to the remaining connector (CN2 or
CN1), in the same way as described above.
CN
CN
1
2
Summary of Contents for PCA-6176 Series
Page 1: ...PCA 6176 Series Full size Pentium II III processor based PCI ISA bus CPU card ...
Page 31: ...Chapter 1 Hardware Configuration 19 Figure 1 5 SECC II CPU installation step 1 ...
Page 32: ...20 PCA 6176 User s Manual Figure 1 6 SECC II CPU installation step 2 ...
Page 63: ...Chapter 4 AGP VGA Setup 51 5 Insert disk 1 and select Have Disk 6 Click OK ...
Page 65: ...Chapter 4 AGP VGA Setup 53 9 Click Next 10 Insert disk 2 and click OK ...
Page 68: ...56 PCA 6176 User s Manual 4 Click Browse to look for the driver program 3 Click Have Disk ...
Page 75: ...Chapter 5 LAN Configuration 63 3 Click Next 4 Click Next ...
Page 77: ...Chapter 5 LAN Configuration 65 7 Select net82557 inf and click OK 8 Click OK ...
Page 78: ...66 PCA 6176 User s Manual 10 Click Next 9 Click OK ...
Page 79: ...Chapter 5 LAN Configuration 67 11 Click Finish 12 Click Yes ...
Page 82: ...70 PCA 6176 User s Manual 6 Select Intel R PRO Adapter and click OK 5 Click OK ...
Page 84: ...72 PCA 6176 User s Manual ...
Page 102: ...90 PCA 6176 User s Manual Figure 7 3 Restarting Windows ...
Page 110: ...98 PCA 6176 User s Manual ...
Page 114: ...102 PCA 6176 User s Manual ...