


7
Chapter 2
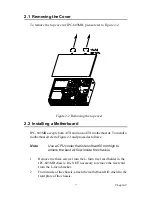
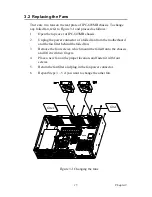
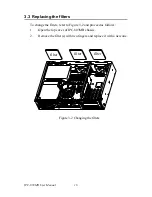
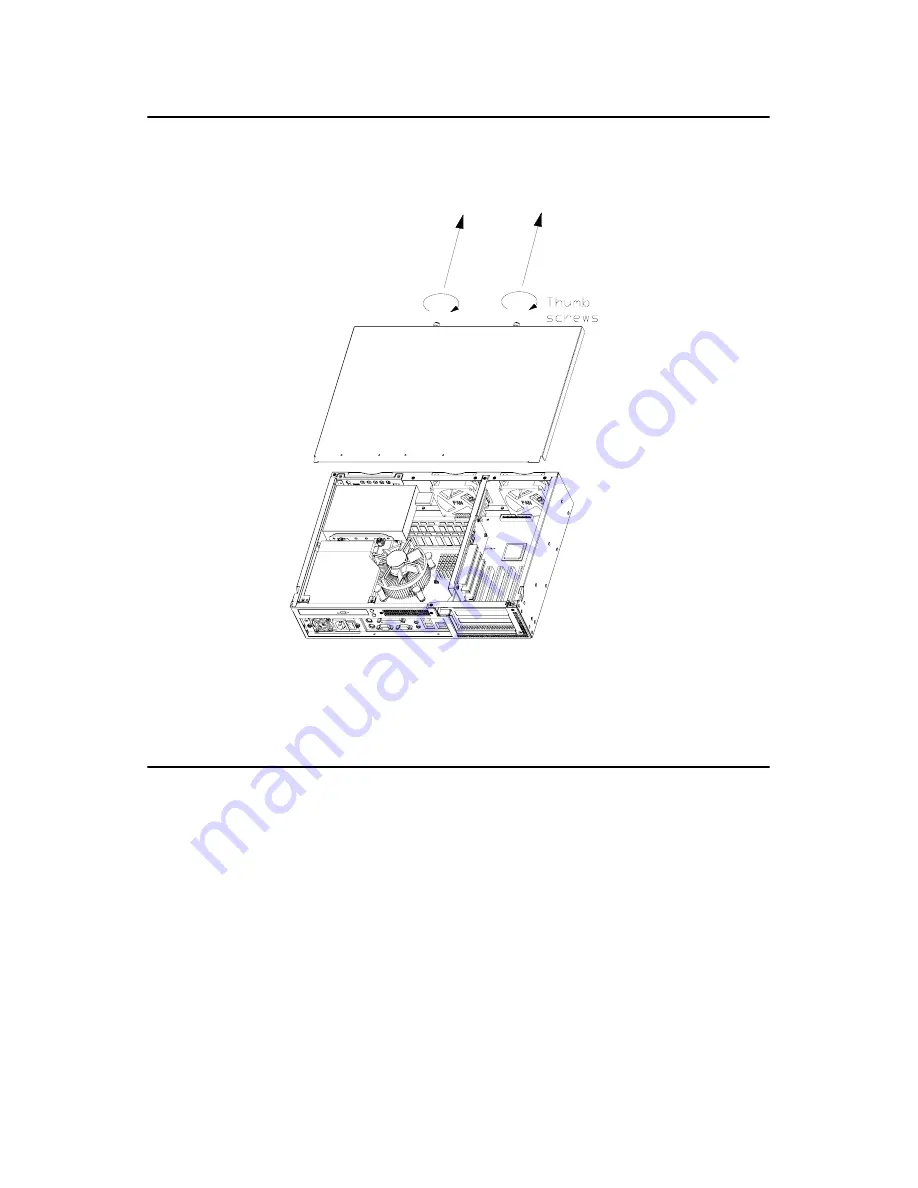
2.1 Removing the Cover
To remove the top cover of IPC-603MB, please refer to Figure 2-2.
Figure 2-2 Removing the top cover
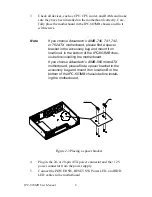
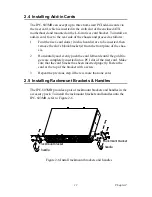
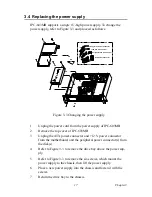
2.2 Installing a Motherboard
IPC-603MB accepts both ATX and microATX motherboards. To install a
motherboard, refer to Figure 2-1 and proceed as follows:
1.
Remove the three screws from the L-form riser card holder in the
IPC-603MB chassis. It is NOT necessary to remove the riser card
from the L-form bracket.
2.
From inside of the chassis, attach the motherboard I/O shield to the
front plate of the chassis.
Note
Use a CPU cooler that is less than 60 mm high to
ensure the best air flow inside the chassis.
Summary of Contents for IPC-603MB
Page 1: ...IPC 603MB Ultra Compact 2U high Rack mount IPC Chassis User Manual...
Page 10: ...IPC 603MB User Manual x...
Page 11: ...2 CHAPTER 1 General Information...
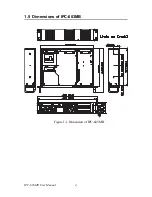
Page 14: ...IPC 603MB User Manual 4 1 5 Dimensions of IPC 603MB Figure 1 1 Dimension of IPC 603MB...
Page 15: ...2 CHAPTER 2 System Setup...
Page 22: ...IPC 603MB User Manual 12...
Page 23: ...2 CHAPTER 3 Operation...
Page 29: ...2 APPENDIX A Exploded Diagram...
Page 30: ...IPC 603MB User Manual 20 Appendix A Exploded Diagram...