9
ACP-2010MB User Manual
Chapter 2
S
ystem
Setup
2.3
Installing a Riser Card and Add-on Cards
The ACP-2010MB supports up to three add-on cards via the riser card. To install the
riser card and one or more add-on cards, please proceed as follows:
1.
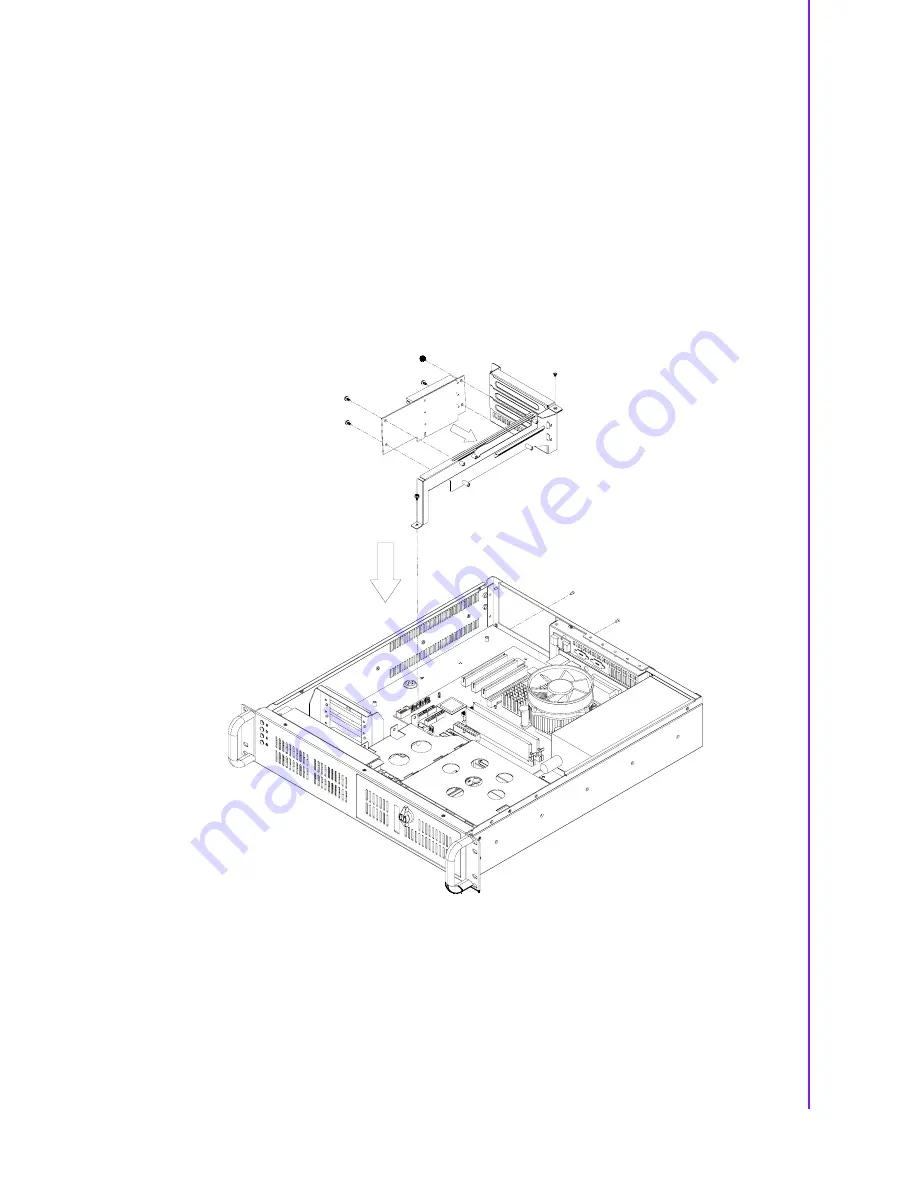
Fasten the riser card to the riser card holder with the four screws. Then insert
this unit into the slot on the motherboard. (See Figure 2.5.)
2.
Remove the corresponding I/O bracket attached to the rear plate of the chassis.
Insert an add-on card vertically into the proper slot on the riser card. For full-
length cards, please make sure that the card bracket has been inserted properly
and the other edge of the card has been inserted into the plastic guiding fillister.
Then fasten the screws on the top of the I/O bracket. (see Figure 2.6)
3.
Repeat Step 2 if there is more than one add-on card to be installed.
4.
Replace the riser card holder and fasten it onto the chassis.
Figure 2.5 Installing a riser card
Summary of Contents for ACP-2010MB
Page 1: ...User Manual ACP 2010MB 2U High Rackmount Chassis for ATX MicroATX Motherboard...
Page 12: ...ACP 2010MB User Manual 4 1 5 Dimension Diagram Figure 1 1 Dimension Diagram Unit mm inch...
Page 22: ...ACP 2010MB User Manual 14...
Page 30: ...ACP 2010MB User Manual 22...
Page 38: ...ACP 2010MB User Manual 30...
Page 39: ...Appendix A A Exploded Diagram and Parts List...


