FA-HDX16 QUICK SETUP GUIDE
FEATURES AND FUNCTIONS (2)
Display Setup
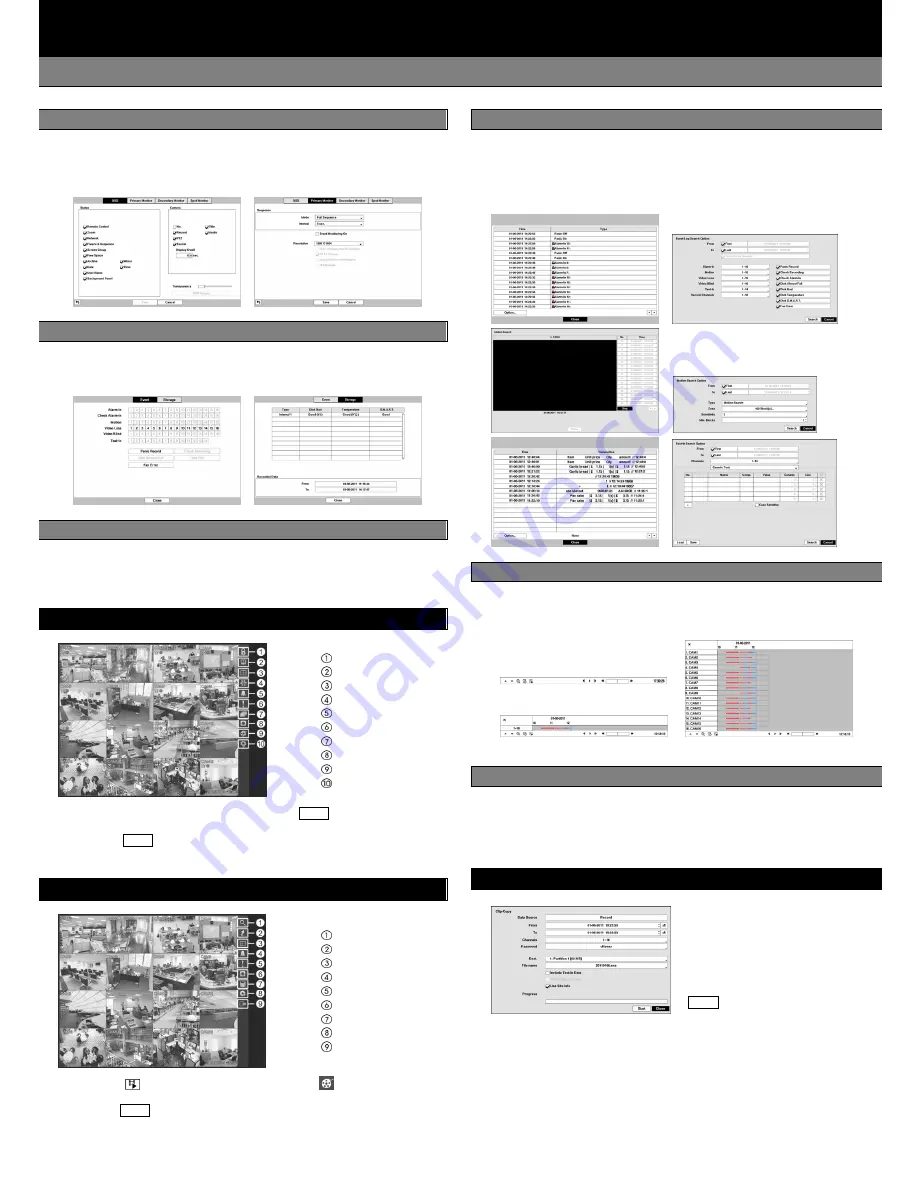
1. Go to “Display -> OSD” to select what information will be displayed on the
monitor.
2. Go to “Display -> Primary Monitor, Secondary Monitor and Spot Monitor”
to set up each monitor. See the following monitor connections examples.
Status Setup
1. Go to “Status -> Event” to display the status of the DVR’s systems and inputs.
2. Go to “Status -> Storage” to display the status of the DVR’s storage devices
and the time information of recorded data.
Camera Setup
1. Go to “Camera -> General” to turn the camera on and off and change the
title of each camera.
2. Go to “Camera -> PTZ” to set up the PTZ cameras.
LIVE MONITORING
Login/Logout
Monitor
Freeze
Export
Alarm
Panic
Sequence
Camera Menu
Search
Setup
While in the live monitoring mode, pressing the
MENU
button or moving the
mouse pointer to the top of the screen displays the Live Monitoring menu.
Pressing the
MENU
button again hides the menu. You can navigate through
menus and items by pressing the arrow buttons.
SEARCH AND PLAYBACK
Search
Go To
Display
Alarm
Panic
Camera Menu
Export
Data Source
Exit
1. Press the
button on the front panel or select
(Search) in the Live
Monitoring menu to enter the Search mode.
2. Press the
MENU
button while in the Search mode or move the mouse pointer
to the top of the screen to display the Search Menu.
Event Search
Move to “Search – Event Log Search, Motion Search and Text-In Search”
from the Search menu to select video from the event log, select motion
events and select text input strings. For more specific search conditions,
select “Option” and enter search parameters then select “Search”. The
search results will be displayed in each screen.
Record Table Search
Move to “Search – Record Table Search” from the Search menu to select
video using a recording table. Recording information about video images
currently displayed on the screen displays on the recording status bar
Compact View
Standard View
Expanded View
Go To Search
Move to “Search – Go To” from the Search menu. Selecting “Go to the First”
displays the first recorded image, selecting “Go to the Last” displays the
last recorded image, and selecting “Go to the Date/Time” displays the Go
to the Date/Time screen.
CLIP COPY
The Clip-Copy screen can be used
to copy video to an internal DVD RW,
or external USB hard disk or flash
drives. Move to “Export – A-B Clip-
Copy or Clip-Copy” from the Search
menu. The clip copy can be simply
done by pressing and holding the
MENU
button for three or more
seconds.
*NOTE: The Clip Copy feature requires the camera title or number along with
the date and time of the recorded images to be copied. To view the copied
images, remove the disk from the DVD RW device and insert it into any PC
with a CD or DVD reader. On the PC access the CD or DVD drive device and
select the image file name. The executable Clip Player software program will
open automatically displaying playback controls for viewing the video clip.
V1.1


