5 |
P a g e
- Ver. 1.1 - 09-22
OPERATING INSTRUCTIONS & GENERAL INFORMATION
INTRODUCTION
Advanced Amplifiers is an amplifier equipment and services company supporting commercial and government
organizations worldwide.
Headquartered in San Diego, California, the company utilizes its global network of resources to effectively serve
and support customer requirements.
As a unique original equipment manufacturer of power amplifiers ranging from 10KHz to 40GHz with various
output power levels for CW & pulse testing applications, we can also fully support custom designs and
manufacturing requirements for both small and large volume procurements. We bring decades of combined
experience in the RF field for numerous applications including and not limited to, EMI/EMC, communications, and
various commercial and industry standards.
With our in-house capabilities and fully equipped testing facilities, Advanced Amplifiers is committed to provide
the best in RF products with industry leading quality and lead times.
INCOMING INSPECTION
Inspect unit for any sign of external damage. Do not use this equipment if there is physical damage or missing parts.
Inspect all front and rear panel connectors for damage. Inspect fans and their airways for any damage or blockings.
For a unit with a digital controller option, the USB and ethernet interface and commands list is in the second part
of the manual.
RF & AC CABLE CONNECTION
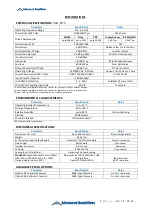
RF Input and Output connectors are outlined in the specifications table. Use the standard AC cable that was
supplied by the manufacturer or higher power rating cables than the manual specifies. Refer to the front and rear
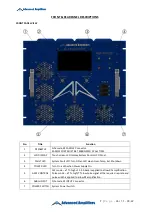
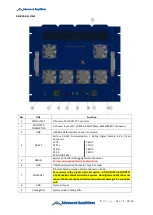
panel description page for the location of RF and AC connectors.
For a system with a digital controller option – DO NOT USE OR CONNECT a PoE enabled ethernet switch to a
system. Our digital controller does not support PoE connection and will cause permanent damages to a controller
unit.
RF TURN ON PROCEDURE
Connect RF input to an RF generator. Connect a suitable load for the power rated and continuous operation to the
output connector. Turn on the AC switch, display will show STANDBY. Optionally, connect the unit to a digital
control Software or Ethernet connection. Set the RF generator to nominal 0dBm and set the desired frequency
in the specified range. Select Gain or ALC and set to the desirable output power level then press the ONLINE button.
Use the front panel LCD gain adjust or the remote function to adjust the output power on the power meter and
the LCD screen to desired levels.
Refer to the Controller manual for detailed operating instructions of the local and remote controller.
RF TURN OFF PROCEDURE
Decrease the RF drive from the RF generator to below -20dBm and press STANDBY on the LCD or via the control
software. Turn off AC switch on the front panel. Disconnect any unnecessary cable connections.


