background image

A-18 / ENGLISH

A-18

 - FORM NO. - 56041972 - Warrior

 ST, Warrior

 EcoFlex

AFTER USE

Raise the brushes (or pads) and raise the squeegee.  Move the machine to a service area.

Turn the Master Key Switch 

(A)

 OFF and remove the key.

To empty the solution tank, pull the Solution Drain Hose 

(16)

 off the elbow.  Direct the hose to a 

fl

 oor drain or bucket.  Rinse the tank with clean water.  

Inspect the solution hoses; replace if kinked or damaged.

To empty the recovery tank, remove the Recovery Tank Drain Hose 

(27)

 from its hanger and remove the cap (hold the end of the hose above the water level 

in the tank to avoid sudden, uncontrolled 

fl

 ow of waste water).  The Recovery Tank Drain Hose 

(27)

 can be squeezed to regulate the 

fl

 ow.  Rinse the tank 

and recovery tank switch(es) 

(32)

 with clean water.  Inspect the recovery and vacuum hoses; replace if kinked or damaged.  

SERVICE NOTE:

  Make sure 

you do not get any water down the Vacuum Motor Inlet Screen 

(4) 

while cleaning.

 NOTE: 

After each use, drain and rinse the recovery tank thoroughly and then 

fi

 ll the recovery tank about 1/3 full with clean water.

Remove the brushes or pad holders.  Rinse the brushes or pads with warm water and hang up to dry.  Allow buf

fi

 ng pads to dry completely before using 

again.  

NOTE:

  You can either remove the brushes manually or automatically by pressing and holding the Scrub OFF Switch 

(H)

 for 5 seconds 

(EcoFlex disk 

models only).

Remove the squeegee, rinse it with warm water and hang it up to dry.

Check the maintenance schedule below and perform any required maintenance before storage.

MAINTENANCE SCHEDULE

 MAINTENANCE 

ITEM 

Daily 

Weekly 

Monthly 

Yearly


Charge 

Batteries X    


Check/Clean Tanks & Hoses (clean recovery tank switches & vacuum inlet screen) 


Check/Clean/Rotate the Brushes/Pads 


Check/Clean the Squeegee 


Clean Hopper on Cylindrical System 


Check Each Battery Cell(s) Water Level (does not apply to gel cell batteries) 


Inspect Scrub Housing Skirts 


Inspect and clean Solution Filter 


Clean Solution Manifolds on Cylindrical System 


Purge Detergent System (EcoFlex only) 


X


Lubricate the Machine 


* Check Carbon Brushes 


X

* Have Advance check the vacuum motor carbon motor brushes once a year or after 300 operating hours.  The brush and drive motor carbon brushes check every 
500 hours or once a year.

NOTE:

  Refer to the Service Manual for more detail on maintenance and service repairs.

Store the machine in a clean, dry place.

Turn the Master Key Switch 

(A)

 OFF (O) and remove the key.

SERVICING THE VACUUM MOTOR

Have your Advance Dealer check the carbon motor 
brushes once a year or after 300 operating hours.

 IMPORTANT!

Motor damage resulting from failure to service 
the carbon brushes is not covered under 
warranty.  See the Limited Warranty Statement.

LUBRICATING THE MACHINE

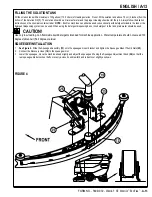
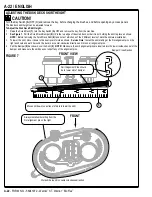
Once a month, apply light machine oil to lubricate the:
• 

General Pivot Points For the Squeegee Linkage 

(A)

.

• 

Squeegee mount angle adjustment knob threads 

(B)

.

• 

Squeegee Tool end wheels 

(C)

.

• 

General Pivot Points For the Brush Linkage 

(D)

.

• 

Scrub deck bumper wheels.

Once per quarter, Grease the following
• 

Rear Caster Wheel Swivels 

(E)

.

Summary of Contents for Warrior EcoFlex

Page 1: ...ol 1 10 Form No 56041972 Instructions for Use Advance Models 56315036 56307250 28D 56315037 32D 56315038 28C 56315538 28D C 56315539 32D C 56315540 28C C 56315039 32C C 56381014 X28D C 56381015 56381...

Page 2: ...EcoFlex A 14 A 15 Operating the Machine Wet Scrubbing A 16 A 17 Wet Vacuuming A 16 A 17 After Using the Machine A 18 Maintenance Schedule A 18 Servicing the Vacuum Motor A 18 Lubricating the Machine A...

Page 3: ...E When the machine is delivered carefully inspect the shipping packaging and the machine for damage If damage is evident save the shipping carton if applicable so that it can be inspected Contact the...

Page 4: ...uids exist Do not clean this machine with a pressure washer Do not operate this machine on ramps or inclines of more than a 2 percent gradient Only use the brushes provided with the appliance or those...

Page 5: ...e d versez pas d agents nettoyants inflammables ne faites pas fonctionner la machine proximit de ces agents ou d autres liquides inflammables Ne nettoyez pas cette machine avec un nettoyeur pression N...

Page 6: ...d in the text NOTE Refer to the service manual for detailed explanations of each item illustrated on the next 4 pages 1 Solution Tank Fill 2 Operator Control Handle 3 Bottle Holders 4 Vacuum Motor Inl...

Page 7: ...Control Circuit Circuit Breaker 22 Squeegee Blade Tension Strap 23 Squeegee Blade Latch 24 Squeegee Blade Alignment Pins 25 Squeegee Mount Thumb Nut 26 Squeegee Adjustment Knob 27 Recovery Tank Drain...

Page 8: ...ution Flow Indicator D2 Fault Indicator D3 Hour Meter D4 Detergent Indicator D5 Battery Indicator D6 Scrub Pressure Indicator D7 Recovery Tank FULL Indicator D8 Battery Low Indicator E Wand Switch Dea...

Page 9: ...in Power B Solution Switch C Vacuum Switch D1 Solution Flow Indicator E Wand Switch Dealer Installed Option H Scrub OFF I Scrub ON J Display J1 Battery Indicator J2 Hour Meter Scrub Pressure Indicator...

Page 10: ...rom overcharging must be allowed to escape When Servicing Batteries Remove all jewelry Do not smoke Wear safety glasses rubber gloves and a rubber apron Work in a well ventilated area Do not allow too...

Page 11: ...ing any access panels 1 Make sure the Brush Deck 7 is in the RAISED position Make sure the Key Switch A is off O 2 If using pads install the pads on the pad holders 3 See Figure 2 To mount the Brushes...

Page 12: ...d before opening any access panels 1 Make sure the Brush Deck is in the RAISED position Make sure the Key Switch A is off O 2 See Figure 3 To access the brushes loosen the black knobs one on each side...

Page 13: ...sing system can be used When using the detergent dispensing do not mix detergent in the tank plain water should be used CAUTION Use only low foaming non flammable liquid detergents intended for machin...

Page 14: ...mes on you should be able to simply pour an entire gallon bottle of detergent into the Cartridge to refill without worrying about measuring NOTE Only reset the system when the cartridge is full When s...

Page 15: ...O 56041972 Warrior ST Warrior EcoFlex A 15 4 4 4 A F D B max 2 G DETERGENT SYSTEM PREPARATION AND USE ECOFLEX MODELS ONLY Press F G for 2 seconds to reset Press F B for 2 seconds to purge FULL RESET D...

Page 16: ...solution flow and the detergent ratio This will cause the indicator to flash green for one minute solution flow rate will increase to the next level scrub pressure will increase to the next level and...

Page 17: ...ENGLISH A 17 FORM NO 56041972 Warrior ST Warrior EcoFlex A 17 34 35 17 27 19 2 13 A E I D H G 5 B WET SCRUBBING...

Page 18: ...nd hang it up to dry 7 Check the maintenance schedule below and perform any required maintenance before storage MAINTENANCE SCHEDULE MAINTENANCE ITEM Daily Weekly Monthly Yearly Charge Batteries X Che...

Page 19: ...ten the vent caps Wash the tops of the batteries with a solution of baking soda and water 2 tablespoons of baking soda to 1 liter of water CHARGING GEL VRLA BATTERIES EcoFlex Charge the batteries each...

Page 20: ...or Replace the Front Squeegee Blade 1 Raise the squeegee tool off the floor loosen the 2 Thumb Nuts 25 disconnect the Recovery Hose 19 and remove the Squeegee Assembly 13 from the mount 2 Remove both...

Page 21: ...when the tank is full If daily rinsing of the recovery tank does not suffice to keep the switches clean you may need to disassemble them for cleaning It is very important that they be reassembled cor...

Page 22: ...he 3 different levels of slots the skirt was installed at 3 To lower the skirt move it down to the next level of slots as shown Service Note Install the skirt starting at the first alignment pin on th...

Page 23: ...ut drive motor bearings 3 Continuous use on ramps POOR WATER PICKUP 1 Recovery tank full vacuum shut off switch activated or dirty 2 Blocked vacuum system squeegee and hoses 3 Disconnected or damaged...

Page 24: ...245 565 1 245 565 Vibrations at the Hand Controls ISO 5349 1 m s2 0 61m s2 0 61m s2 Gradeability Transport 2 1 15 2 1 15 Cleaning 2 1 15 2 1 15 Model Warrior 28C Warrior 32C Warrior 28C C Warrior X28C...

Page 25: ......

Page 26: ...h medo B 16 B 17 Despu s de la utilizaci n de la m quina B 18 Programa de mantenimiento B 18 Mantenimiento del motor de aspiraci n B 18 Lubricaci n de la m quina B 18 Mantenimiento Recarga de las bat...

Page 27: ..._______________ DESEMBALAJE DE LA M QUINA Cuando reciba la m quina examine con atenci n el embalaje y la m quina con el fin de comprobar si existe alg n da o Si observa alg n da o guarde la caja de em...

Page 28: ...ancias cerca de ellas ni en zonas en las que haya l quidos inflamables No lave la m quina con una limpiadora a presi n No haga funcionar esta m quina en rampas o en pendientes superiores al 2 por cien...

Page 29: ......

Page 30: ...jeto ilustrado en las siguientes 4 p ginas 1 Llenado del dep sito de soluci n 2 Manilla de control del operario 3 Portabotellas 4 Criba de entrada del motor de aspiraci n 5 Tapa del dep sito de recupe...

Page 31: ...si n de la cuchilla de la boquilla 23 Pestillo de la cuchilla de la boquilla 24 Pasadores de alineaci n de la cuchilla de la boquilla 25 Tuerca de palomilla de montaje de la boquilla 26 Bot n de ajust...

Page 32: ...de error D3 Cron metro D4 Indicador de detergente D5 Indicador de bater a D6 Indicador de la presi n del fregado D7 Indicador de llenado del dep sito de recuperaci n D8 Indicador de bater a baja E Int...

Page 33: ...raci n D1 Indicador de flujo de la soluci n E Interruptor de vara opci n instalada por el distribuidor H Fregado apagado I Fregado encendido J Pantalla J1 Indicador de bater a J2 Cron metro Indicador...

Page 34: ...ando revise las bater as Qu tese todas las joyas No fume Lleve gafas de seguridad un delantal de goma y guantes de goma Trabaje en una zona bien ventilada No permita que las herramientas toquen simult...

Page 35: ...de que el portacepillos 7 se encuentre en la posici n ELEVADA Aseg rese de que est apagado O el conmutador de llave A 2 Si utiliza bayetas instale las bayetas en los portabayetas 3 Ver la Figura 2 Par...

Page 36: ...cceso 1 Aseg rese de que el portacepillos se encuentre en la posici n ELEVADA Aseg rese de que est apagado O el conmutador de llave A 2 Ver la Figura 3 Para acceder a los cepillos afloje los botones n...

Page 37: ...n de detergente EcoFlex no mezcle detergente en el dep sito utilice agua PRECAUCI N Utilice nicamente detergentes l quidos no inflamables de bajo poder espumante que est n dise ados para aplicaciones...

Page 38: ...nicie el sistema Cuando se encienda este indicador s lo tiene que verter una botella completa de 3 7 litros de detergente en el cartucho para rellenarlo sin preocuparse de las medidas NOTA reinicie el...

Page 39: ...Warrior ST Warrior EcoFlex B 15 4 4 4 A F D B max 2 G REPARACI N Y USO DEL SISTEMA DE DETERGENTE ECOFLEX Pulse F y G durante 2 segundos para reiniciar Pulse F y B durante 2 segundos para purgar LLENO...

Page 40: ...resi n de fregado el flujo de la soluci n y la mezcla de detergente Esto har que el indicador parpadee en amarillo durante un minuto el flujo de la soluci n aumentar al siguiente nivel la presi n de f...

Page 41: ...ESPA OL B 17 FORM NO 56041972 Warrior ST Warrior EcoFlex B 17 34 35 17 27 19 2 13 A E I D H G 5 B FREGADO EN H MEDO...

Page 42: ...tinuaci n y realice cualquier operaci n de mantenimiento necesaria antes de guardar la m quina PROGRAMA DE MANTENIMIENTO OPERACI N DE MANTENIMIENTO Diaria Semanal Mensual Anual Recarga de bater as X C...

Page 43: ...picar cido al suelo Apriete las cubiertas de ventilaci n Limpie la parte superior con una soluci n de levadura qu mica y agua 2 cucharadas de levadura qu mica en 1 litro de agua RECARGA DE BATAR AS DE...

Page 44: ...uchilla de la boquilla delantera 1 Eleve la boquilla del suelo afloje las 2 tuercas de palomilla 25 desconecte la tuber a de recuperaci n 19 y retire el conjunto de la boquilla 13 del soporte 2 Retire...

Page 45: ...uando el dep sito est lleno Si el enjuagado diario del dep sito de recuperaci n no basta para mantener los interruptores limpios es posible que tenga que desmontarlos para la limpieza Es muy important...

Page 46: ...3 diferentes niveles de ranura estaba instalado el z calo 3 Para bajar el z calo despl celo hasta el siguiente nivel de ranuras como se muestra Nota del servicio Instale el z calo comenzando en el pr...

Page 47: ...s MALA RECOGIDA DE AGUA 1 Dep sito de recuperaci n lleno interruptor de cierre de aspiraci n activado o sucio 2 Sistema de aspiraci n bloqueado boquilla y mangueras 3 Mangueras de aspiraci n desconect...

Page 48: ...5 565 1 245 565 Vibraci n en los controles manuales ISO 5349 1 m s2 0 61m s2 0 61m s2 Capacidad ascendente Transporte 2 1 15 2 1 15 Limpieza 2 1 15 2 1 15 Modelo Warrior 28C Warrior 32C Warrior 28C C...

Page 49: ......

Page 50: ......

Page 51: ......

Page 52: ......

Reviews: