


Create panoramic images with Photomerge
About Photomerge
Take pictures for Photomerge
Create a Photomerge composition
Create 360-degree panoramas (Photoshop Extended)
Adobe recommends
Have a tutorial you'd like to share?
Book excerpt: Panoramas made easy
Quickly master Photomerge with this excerpt
from the Adobe Photoshop Book for Digital
Photographers.
About Photomerge
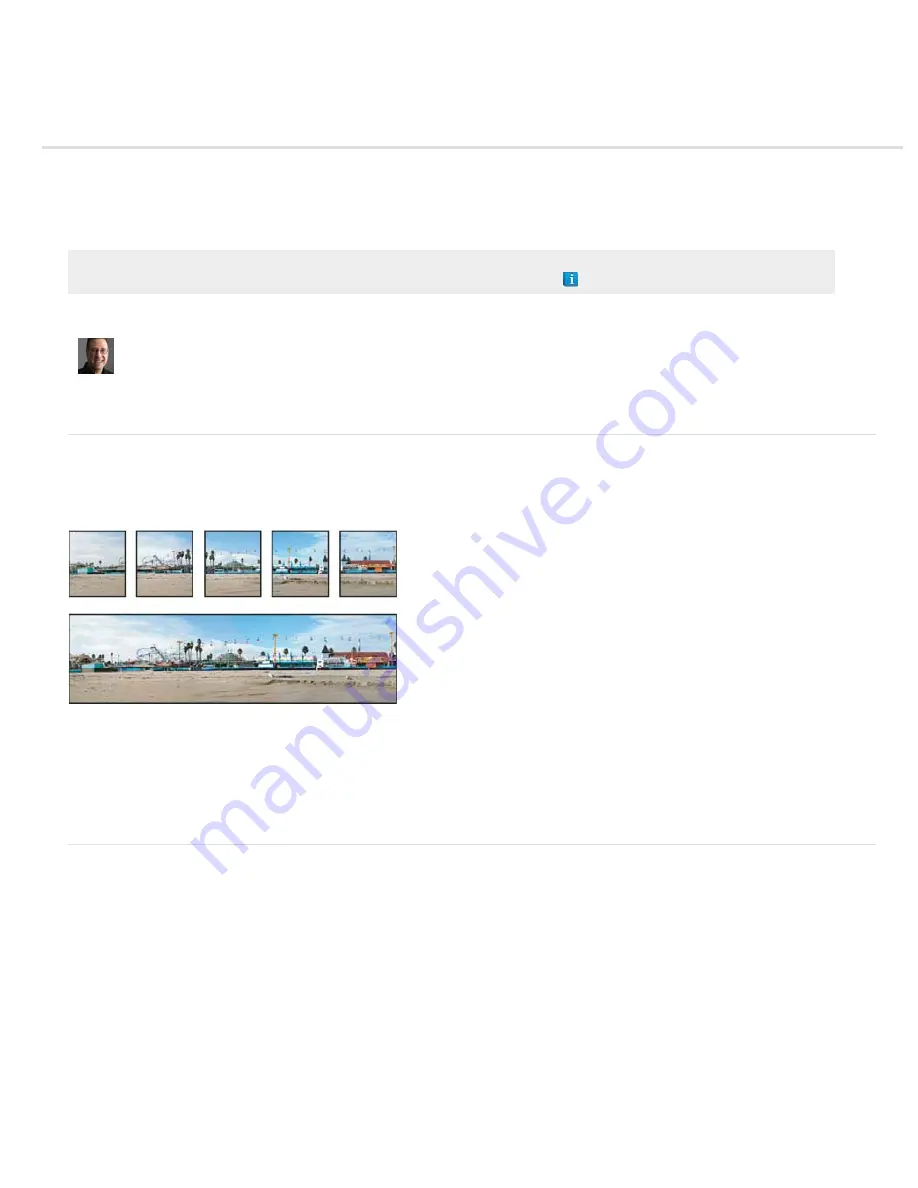
The Photomerge™ command combines several photographs into one continuous image. For example, you can take five overlapping photographs
of a city skyline, and then merge them into a panorama. The Photomerge command can assemble photos that are tiled horizontally as well as
vertically.
Source images (top), and completed Photomerge composition (bottom)
To create Photomerge compositions, choose File > Automate > Photomerge and then choose your source files and then specify layout and
blending options. Your option choice depends on how you photographed the panorama. For example, if you’ve photographed images for a 360
degree panorama, the Spherical layout option is recommended. This option stitches the images and transforms them as if they were mapped to
the inside of a sphere, which simulates the experience of viewing a 360 degree panorama.
For a video overview of Photomerge, see
.
Take pictures for Photomerge
Your source photographs play a large role in panoramic compositions. To avoid problems, follow these guidelines when taking pictures for use
with Photomerge:
Overlap images sufficiently
Images should overlap by approximately 40%. If the overlap is less, Photomerge may not be able to automatically
assemble the panorama. However, keep in mind that the images shouldn’t overlap too much. If images overlap by 70% or more, Photomerge may
not be able to blend the images. Try to keep the individual photos at least somewhat distinct from each other.
Use one focal length
If you use a zoom lens, don’t change the focal length (zoom in or out) while taking your pictures.
Keep the camera level
Although Photomerge can process slight rotations between pictures, a tilt of more than a few degrees can result in errors
when the panorama is assembled. Using a tripod with a rotating head helps maintain camera alignment and viewpoint.
Stay in the same position
Try not to change your position as you take a series of photographs, so that the pictures are from the same viewpoint.
Using the optical viewfinder with the camera held close to the eye helps keep the viewpoint consistent. Or try using a tripod to keep the camera in
the same place.
Avoid using distortion lenses
Distortion lenses can interfere with Photomerge. However, the Auto option adjusts for images taken with fish-eye
lenses.
Maintain the same exposure
Avoid using the flash in some pictures and not in others. The blending features in Photomerge helps smooth out
Summary of Contents for Photoshop CS6
Page 1: ...ADOBE PHOTOSHOP Help and tutorials...
Page 65: ...Legal Notices Online Privacy Policy...
Page 100: ...Image and color basics...
Page 108: ...Legal Notices Online Privacy Policy...
Page 176: ...Legal Notices Online Privacy Policy...
Page 182: ...Legal Notices Online Privacy Policy...
Page 193: ...applied to the original Smart Object More Help topics Legal Notices Online Privacy Policy...
Page 236: ...Legal Notices Online Privacy Policy...
Page 286: ...More Help topics Adjusting image color and tone in CS6 Legal Notices Online Privacy Policy...
Page 376: ...Legal Notices Online Privacy Policy...
Page 457: ...Text...
Page 461: ...Legal Notices Online Privacy Policy...
Page 548: ...Legal Notices Online Privacy Policy...
Page 570: ...Saving and exporting...
Page 598: ...Printing...
Page 627: ...Legal Notices Online Privacy Policy...
Page 646: ...Web graphics...
Page 662: ...Legal Notices Online Privacy Policy...
Page 722: ...Legal Notices Online Privacy Policy...
Page 730: ...Color Management...
Page 739: ......
Page 748: ......


