Owner’s Guide
21
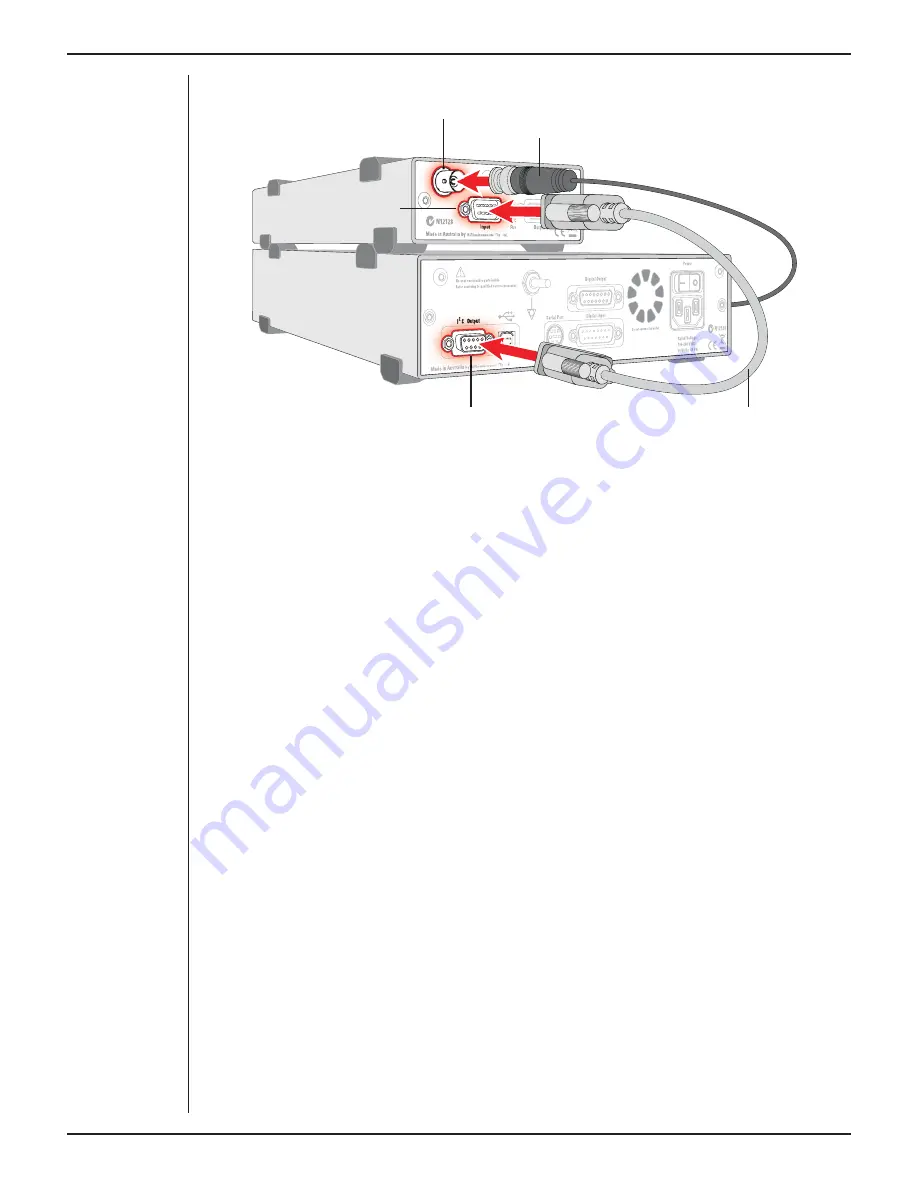
Check that the connectors for the I
2
C bus are screwed in firmly. Check the BNC cable
for firm connections as well. Loose connectors can cause erratic front-end behavior, or
may cause the front-end to fail to work at all.
Multiple Front-ends
Multiple separate front-ends can be connected up to a PowerLab. The number of normal
front-ends that can be connected depends on the number of (positive) input channels
on the PowerLab, since each BNC cable from a front-end is connected to one of the
analog inputs on the PowerLab. Only one front-end such as a Stimulus Isolator can be
connected to the (positive) output of the PowerLab.
The initial front-end should be connected with the I
2
C cable as in Figure 8–3. The
remainder are daisy-chained via I
2
C cables, connecting the I
2
C output of the last
connected front-end to the I
2
C input of the front-end to be added (see Figure 2–2 on
page 11).
Using LabChart
Once the GSR Amp is connected, turn the PowerLab on and launch LabChart. When
a GSR Amp is properly connected to the PowerLab, the
Input Amplifier…
menu
command is replaced by
GSR Amp…
for the input channel to which it is connected.
If LabChart fails to find a front-end connected, the normal text remains. If you were
expecting a connected front-end and see the normal text instead, you should quit
the application, turn the PowerLab off and check the connections. Then restart the
PowerLab and re-launch LabChart.
Figure 3–3
Connecting a
GSR Amp to the
PowerLab
BNC connector cable
(to PowerLab input)
GSR Amp Signal Output
GSR Amp I
2
C input
I
2
C connector cable
PowerLab I
2
C output


