background image

22” LCD Color Monitor                                     Adelpia TGL2240A 

6  

3. Operating Instructions 

3.1 General Instructions 

Press the power button to turn the monitor on or off. The other control buttons are located in the bottom of the bezel. By 

changing these settings, the picture can be adjusted to your personal preferences. 

-


The power cord should be connected. 

-


Connect the video cable from the monitor to the video card. 

-


Press the power button to turn on the monitor, the power indicator will light up. 

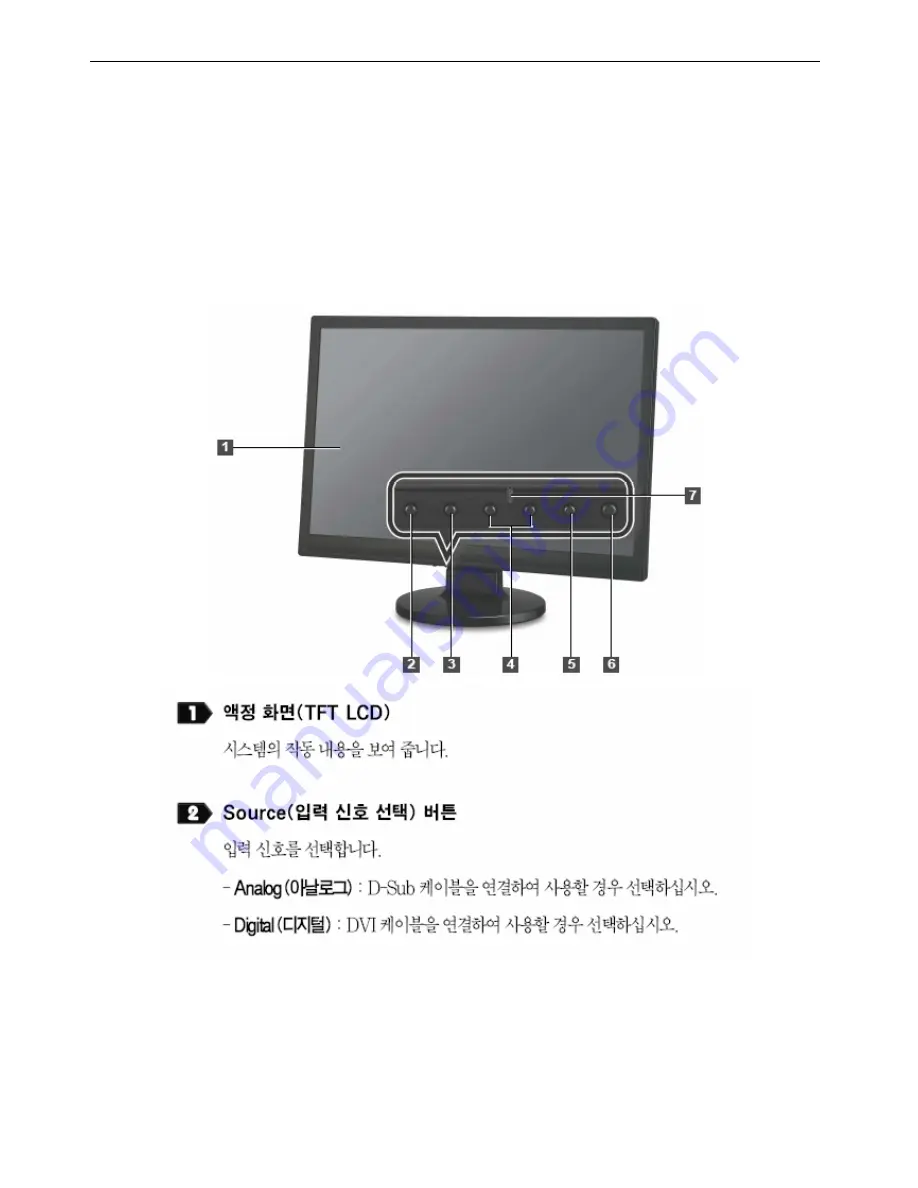
3.2 Control Button


Summary of Contents for TGL2240A

Page 1: ...Operation Instruction 6 3 1 General Instructions 6 3 2 Control Button 6 3 3 Adjusting the Picture 8 4 Input Output Specification 11 4 1 Input Signal Connector 11 4 2 Factory Preset Display Modes 13 4 3 Power supply features 13 4 4 Panel Specification 14 5 Block Diagram 16 5 1 Software Flow Chart 16 5 2 Electrical Block Diagram 18 6 Schematic 20 6 1 Main Board 20 6 2 Power Board 24 7 PCB Layout 27 ...

Page 2: ...22 LCD Color Monitor Adelpia TGL2240A 2 Revision List Revision Date Revision History TPV Model A00 Aug 18 08 Initial Release TCRMMTNFX2UQHN ...

Page 3: ...ty characteristics may create shock fire or other hazards Under no circumstances should the original design be modified or altered without written permission from AOC AOC assumes no liability express or implied arising out of any unauthorized modification of design Servicer assumes all liability FOR PRODUCTS CONTAINING LASER DANGER Invisible laser radiation when open AVOID DIRECT EXPOSURE TO BEAM ...

Page 4: ...22 LCD Color Monitor Adelpia TGL2240A 4 1 Monitor Specifications ...

Page 5: ... brightness control logic and DDC The power board will provide AC to DC Inverter voltage to drive the backlight and the main board chips each voltage Monitor Block Diagram Video signal DDC Power Board Contains Adapter Inverter Flat Panel and CCFL backlight Main Board Key board RS232 Connector For white balance adjustment in factory mode HOST Computer CCFL Drive AC IN 100V 240V ...

Page 6: ...f The other control buttons are located in the bottom of the bezel By changing these settings the picture can be adjusted to your personal preferences The power cord should be connected Connect the video cable from the monitor to the video card Press the power button to turn on the monitor the power indicator will light up 3 2 Control Button ...

Page 7: ...22 LCD Color Monitor Adelpia TGL2240A 7 ...

Page 8: ...22 LCD Color Monitor Adelpia TGL2240A 8 3 3 Adjusting the Picture ...

Page 9: ...22 LCD Color Monitor Adelpia TGL2240A 9 ...

Page 10: ...22 LCD Color Monitor Adelpia TGL2240A 10 ...

Page 11: ...22 LCD Color Monitor Adelpia TGL2240A 11 4 Input Output Specification 4 1 Input Signal Connector ...

Page 12: ...22 LCD Color Monitor Adelpia TGL2240A 12 ...

Page 13: ...z 60Hz Current 1 5 A max at 100V 1 5A max at 240V Peak surge current 55 A peak at 240 V AC and cold starting Leakage current 1 5 mA for power from PC outlet 3 5 mA for power from Wall outlet Power line surge No adverse effects no loss of information or defect with a maximum of 1 half wave missing per second Power factor correction According to EN 61000 3 2 ...

Page 14: ...h wide TFT LCD module with a 4 CCFL Backlight Unit and a 30 pin 2ch LVDS interface This module supports 1680 x 1050 WSXGA 16 10 wide screen mode and displays up to 16 7 millions colors The inverter module for the Backlight Unit is not built in General Specifications Mechanical Specifications Electrical Characteristics ...

Page 15: ...22 LCD Color Monitor Adelpia TGL2240A 15 Optical Characteristics ...

Page 16: ...22 LCD Color Monitor Adelpia TGL2240A 16 5 Block Diagram 5 1 Software Flow Chart 1 2 N Y 5 Y N 10 Y N 12 Y N 7 Y N 6 4 3 8 9 14 11 13 Y N 15 Y N 16 17 19 Y N 18 ...

Page 17: ... on the LED and set it to green color Scalar initialize 10 In standby mode 11 Update the life time of back light 12 Check the analog port are there any signals coming 13 Does the scalar send out an interrupt request 14 Wake up the scalar 15 Are there any signals coming from analog port 16 Display No connection Check Signal Cable message And go into standby mode after the message disappears 17 Prog...

Page 18: ...8 5 2 Electrical Block Diagram 5 2 1 Scaler Board Block Diagram U401 Scalar IC TSUMO58GHL LF Include MCU ADC OSD D Sub Connector CN101 H sync V sync RGB LCD Interface CN301 Key Board Control CN402 Crystal X401 14 31818MHZ DVI Connector CN102 ...

Page 19: ...Filter Start Circuit R904 R905 R906 PWM Control IC Transformer Feedback circuit Rectifier Diodes AC input 5V 5V1 ON OFF Control PWM Control IC Feedback Circuit OSC and Output DC Convert MOSFET Q805 Q806 Over Voltage protect Lamp ON OFF DIM CN902 Audio Power Amplifier IC601 APA2069JITUL CN602 Audio L R out ...

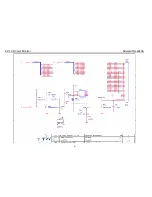
Page 20: ...22 LCD Color Monitor Adelpia TGL2240A 20 6 Schematic 6 1 Main Board ...

Page 21: ...22 LCD Color Monitor Adelpia TGL2240A 21 ...

Page 22: ...22 LCD Color Monitor Adelpia TGL2240A 22 ...

Page 23: ...22 LCD Color Monitor Adelpia TGL2240A 23 ...

Page 24: ...22 LCD Color Monitor Adelpia TGL2240A 24 6 2 Power Board ...

Page 25: ...22 LCD Color Monitor Adelpia TGL2240A 25 ...

Page 26: ...22 LCD Color Monitor Adelpia TGL2240A 26 ...

Page 27: ...22 LCD Color Monitor Adelpia TGL2240A 27 7 PCB Layout 7 1 Main Board ...

Page 28: ...22 LCD Color Monitor Adelpia TGL2240A 28 ...

Page 29: ...22 LCD Color Monitor Adelpia TGL2240A 29 7 2 Power Board ...

Page 30: ...22 LCD Color Monitor Adelpia TGL2240A 30 7 3 Key board ...

Page 31: ...elpia TGL2240A 31 8 Maintainability 8 1 Equipment and Tools Requirement 1 Voltmeter 2 Oscilloscope 3 Pattern Generator 4 DDC Tool with a Compatible Computer 5 Alignment Tool 6 LCD Color Analyzer 7 Service Manual 8 User Manual ...

Page 32: ...ress power key and look if the picture is normal Please reinsert and make sure the AC of 100 240 is normal Reinsert or check the power sect Check if X401 oscillate w veforms are normal Measure U701 Pin2 3 3V C704 1 8V OK OK NG NG NG Measure CN701 Replace U401 Replace X401 NG Replace U701 Q702 OK OK ...

Page 33: ...aveform is normal Replace U401 Replace X401 Measure U701 Pin2 3 3V C704 1 8V Check Correspondent component Replace U401 Check X401 oscillate waveform is Replace U701 Q702 OK OK OK OK OK NG NG NG NG Check reset circuit of U401 is normal Check HS VS from CN101 is normal Replace X401 Check Correspondent component NG NG OK ...

Page 34: ...Measure Q301 base is low level X401 oscillate waveform is normal Check CN301 is solder and Q301 Q302 is OK Check Correspondent component Replace PANEL Check Correspondent component Replace U401 OK OK OK Replace X401 OK NG NG NG NG Check reset circuit of U401 is normal ...

Page 35: ... C905 Check bridge rectified circuit and F901 circuit Check start voltage for the pin3 of U901 Check R904 R905 R906 Change U901 NG Check the auxiliary voltage is bigger than 10V and smaller than 20V 1 Check U901 2 Check R909 D901 C908 C907 circuit OK OK NG Check D906 D907 D908 IC903 ZD921 ZD922 Q903 ZD902 OK Check U901 Pin8 PWM wave OK Check U901 NG NG NG OK NG ...

Page 36: ...ignal Check Interface board or main board O Check U801 PIN12 16V NG OK Check ON OFF Check U801 PIN5 have triangle wave NG OK Change U801 Check IC801 PIN9 PIN10 PWM wave NG OK Check U801 Check Q804 Q809 Drain wave NG Check the output of T801 T802 Check Q805 Q806 Q810 Q811 Check connecter lamp feedback and protect circuit OK NG Change T801 T802 OK ...

Page 37: ...37 8 2 3 Key Board OSD is unstable or not working Is Key Pad Board connecting normally Connect Key Pad Board Is Button Switch normally Replace Button Switch OK NG NG Is K y Pad Board Normally Replace Key Pad Board OK NG OK Check Main Board ...

Page 38: ... 100 5 Gain adjustment Move cursor to F and press MENU key A Adjust 9300K color temperature 1 Switch the Chroma 7120 to 9300k channel 2 The chroma 7120 will show x 283 25 y 297 25 Y 200 cd m2 3 Switch the chroma 7120 to RGB MODE with press MODE button to change 4 Adjust the RED of color color1 on factory window until chroma 7120 indicator reached the value R 100 5 Adjust the GREEN of color color1 ...

Page 39: ...ma 7120 indicator reached the value B 100 7 Repeat above procedure item 4 5 6 until chroma 7120 RGB value meet the tolerance 100 2 D Adjust sRGB color temperature 1 Switch the chroma 7120 to sRGB channel 2 The chroma 7120 will show x 313 25 y 329 25 Y 200cd m2 3 Switch the chroma 7120 to RGB MODE with press MODE button to change 4 Adjust the RED of color sRGB on factory window until chroma 7120 in...

Page 40: ...22 LCD Color Monitor Adelpia TGL2240A 40 10 Monitor Exploded View ...

Page 41: ...nd source E09502 095G8014 6X 51 HARNESS 6P 6P 216mm 0M1G 130 5120 SCREW 0M1G1730 6120 SCREW 42 D020523 705GQ834547 22 LCD STAND BASE ASS Y A37G0055 1 Hinge AM1G1740 12 47 CR3 SCREW Q12G6600 6 FOOT Q34G0306AED 1B0100 STAND Q34G0307AEDA1B0133 BASE 8S2 E750 750GLMC0Z1312N PANEL M220Z1 L03 C1 NB CMO E750 750GLMC0Z1322N PANEL M220Z1 L03 C1 NB CMO 2nd source 756GQ8CB AW004 MAIN BOARD CBPCRMTUVQ1 SMTC U4...

Page 42: ...33 32 IC M24C04 WMN6TP SO8 U402 056G1133 81 SST25LF020A 33 4C SAE Q701 057G 417 12 T KEC 2N3904S RTK PS Q302 057G 417 13 T KEC 2N3906S RTK PS Q702 057G 417 22 T TRA KN2907AS 60V 0 6A SOT 23 Q703 057G 417 22 T TRA KN2907AS 60V 0 6A SOT 23 Q301 057G 763 1 A03401 SOT23 BY AOS A1 R423 061G0402000 RST CHIPR 0 OHM 5 1 16W R134 061G0402100 RST CHIPR 10 OHM 5 1 16W R132 061G0402100 RST CHIPR 10 OHM 5 1 16...

Page 43: ...0402103 RST CHIPR 10 KOHM 5 1 16W R120 061G0402103 RST CHIPR 10 KOHM 5 1 16W R133 061G0402103 RST CHIPR 10 KOHM 5 1 16W R442 061G0402103 RST CHIPR 10 KOHM 5 1 16W R441 061G0402103 RST CHIPR 10 KOHM 5 1 16W R135 061G0402103 RST CHIPR 10 KOHM 5 1 16W R303 061G0402103 RST CHIPR 10 KOHM 5 1 16W R408 061G0402103 RST CHIPR 10 KOHM 5 1 16W R426 061G0402103 RST CHIPR 10 KOHM 5 1 16W R440 061G0402103 RST C...

Page 44: ...X7R C122 065G0402102 32 1000PF 10 50V X7R C124 065G0402104 12 CAP CHIP 0402 0 1UF 16V X7R C710 065G0402104 12 CAP CHIP 0402 0 1UF 16V X7R C711 065G0402104 12 CAP CHIP 0402 0 1UF 16V X7R C406 065G0402104 15 MLCC 0402 0 1UF K 16V X5R C405 065G0402104 15 MLCC 0402 0 1UF K 16V X5R C404 065G0402104 15 MLCC 0402 0 1UF K 16V X5R C709 065G0402104 15 MLCC 0402 0 1UF K 16V X5R C432 065G0402104 15 MLCC 0402 ...

Page 45: ...NPO C114 065G0402473 12 CHIP 0 047uF 16V X7R C111 065G0402473 12 CHIP 0 047uF 16V X7R C110 065G0402473 12 CHIP 0 047uF 16V X7R C108 065G0402473 12 CHIP 0 047uF 16V X7R C106 065G0402473 12 CHIP 0 047uF 16V X7R C102 065G0402473 12 CHIP 0 047uF 16V X7R C113 065G0402509 31 CHIP 5pF 50V NPO C109 065G0402509 31 CHIP 5pF 50V NPO C105 065G0402509 31 CHIP 5pF 50V NPO FB702 071G 56G301 EA BEAD 300 欧 FB401 0...

Page 46: ...05 061G0603102 RST CHIPR 1K OHM 5 1 10W R004 061G0603202 RST CHIPR 2 KOHM 5 1 10W R002 061G0603202 RST CHIPR 2 KOHM 5 1 10W J002 061G1206000 RST CHIPR 0 OHM 5 1 4W J001 061G1206000 RST CHIPR 0 OHM 5 1 4W C004 065G0603151 32 CHIP 150PF 50V X7R C005 065G0603151 32 CHIP 150PF 50V X7R C011 065G0603151 32 CHIP 150PF 50V X7R C001 065G0603151 32 CHIP 150PF 50V X7R C003 065G0603151 32 CHIP 150PF 50V X7R 7...
Page 47: ... 470UF M 16V L904 073G 253 91 H CHOKE COIL L903 073G 253 91 H CHOKE COIL L904 073G 253 91 L CHOKE BY LI TA L903 073G 253 91 L CHOKE BY LI TA L901 073L 174 40 HG GBQM4 778 391 T802 080GL20T510 DN X FMR INVERTER 142uH T801 080GL20T510 DN X FMR INVERTER 142uH T901 080GL22T 3 N X FMR 510uH YUVA 822 CN901 087G 50132A DL AC SOCKET 3PIN BD901A 093G 50460 28 BRIDGE DIODE KBP208G LITEON D907 093G3006 1 1 3...

Page 48: ...10W R819 061G0603100 2F RST CHIPR 10K OHM 1 1 10W R824 061G0603100 2F RST CHIPR 10K OHM 1 1 10W R831 061G0603100 2F RST CHIPR 10K OHM 1 1 10W R833 061G0603100 2F RST CHIPR 10K OHM 1 1 10W R838 061G0603100 2F RST CHIPR 10K OHM 1 1 10W R840 061G0603100 2F RST CHIPR 10K OHM 1 1 10W R852 061G0603100 2F RST CHIPR 10K OHM 1 1 10W R853 061G0603100 2F RST CHIPR 10K OHM 1 1 10W R813 061G0603101 RST CHIPR 1...

Page 49: ... R802 061G0805101 1ST CHIPR 100 OHM 5 1 8W R925 061G0805102 RST CHIPR 1K OHM 5 1 8W R939 061G0805102 RST CHIPR 1K OHM 5 1 8W R938 061G0805103 RST CHIPR 10K OHM 5 1 8W R841 061G0805150 1F RST CHIPR 1 5 KOHM 1 1 8W R839 061G0805150 1F RST CHIPR 1 5 KOHM 1 1 8W R812 061G0805150 1F RST CHIPR 1 5 KOHM 1 1 8W R811 061G0805150 1F RST CHIPR 1 5 KOHM 1 1 8W R924 061G0805151 RST CHIPR 150 OHM 5 1 8W R826 06...

Page 50: ...932 065G0603102 32 1000PF 10 50V X7R C804 065G0603104 12 CER2 0603 X7R 16V 100N P C807 065G0603104 12 CER2 0603 X7R 16V 100N P C814 065G0603104 12 CER2 0603 X7R 16V 100N P C810 065G0603104 22 CAP CHIP 0603 0 1UF K 25V X7R C802 065G0603105 12 CHIP 1UF 16VX7R 0603 C806 065G0603105 12 CHIP 1UF 16VX7R 0603 C819 065G0603105 12 CHIP 1UF 16VX7R 0603 C820 065G0603105 12 CHIP 1UF 16VX7R 0603 C818 065G06032...

Page 51: ...64 38 D DIODE BAW56 DIODES D808 093G 64 38 D DIODE BAW56 DIODES ZD921 093G 39S 12 T RLZ20B LLDS ZD922 093G 39S 24 T RLZ 5 6B LLDS ZD902 093G 39S 44 T RLZ18B LLDS D903 093G 64S511SEM IN4148W D812 093G 64S511SEM IN4148W D811 093G 64S511SEM IN4148W D803 093G 64S511SEM IN4148W D807 093G 64S511SEM IN4148W CN901 006G 31500 EYELET T901 006G 31502 1 5MM RIVET IC904 056G 158 12 KIA431A AT P TO 92 IC904 056...

Page 52: ...Box Sealing label Q40G000297212A Energy star label black Q40G000297219A POP LABEL FOR TGL2240A Q44GC034101 EPS L Q44GC034201 EPS R Q44GC034972 2A 22 LCD CARTON Q45G 77 5 PE PACKING Q45G 88606 R PE BAG FOR BASE Q45G 88609 74 R epe bag for monitor Q52G6020 29 PROTECT FILM Q41G2201972 7A manual Q45G 76 28 RN R PE BAG MANUAL 040G 58162435A P N LABEL FOR MANUAL PE BAG Q40G0001972 1A Carton label ...

Reviews: