ADDAC703Assembly Guide
ADDACSYSTEM
page 6
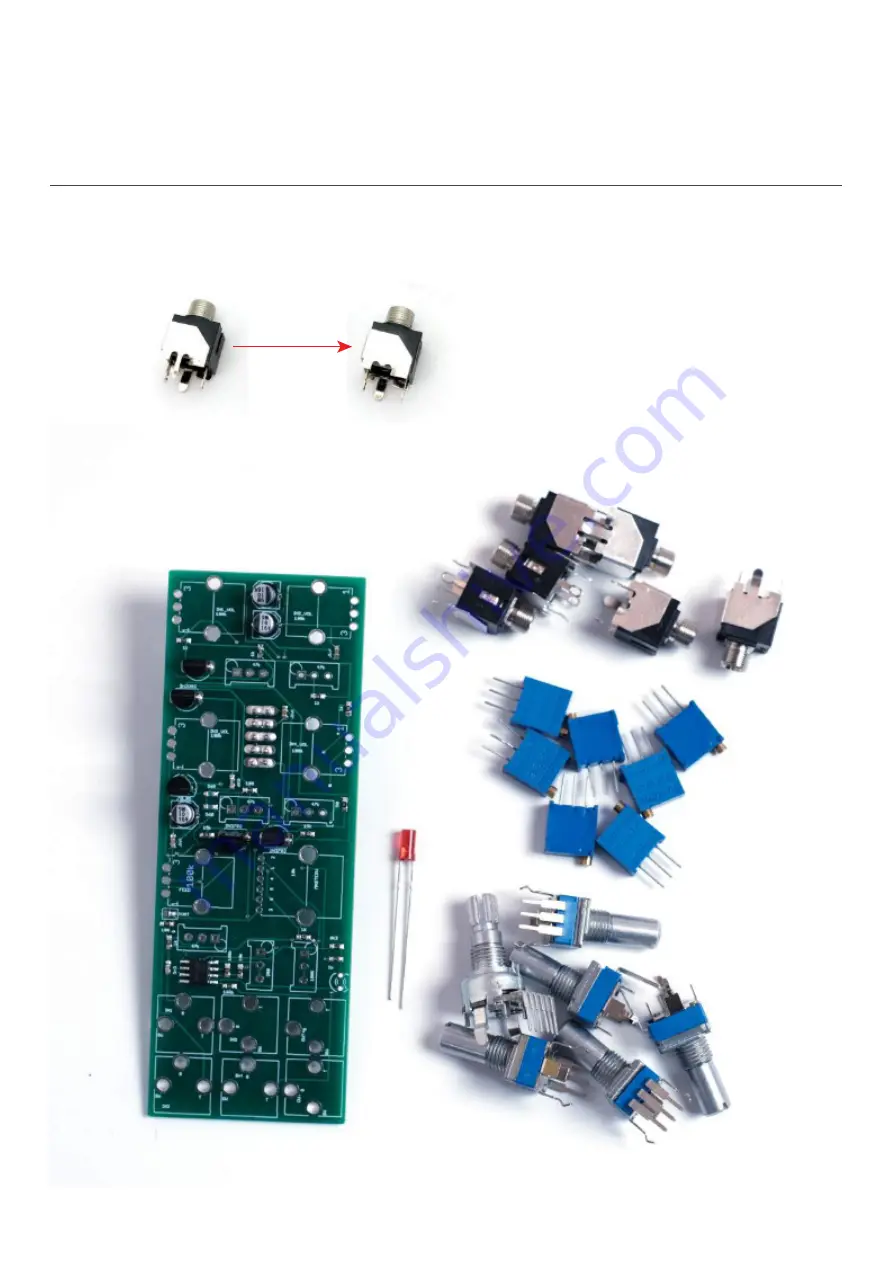
STEP 4:Next weʼll need to prepare some parts before adding them to the front panel.Locate the jacks and cut the smallest legs like shown below.
Page 1: ......
Page 2: ...November 2019 ADDAC703Assembly Guide ADDACSYSTEM page 2...
Page 3: ...soldering these caps is easy just place a dab of solder on the pad on your right left pad if you re left handed and then with the help of a tweezer put the capacitor in place and reflow the previously...
Page 4: ...ADDACSYSTEM page 4 STEP 2 Next place the transistors and power regulator like shown below ADDAC703Assembly Guide L79L05 2N3702 2N3702 2N3392 2N3392...
Page 5: ...ADDACSYSTEM page 5 STEP 3 Next place the boxed power header Notice the orientation marked on the pcb ADDAC703Assembly Guide...
Page 6: ...ADDAC703Assembly Guide ADDACSYSTEM page 6 STEP 4 Next we ll need to prepare some parts before adding them to the front panel Locate the jacks and cut the smallest legs like shown below...
Page 7: ...alues orientation and jack types like shown below page 7 ADDAC703Assembly Guide Threaded Jacks Threaded Jacks Non threaded Jacks Non threaded Jacks 50k 503 50k 503 50k 503 50k 503 50k 503 100k 104 1k...
Page 8: ...ADDACSYSTEM STEP 6 Place the frontpanel and tighten all nuts page 8 ADDAC703Assembly Guide...
Page 9: ...ADDACSYSTEM page 9 STEP 7 Adjust the height of the pcb keeping it parallel to the front panel ADDAC703Assembly Guide Keep lines parallel...
Page 10: ...ADDACSYSTEM page 10 STEP 8 Solder all parts ADDAC703Assembly Guide...
Page 11: ...ADDACSYSTEM page 11 Finish it by placing the knobs and you ve finished the assembly process ADDAC703Assembly Guide...
Page 12: ...For feedback comments or problems please contact us at addac addacsystem com ADDAC703ASSEMBLY GUIDE Revision 01November 2019...