background image

Connecting to Your Network

Powering On the Server

Connect the server to a 10BaseT, 100BaseTX, or 1000BaseT network. Use one or both of the 
Ethernet cables provided starting with the primary Ethernet connector. Using both connectors
offers advantages such as load balancing and failover.

Note:

If you use only one network connector, use the primary Ethernet connector marked '1' on

the back of the server as shown in the section, “Hardware Features.”

Turn on both power module switches on the back of the server. Then press
the power button on the front of the server and hold it down until the LCD
lights up. The LCD panel indicates boot and system status. When the
system is ready, the server name displays.

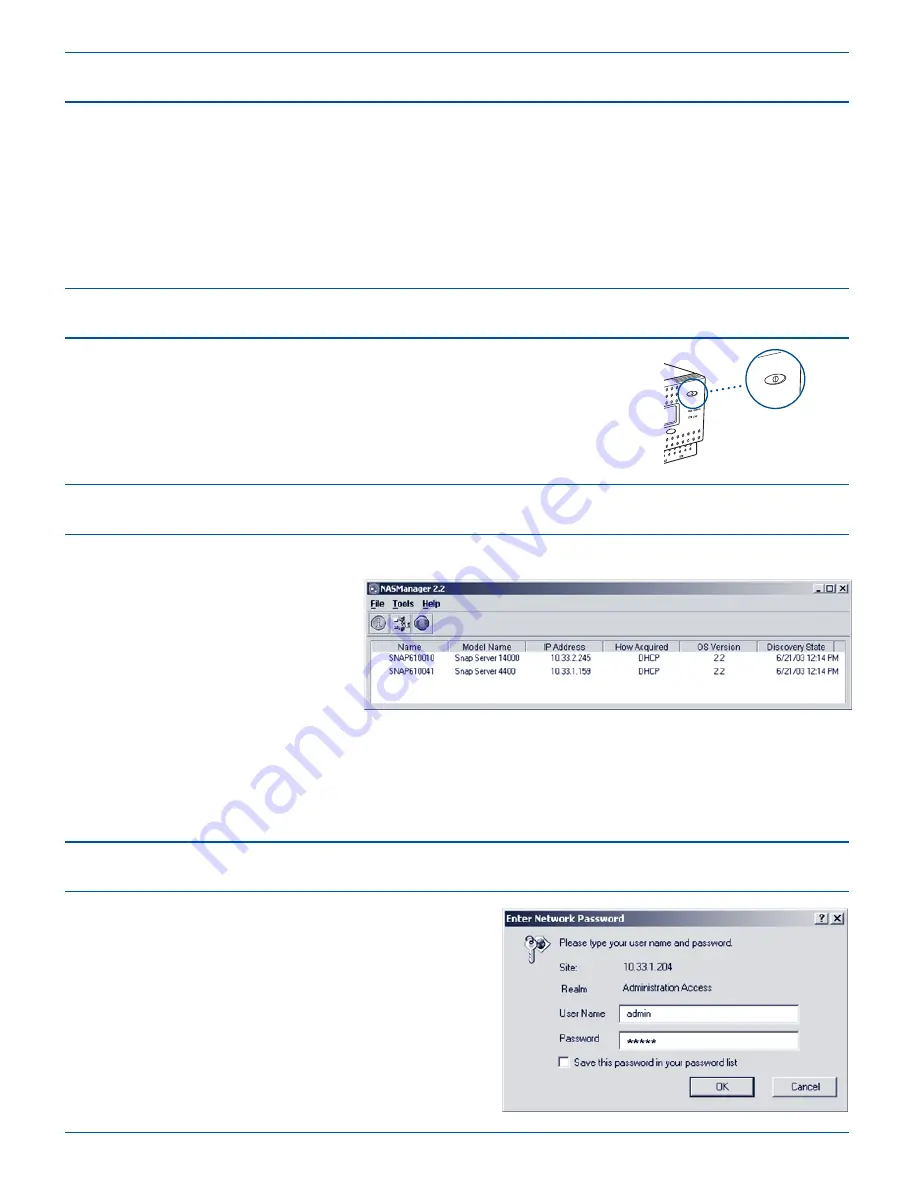
Acquiring an IP Address

1.

Install NASManager from the User CD onto a client computer. 

2.

Launch NASManager.

3. 

In the NASManager window,
locate the server by name 
(The default server name is
SNAP

nnnnnn, where 

nnnnnn

is the

server number of your server.)

Note:

If you do not have a DHCP server on your network, you must assign an IP address manually. In

the NASManager window, select your server, then select 

Tools > Set IP Address

. Enter a unique IP

address, and click OK. When prompted, enter 

admin

for the user name and 

admin

for the password

.

Initializing the Server

1.

Launch your browser and enter the 
Snap Server 14000 server’s name or IP address.

2.

Log in with default User Name 

admin

and

Password 

admin

.

3.

Complete setup with the Initial 
Setup Wizard.

Note:

To learn more about configuring the server,

see the Administrator Guide and the online help.

Summary of Contents for 5325301553

Page 1: ...QuickStartGuide and User CD Kurzanleitung und Benutzer CD Guía de iniciación rápida y CD del usuario Guide de mise en route rapide et CD de l utilisateur ...

Page 2: ...the server s individual power connectors 2 Plug the other ends of the power cords into properly grounded electrical outlets For the greatest protection from power failures connect each power cord to a different uninterruptible power supply UPS Each UPS should have a minimum rating of 160 watt hours If you have only one UPS connect one power cord to the UPS Connect the other power cord to a properl...

Page 3: ...ready the server name displays Acquiring an IP Address 1 Install NASManager from the User CD onto a client computer 2 Launch NASManager 3 In the NASManager window locate the server by name The default server name is SNAPnnnnnn where nnnnnn is the server number of your server Note If you do not have a DHCP server on your network you must assign an IP address manually In the NASManager window select...

Page 4: ...t swappable fans 6 Power module status lights 7 AC power on off switches 8 AC power supply modules 9 Power connectors 10 Power supply activity lights 11 Service connector 12 Fan status lights 13 Primary Ethernet connector 14 SCSI connector 15 Secondary Ethernet connector 16 Server number label 17 Serial number label ...

Page 5: ...stem http www snapappliance com support Obtención de servicio de asistencia técnica para su Snap Server 14000 Para obtener servicio o asistencia técnica para su Snap Server 14000 visite nuestro sitio Web www snapappliance com Para obtener respuesta inmediata a su solicitud de asistencia envíelas en la forma de preguntas a nuestro Sistema experto de base de conocimiento en http www snapappliance co...

Page 6: ...s a PDF on the User CD or use the online help 70990572 001 Rev A Copyright 2003 Snap Appliance Inc All rights reserved worldwide All other product names or company names are the property of their respective owners Copyright 2003 Snap Appliance Inc Alle Rechte weltweit vorbehalten Alle anderen Produktnamen und Firmennamen sind Eigentum der jeweiligen Unternehmen Copyright 2003 Snap Appliance Inc Re...

Reviews: