Sprache /
Language
:
Deutsch /
english
Montageanleitung
Installation Guide
Version:
1.2
9
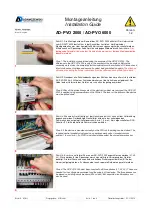
Schritt 9: Der AD-PVO 2000 ist nun fertig verdrahtet. Für die korrekte Funktion müssen
mindestens 12 Adern am Gerät angeschlossen sein. Die vier Adern des
Niederspannungsnetzes (L1, L2, L3 und N), die sechs Sekundäranschlüsse der
Stromwandler und die zwei Adern des Lastrelais. Das Störmelderelais kann optional
angeschlossen werden.
Step 9: The AD-2000 PVO is now completely wired. For the correct operation at least 12
wires have to be connected to the unit. The four conductors of the low voltage system
(L1, L2, L3 and N), the six secondary output terminals of the current transformer, and the
two wires of the load-relay. The alarm relay can be connected optionally.
10
Schritt 10: Nachdem alle Schutzabdeckungen wieder montiert sind, kann am
Hauptschalter zugeschaltet werden. Wenn der AD-PVO 2000 an mindestens einer Phase
Versorgungsspannung erkennt, leuchtet die grüne Betriebs-LED.
Step 10: After all protective covers are installed again, turn on the main switch. If the AD-
PVO 2000 detects supply voltage at least at one phase, the green Power-LED lights up.
11
Schritt 11: Nun kann das Gerät in Betrieb genommen werden. Es können entweder alle
Parameter über PC und den zugehörigen Programmieradapter editiert werden, oder es
kann eine “Automatische Lasteinmessung“ gestartet werden. Durch die “Automatische
Lasteinmessung“ wird kein PC für die Inbetriebnahme benötigt. Die “Automatische
Lasteinmessung“ wird mit einem Langtastendruck (3s) auf die “Quit-Taste“ gestartet. Die
beiden LEDs blinken während der Lasteinmessung abwechselnd. Hier bitte die
detaillierte Beschreibung im Datenblatt beachten. Achtung: Bevor die “Automatische
Lasteinmessung“ gestartet wird, bitte prüfen ob die angeschlossene Last auch
eingeschaltet ist.
Step 11: Now the device can be put into operation. All parameters can be edited either
via PC and the associated programming adapter, or it can be started an "Automatic Load
Calibration". Because of the "Automatic Load Calibration" no PC is required for the
parametrization. The "Automatic Load Calibration" starts with a long press (3 seconds)
on the "Quit" button. The two LEDs flash alternately during the "Automatic Load
Calibration". Please note the detailed description in the data sheet. Attention: Before the
"Automatic Load Calibration" is started, please check if the connected load is switched
on.
Erstellt: M. Alt
Freigegeben: H. Biehler
Seite: 3 von 3
Überarbeitungsstatus: 21.11.2013
AD-PVO 2000 / AD-PVO 6000


