actiLib Library 4U
– User and Service Guide
Page 29 of 103
1.
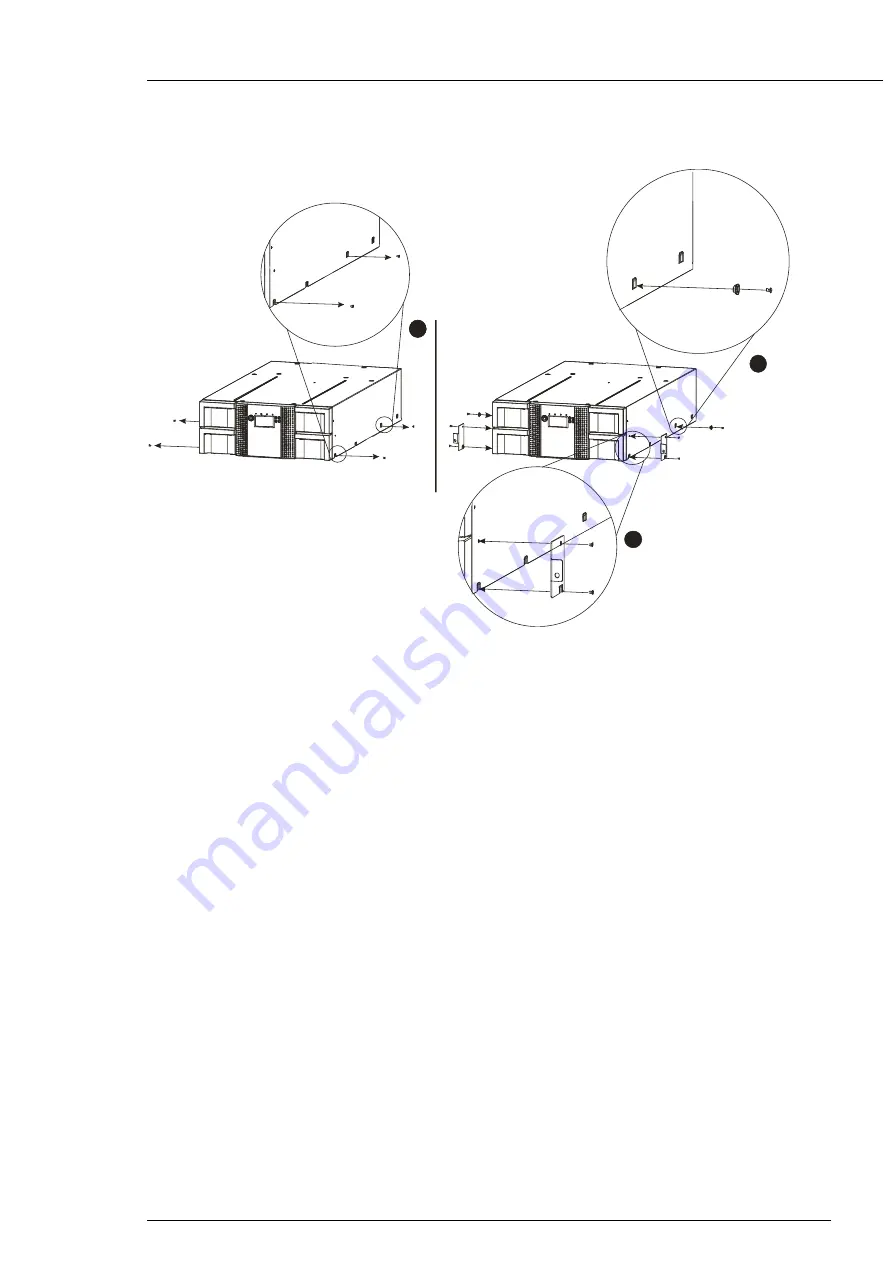
Using the Torx screwdriver, remove the screw on each side of you Library. Shown in
step1.
1
1
2
3
Figure 15 Installing the mounting brackets and guide pulleys
1.
Install the Library guide pulleys on each side of the Library using the 2 Torx screws included in the
Install the mounting brackets of the Library using the 4 Torxs screws included in the rack kit. Shown in
2.
With Library guide pulleys and mounting brackets installed, slide the Library onto the rails.
1.
Secure the Library to the rack (see Figure 16) using a 3# Phillips screwdriver placed through the
small holes in the mounting bracket to tighten the M5 screw on each side of the Library.
Summary of Contents for actiLib Autoloader 4U
Page 40: ...actiLib Library 4U User and Service Guide Page 40 of 103 Figure 24 Interaction Mode Commands ...
Page 43: ...actiLib Library 4U User and Service Guide Page 43 of 103 Figure 27 Interaction Mode Service ...
Page 60: ...actiLib Library 4U User and Service Guide Page 60 of 103 Figure 40 Configuration license key ...


