background image

www.acti.com


Hardware Manual 


12 

Waterproof RJ-45 Connector 

NOTE:


The preceding installation process is for concealed installation, during which holes are 

punched on the wall and cables are penetrated into the wall. If open installation is adopted, 

cables are not penetrated into the wall but threaded out from the outlet on one side of the 

base. 


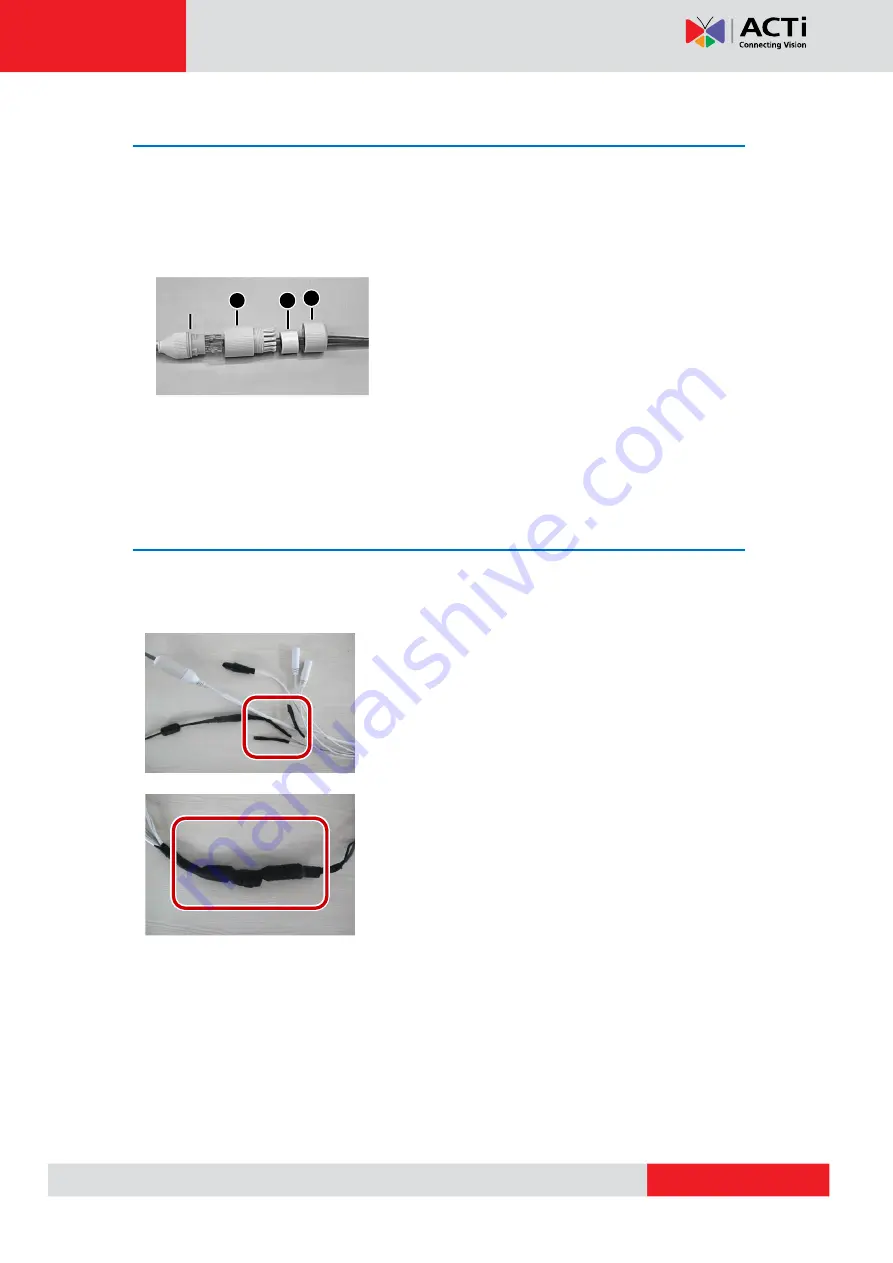
Attach the seal ring to the Ethernet interface. Mount 

the waterproof components in order. Then insert the 

cable into the Ethernet interface and screw the 

waterproof bolt in. 

NOTE:

 You can crimp the inner wires of the cable with the RJ45 plug first and then cover the 

waterproof components. You may also cover the waterproof components first. 


Waterproof Tail Cable 

Connect the tail cables and then take the following steps to protect the tail cables from water 

using waterproof tapes. The figures are for your reference only. 


Connect the tail cables, and protect the cables and cable 

connections using insulating tapes. Then wrap all the tail 

cables together using insulating tapes. 


Choose a start point for waterproof tapes and protect the 

tail cables using waterproof tapes. 

NOTE: 


Avoid short circuit when insulating the cables. 


Use self adhesive waterproof tapes that will stick together with the twisted cables. 


Tighten waterproof tapes when wrapping the cables and make sure the cable connections 

are fully covered. Wrap with take and protect unused cable connections, as well. 


You are recommended to put the waterproof cables in a waterproof junction box which 

needs to be purchased separately. 


Insert in order

Seal ring

1

2

3

Summary of Contents for Z81

Page 1: ...Dome Camera Hardware Manual Z81 Z82 Z87 2022 03 09...

Page 2: ...Regulatory Compliance 4 Safety and Compliance Information 5 Introduction 7 List of Models 7 Package Contents 8 Physical Description 8 Installation Procedures 10 Mounting on the Ceiling 10 Waterproof R...

Page 3: ...g or removing covers may expose you to dangerous voltage or other hazards Refer all servicing to qualified service personnel Trademarks ACTi and ACTi logo are registered trademarks of ACTi Corporation...

Page 4: ...eration of this equipment in a residential area is likely to cause harmful interference in which case the user will be required to correct the interference at his own expense This product complies wit...

Page 5: ...not hold the tail cable by hand for weight bearing Otherwise the cable connector of the camera could be loosened Do not cut the tail cable Exposed tail cables may cause short circuit and damage the c...

Page 6: ...se or the stain still cannot be removed use anti static gloves or an oil free cloth dipped with detergent and clean the glass surface gently until it is removed Do not use organic solvents such as ben...

Page 7: ...anual contains the following models Z81 2MP Outdoor Zoom Dome with D N Adaptive IR Extreme WDR SLLS 4 4x Zoom Lens Z82 4MP Outdoor Zoom Dome with D N Adaptive IR Extreme WDR SLLS 4 4x Zoom Lens Z87 4M...

Page 8: ...gland Physical Description Z81 Z82 Item Description 1 DC 12V Power Input Jack This connector is used to connect to a DC 12V power adapter if a non PoE network connection will be used 2 Ethernet Port C...

Page 9: ...microSDHC and microSDXC cards 2 Reset Button Press and hold to reset the camera to its default factory settings 3 Built in Microphone Receives audio input 4 DC 12V Power Input Jack This connector is...

Page 10: ...oles paste the drill template stickers on the surface and then use a 6 6 5mm drill bit to drill 30 mm depth guide holes according to the positions marked by drill template 2 Insert the plastic anchors...

Page 11: ...to the base Adjust the housing to the position shown in figure figure then push and turn it to anywhere but 6 Adjust the lens viewing direction and then tighten the screw Connect cable and protect it...

Page 12: ...Waterproof Tail Cable Connect the tail cables and then take the following steps to protect the tail cables from water using waterproof tapes The figures are for your reference only Connect the tail ca...

Page 13: ...diately be ready for the access from the PC The user however might not know the IP address of the camera yet It is necessary to know the IP address of the camera in other to be able to access it by us...

Page 14: ...work and it does not detect any DHCP services it will automatically assign itself a default IP 192 168 0 100 Whereas the default port number would be 80 In order to access that camera the IP address o...

Page 15: ...P Utility With the procedure shown above all the cameras will have unique IP addresses starting from 192 168 0 101 In case there are 20 cameras selected the last one of the cameras would have the IP 1...

Page 16: ...ndows does not prompt you to install ActiveX follow these steps to turn off UAC Click the Start button and then go to Control Panel In the search box type UAC then click Change User Acount Control Set...

Page 17: ...www acti com Hardware Manual 17 Then use this newly setup Account and Password to login to the Web Configurator...

Page 18: ...Copyright 2022 ACTi Corporation All Rights Reserved 7F No 1 Alley 20 Lane 407 Sec 2 Ti Ding Blvd Neihu District Taipei Taiwan 114 R O C TEL 886 2 2656 2588 FAX 886 2 2656 2599 Email sales acti com...

Reviews: