


Press the scroll button and release it immediately to continuously scroll the screen according to
thescroll mark's indicated direction. Pressing the scroll button again removes the scroll mark and
stops pen scrolling.
Pen scrolling works for most Microsoft applications, including Microsoft's Internet Explorer, Word,
Excel, PowerPoint, and Access. Many other applications also support pen scrolling. You will find that
the behavior of pen scrolling
varies somewhat from application to application, even among Microsoft
applications. Some applications will allow you to scroll in all directions, while others will scroll only up
and down; Some will scroll smoothly, while others tend to be "jumpy".
You may configure the pen tablet by modifying the functions of pen tip and the two barrel buttons,
adjusting the pressure sensitivity of the stylus pen, determine the scope of the tablet's working area,
or (re-)program the hot-cells of your pen tablet.
Tap on the tablet icon () in the
system tray
, usually located at the lower right corner of the screen, to
open the pen tablet control panel. Alternatively, tap [Start] > [Settings] > [Control Panel], and double-
tap the [Tablet Setting ] icon. The tablet's parameter window will appear on your screen. There are
five tabs in this window:
Info
,
Button
,
Scope
,
Hot Cells
and
Pressure
.
9.3
Variations in the pen scrolling function
II. Pen tablet configuration
10. The Info tab
The Info tab displays the version number of the driver.
11. The Button tab
11.1 Button Command
11.2
Double Click Time
11.3
Default
You may reprogram the functions of the pen tip and the two barrel
buttons by selecting the button name from the drop down menu
and assigning a command of a traditional three-button mouse to
it.
Move the slider to adjust the double-tap speed.
Tap on the Default button to restore all actions to manufacturing
default settings.
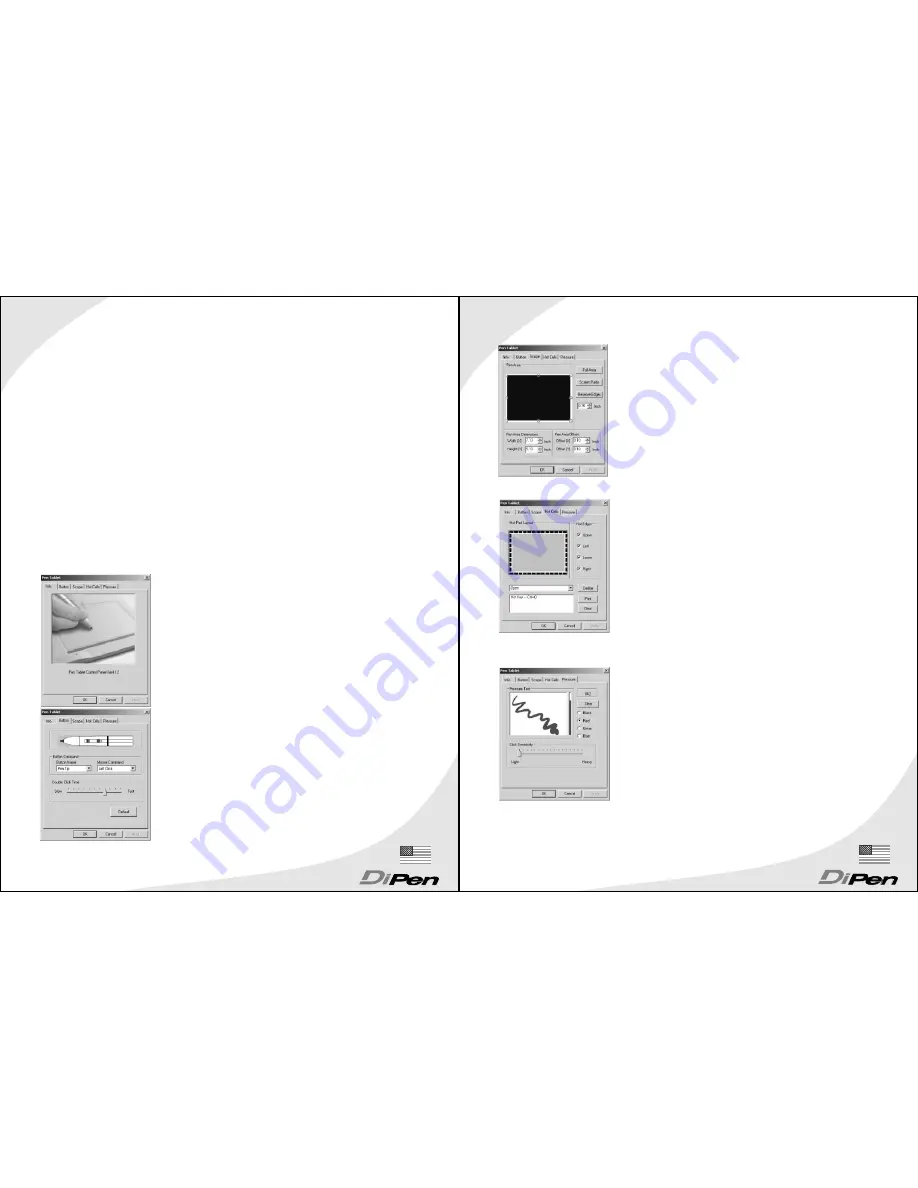
12. The Scope tab
12.1 Full Area
12.2 Screen Ratio
12.3 Reserve edges
Tap on the Full Area button to select the largest possible working
area.
Tap on the Screen Ration button to map the working area with
the tablet's graticule.
Tap on the Reserve Edges button to allocate space for the
tablet's hot cells.
13. The Hot Cells tab
13.1
Hot Edges
13.2
Define
13.3
Hot cells are shortcuts at the edges of the working area that you
can tap to run a program or a hot key combination e.g. Ctrl-V for
Paste. Select the edges of the working area that you wish to
contain hot-cells.
Tap on the Define button to program a hot cell to run a
program, go to a specific Web site, or perform a hot-key
action.
Tap on the Print button to print an overview of all hot cell
functions.
14. The Pressure tab
14.1 Pressure Test
14.2 Clear
14.3 Click Sensitivity
The pressure sensitivity of the pen tablet can be adjusted in this
tab. There is a test area to see the thickness of a line at a certain
pressure of the pen tip on the pad. The numerical value of the
pressure level is shown in the field above the Clear button.
Tap on the Clear button to clear the result in the Pressure Test
area.
By default, tapping with the pen tip is equivalent to a left click of a
mouse. Move the slider in the sensitivity bar to adjust the
response of the pen tip to select a program or menu option.
15
16


