background image

8

8

stylemaster

98013014 R.0

• 

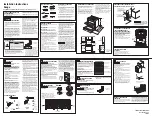
Para encender el horno con termocontrol de

encendido manual:

Perilla en posición de encendido.

APAGADO

FLAMA

MÍNIMA

FLAMA

MÁXIMA

HORNO CON TERMOCONTROL

1.- Encienda un cerillo y colóquelo cerca del

agujero de la charola del horno. Al mismo

tiempo presione y gire 1/4 de vuelta la

perilla del horno.

2.- Verifique que el quemador del horno se

haya encendido.

stylemaster

98013014 R.0

• 

How to light the oven burner with thermocontrol,

  manually:

OFF

MINIM

UM

FLAME

MAXIM

UM

FLAME

Knob in 

ignition position.

    OVEN WITH THERMOCONTROL

1.- Open the oven door, light a match and

place the flame at the igniter hole in the

front of the oven tray. While you push in

and turn 

the oven 

knob 1/4 

of the 

way, the

burner will light immediately.

2.- Verify 

that the 

oven burner 

has been 

ignited.

stylemaster

98013014 R.0

• 

How to light the oven burner with thermocontrol,

  manually:

OFF

MINIM

UM

FLAME

MAXIM

UM

FLAME

Knob in 

ignition position.

    OVEN WITH 4 STEPS THERMOCONTROL

1.- Open the oven door, light a match and

place the flame at the igniter hole in the

front of the oven tray. While you push in

and turn 

the oven 

knob 1/4 

of the 

way, the

burner will light immediately.

2.- Verify 

that the 

oven burner 

has been 

ignited.

Some models (see page 2) have a thermost

at and pilot

to control the oven function.

• How to light the oven burner with thermostat and

  pilot:

1.- Open 

the oven 

door, light 

a match 

and place 

the flame

     at the igniter hole in the front of the oven tray, push

     and turn the oven knob to the pilot position.

2.- Turn the oven knob 1/4 of the way to ignite the oven

     burner, this position is minimum flame.

3.- Verify that the oven burner has been ignited.

    OVEN WITH THERMOSTAT

 AND PILOT

Knob on 

the mark 

of ignition.

OFF

stylemaster

98013014 R.0

• 

Para encender el horno con termocontrol de

encendido manual:

Perilla en posición de encendido.

APAGADO

FLAMA

MÍNIMA

FLAMA

MÁXIMA

HORNO CON TERMOCONTROL DE 4 PASOS

1.- Encienda un cerillo y colóquelo cerca del

agujero de la charola del horno. Al mismo

tiempo presione y gire 1/4 de vuelta la

perilla del horno.

2.- Verifique que el quemador del horno se

haya encendido.

Algunos modelos (ver Pag. 2) cuentan con termostato

y piloto de encendido en el horno. Para operarlo:

1.- Encienda un cerillo y colóquelo cerca del agujero

     de la charola del horno, presione y gire la perilla del

     horno hasta la posición de piloto.

2.- Gire la perilla hasta 1/4 de vuelta para que encienda

     el quemador.

3.- Verifique que el quemador del horno se haya

     encendido.

HORNO CON TERMOSTATO Y PILOTO DE ENCENDIDO

Perilla en posición de encendido.

stylemaster

98008356 R.0

stylemaster

98010112 R.0

APAGADO

Algunos modelos (ver Pag. 2) cuentan con quemadores

multiposición. Estos quemadores se cambian de posición

permitiendo concentrar más calor para ollas grandes.

DUO FLAMA

 (QUEMADORES MULTIPOSICIÓN)

Algunos modelos tienen los quemadores

multiposición al centro de la estufa.

Some models have the multiposition

burners on the center of the range.

    MULTIPOSITION BURNERS

Some models 

(see page 

2) have 

multiposition burners. 

The

position of these burners can be changed, allowing to

concentrate the heat for large pots.

Summary of Contents for AB20214

Page 1: ...los Impreso en México STM01158 Rev 0 Part No 98017314 Rev 0 THIS MANUAL CONTAINS IMPORTANT INFORMATION READ IT BEFORE FIRST USE OF YOUR RANGE INSTALLATION USE AND CARE MANUAL Covers the following models Printed in Mexico STM01158 Rev 0 ESTUFAS EMPOTRABLES BUILT IN RANGES AB20214 AB20514 AB30314 AB30414 AB30467 AB30850 AB20214 AB20514 AB30314 AB30414 AB30467 AB30850 ...

Page 2: ... 2 3 6 11 14 14 15 Index 6 11 14 14 15 3 2 Fabricado por INDUSTRIAS ACROS WHIRLPOOL S A DE C V Unidad Celaya km 280 Carretera Panamericana C P 38020 Celaya Gto México Tel 01 461 6185500 Manufactured by INDUSTRIAS ACROS WHIRLPOOL S A DE C V Unidad Celaya km 280 Carretera Panamericana C P 38020 Celaya Gto México Phone 01 461 6185500 Comal Comal Capelo de cristal Parrillas superiores Quemadores estam...

Page 3: ... technician or Service technician must install this range Remove all packing material and put the range accessories in their places Select the best location in your kitchen for your range Protected from wind and with enough space to open the oven door Do not install cabinetry directly above the range If you will install an exhaust device put it at 61 cm minimum from the range cooktop If your range...

Page 4: ...cubierta de la cocina sin llegar hasta el fondo Conecte la línea de gas como se indica en la página 5 y verifique con agua jabonosa que no existan fugas de gas Realice cuidadosamente las conexiones eléctricas necesarias y deslice la estufa hasta el fondo Coloque nuevamente los quemadores superiores las tapas de los quemadores y las parrillas Remove the top grates the top burners and the burners ca...

Page 5: ... ESPREA 68 68 68 66 64 57 64 mm 0 787 0 787 0 787 0 838 0 914 1 092 0 914 kJ h 6 800 6 800 7 000 7 900 9 500 13 600 10 000 DIAM ESPREA CAPACIDAD TERMICA ESPREA 58 58 58 56 55 52 55 mm 1 067 1 067 1 067 1 181 1 321 1 613 1 321 kJ h 6 800 6 800 7 000 7 900 9 500 13 600 10 000 DIAM ESPREA CAPACIDAD TERMICA GAS NATURAL PRESIÓN DE OPERACIÓN 1 76 kPa 18 cm Col agua QUEMADOR SUPERIOR ESTAMPADO QUEMADOR C...

Page 6: ... 1 cm 4 Coloque el frente de perillas los tornillos y las perillas nuevamente en su lugar TORNILLO DE AJUSTE DE PILOTO HORNO Posición de Piloto If the range has yellow flames it may require adjustment to the air shutters Remove the knobs 1 Unscrew the screws of front and below the manifold panel and remove it 2 3 HOW TO ADJUST THE FLAMES AND OVEN PILOT How to adjust the air for surface burners Adj...

Page 7: ...und the air shutter C Turn on the oven D Verify that the flames are blue E If the flames are not blue repeat since step B When the flames are adjusted tighten the screw again F Replace the oven tray and the oven rack How to adjust the oven burner air shutter Remove the oven rack See page 9 1 3 Remove the oven tray See page 11 2 Perilla en posición de encendido Para encender los quemadores superior...

Page 8: ...ay push and turn the oven knob to the pilot position 2 Turn the oven knob 1 4 of the way to ignite the oven burner this position is minimum flame 3 Verify that the oven burner has been ignited OVEN WITH THERMOSTAT AND PILOT Knob on the mark of ignition OFF stylemaster 98013014 R 0 Para encender el horno con termocontrol de encendido manual Perilla en posición de encendido APAGADO FLAMA MÍNIMA FLAM...

Page 9: ... utensils over the Glass Lid GLASS LID OVEN RACK The oven has 4 different supports for the oven rack this rack has a stop to avoid droping from the oven to change the rack position follow the steps To remove the oven rack 1 Pull the oven rack until it stops 2 Lift the front part 3 Pull it again until it is released To install the oven rack 1 Push the oven rack until it stops 2 Lift the front part ...

Page 10: ... la palanca se coloca en la posición del candado abierto Si la palanca se coloca en la posición del candado cerrado la perilla no podrá girarse Forma correcta de operar las perillas Super Safe El colocar la palanca en posición de candado cerrado cuando el quemador está encendido podría dañar o dificultar la operación de la perilla Super Safe OVEN LIGHT Some models see page 2 have an oven light The...

Page 11: ...el agujero del frente de perillas empuje firmemente la perilla hasta que tope con el frente de perillas En caso de retirar las perillas para limpieza coloquelas de acuerdo a las siguientes instrucciones Cleaning and Maintenance Regularly clean grates burners cooktop and the oven tray Use water soap and a damp cloth avoid using abrasive or sharp objects Periodically clean the gap between the cookto...

Page 12: ...proveedor de gas No seguir estas instrucciones puede ocasionar riesgo de fuego o explosión ADVERTENCIA ADVERTENCIA For your safety Do not store gasoline or other flamable liquids near to your range Make sure that the furniture near to your range as well as the wall and the floor must support a temperature of 180 C to avoid any deformation Do not obstruct the side grooves in the oven tray Failure t...

Page 13: ...l Diagram Range with Electronic Ignition with Independent Switch Ignition Module Integrated Oven Light Switch Electronic Ignition Switch N L1 Electrical Diagram Range with Oven Light and Electronic Ignition with Independent Switch Oven Bulb 40 W Ignition Module Integrated Oven Light Switch Electronic Ignition Switch N L1 Diagrama Eléctrico Estufa de Encendido Electrónico con Interruptor Independie...

Page 14: ...______ PRODUCTO______________ MARCA_________ MODELO_____________ NUM DE SERIE ________________FECHA DE ENTREGA_______________ FIRMA DEL DISTRIBUIDOR Y SELLO REPRESENTANTE AUTORIZADO Señale con precisión calle número exterior o interior colonia ciudad estado y C P NOTA IMPORTANTE WHIRLPOOL MEXICO S A DE C V Antigua Carretera a Roma km 9 Col Milagro Apodaca N L México C P 66600 Tel 81 83 29 21 00 en...

Page 15: ...te Sur No 555 Col Centro Follow are listed our exclusive service centers if you need assistance or spare parts call the nearest service center where you will be assisted by qualified technicians En otras ciudades de la República Mexicana llame sin costo al 01 800 8 300 400 www saw com mx ACAPULCO GRO Tel 01 800 8 300 400 Av Constituyentes No 39 Col Vista Alegre AGUASCALIENTES AGS Tel 01 800 8 300 ...

Page 16: ...16 16 NOTES NOTAS ...

Page 17: ... be expressly authorized by Whirlpool Co 3 All images produced from this artwork must conform to the original Whirlpool file NUMBER DESCRIPTION SCALE REVISED BY LEGAL DEPT REWORK DATE 1 2 3 4 5 1 1 REV INSTRUCTIONS TO PRINT THIS FILE 20 JUL 2005 M A C 0 Released for tooling EN 459628 Electrodomésticos THIS PAGE IS NOT PART OF THE ARTWORK THEREFORE IT SHOULD NOT BE PRINTED IT IS ONLY FOR INFORMATIO...

Reviews: