

1)
Close QQboxx Pro 3.
2)
Disconnect NK50Y's USB cable from PC.
3)
Turn off NK50Y.
4)
Turn off NB11.
5)
Turn off Epson printer.
6)
Turn off the PC.
Start Labeling Discs with NK50Y System
When the NK50Y system is hardware ready, follow the steps
below to start labeling discs:
1)
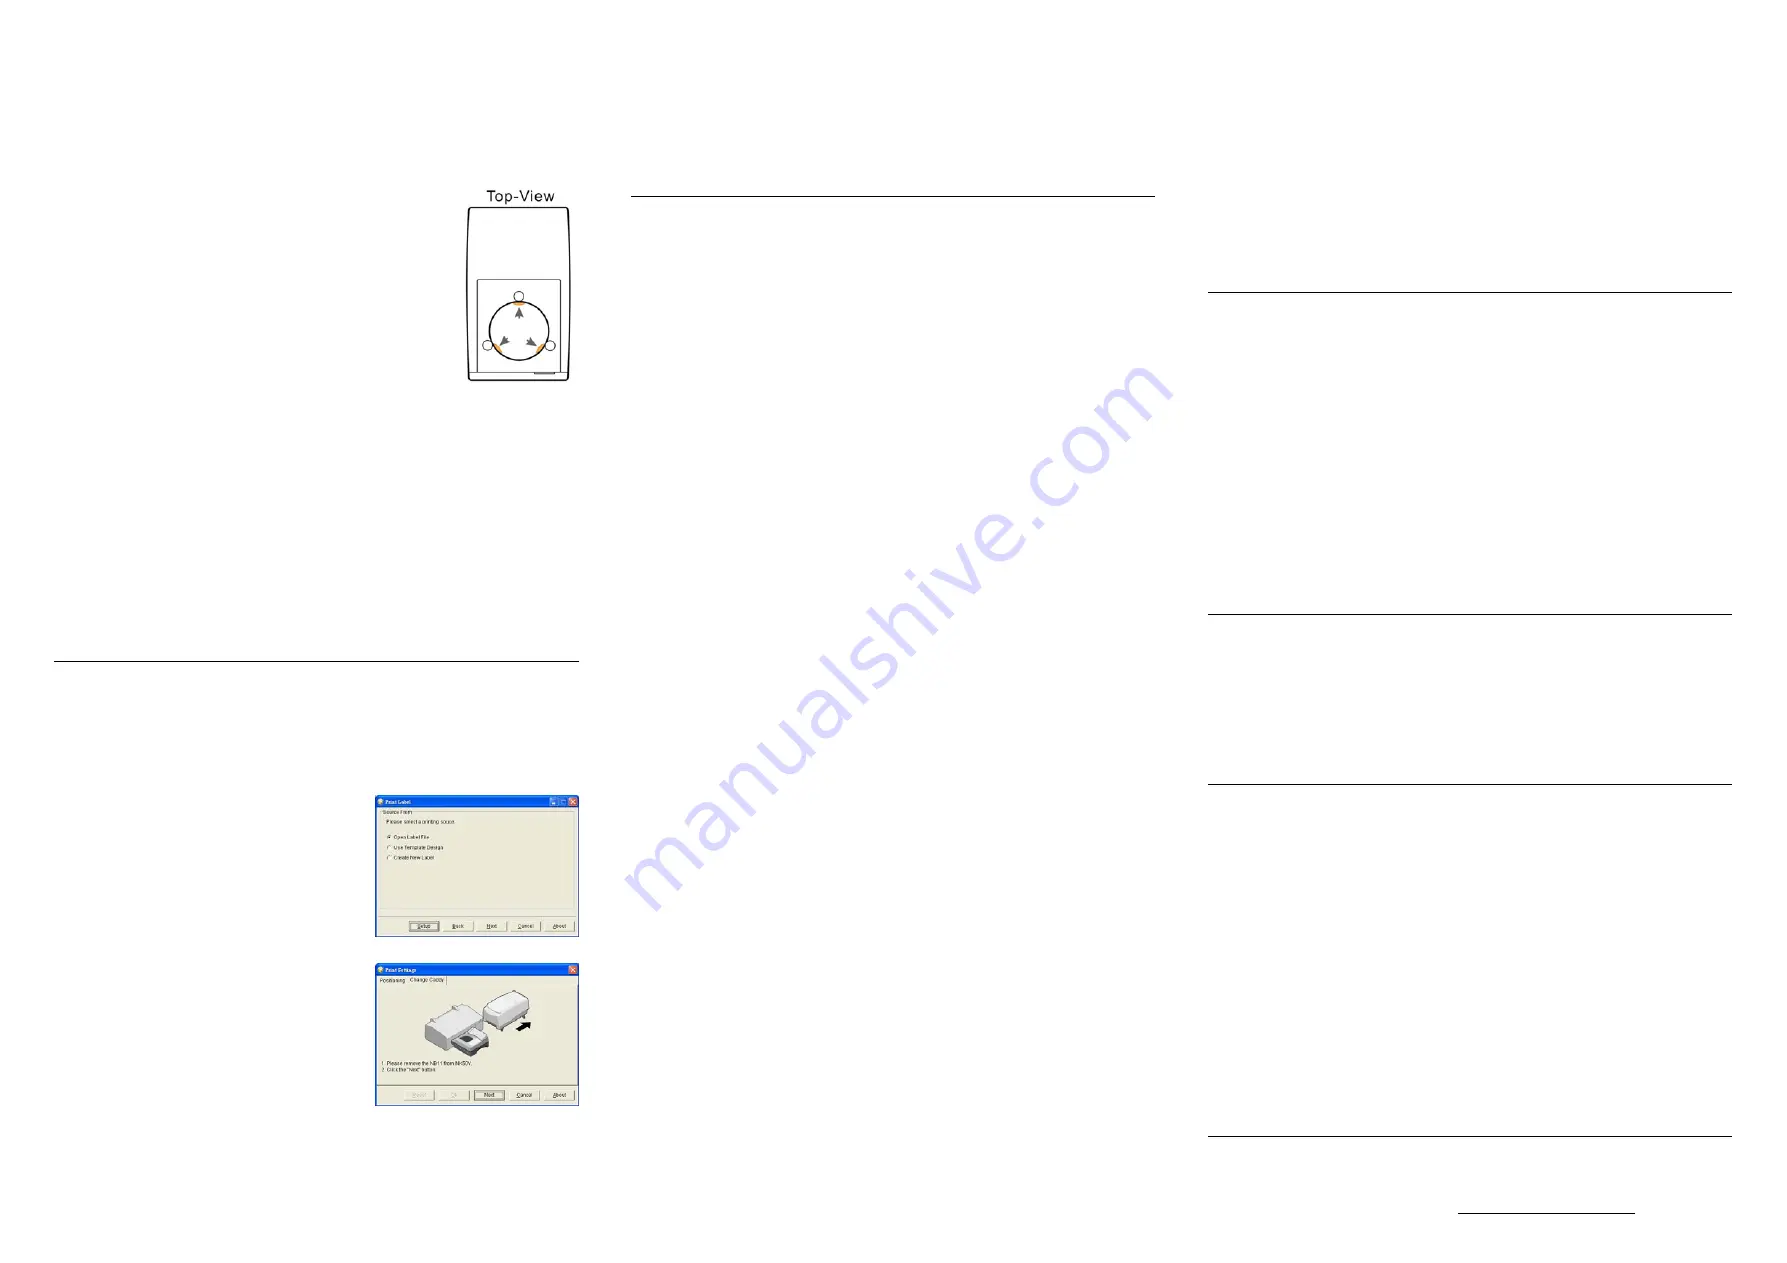
Load the Nimbie NB11 with ink-jet printable discs with the
printable side faced up.
Warning:
When the disc loader is empty, do not attempt to load many
discs at once.
First, carefully load only one disc into the disc loader and
assure it is firmly resting on the three wheels seen in the
illustration to the right. You may then gradually load
additional discs on top of the first disc, until the loader is full.
2)
Launch QQboxx Pro 3. The system may take up to one minute to detect NK50Y.
Patiently wait until the status shows ready.
Warning:
Before removing NK50Y from Epson printer, always close QQboxx Pro 3 software
to deactivate the NK50Y device.
3)
Before starting a disc publishing job, refer to the QQboxx Pro 3 manual to adjust
printing position.
4)
When NK50Y is Ready, refer to the QQboxx Pro 3 manual to execute a disc
publishing job. A disc publishing job shall include the following processes:
•
One disc will be loaded from the disc loader to the disc drive in the NB11;
•
After burning data is complete, the disc will be transferred from NB11 to NY50Y;
•
The NK50Y will start labeling the disc. The finished disc will exit from the Output
Ramp on the NK50Y.
A
PPENDIX
Replace Disc Caddy of NK50Y
The disc caddy will be worn out after a number of disc printings. When printing quality is
getting poor, please change the disc caddy.
A spare disc caddy shall come with your NK50Y. Or, contact your dealer to purchase
additional disc caddies.
Follow the steps below to reject the caddy from NK50Y for replacement:
1)
Double-Click the Print Label function on Main
Menu of QQboxx Pro 3 software.
2)
Click the Setup button to go to “Print Setting”.
3)
Click “Change Caddy”. Then, follow the
instructions on the screen to replace the disc
caddy. The processes shall include:
•
While keep the cables connected among all
devices, move NB11 away from NK50Y so
as to give a room to remove NK50Y off the
printer.
•
Hold NK50Y with both hands and tilt its LED
end upward to roughly 45 degrees. Then,
gently pull it outward off the printer.
Warning:
Do not click the Next button while NK50Y is
attached on Epson printer as it may
permanently damage the hardware.
•
Give NK50Y plenty of room in front of it for
the disc caddy to come out.
•
Gently pull the disc caddy out of NK50Y.
•
Insert a disc caddy into the slot where the old caddy previously came out. Push
the caddy into NK50Y until the end is reached.
•
Disconnect NK50Y from PC by disconnecting the USB cable, then, turn the
NK50Y off.
•
Wait for 15 seconds. Then, turn the NK50Y back on. Patiently wait until the
initialization is complete.
•
Re-attach the NK50Y on the Epson printer. Reconnect USB cable from NK50Y to
PC and wait until the software successfully detects the NK50Y.
•
Return the NB11 to its previously location, with its Output Ramp leans on NB11
Disc Bridge.
Now, try printing a few discs to make sure that replacement caddy is in place.
F
REQUENTLY
A
SKED
Q
UESTIONS
AND
T
ROUBLESHOOTING
Q: How to cancel the current printing job…
Before next disc is being loaded into NB11, go to QQboxx Pro 3 menu and cancel
the job. Wait until the last disc come out of NB11 and NK50Y.
Q: How to replace Epson printer cartridge and resume printing…
1)
Cancel the current printing job and close QQboxx Pro 3 software.
2)
Move NB11 away and remove NK50Y off the Epson printer.
3)
Refer to Epson printer manual to replace cartridge.
4)
Then, refer to “Attach NK50Y onto printer” section to re-attach NK50Y onto
Epson printer.
Q: QQboxx Pro 3 can’t detect or activate NK50Y …
•
Make sure Epson printer is ready (the LED indicator lights up steady-green).
•
Make sure NB11 is ready (the LED indicator lights up steady-green).
•
Make sure NK50Y is ready (the LED indicator lights up steady-green).
•
Make sure USB cables are correctly connected among NK50Y, NB11, Epson
printer and PC.
•
Remove NK50Y from Epson printer. Refer to Install Device Driver section to
make sure NK50Y and its device driver are successfully installed.
Q: Epson printer shows error on indicators or error status window…
•
Stop QQboxx Pro 3 software. Turn off Epson printer; wait for one minute and turn
it on.
•
Detach NK50Y from Epson printer. Test the printer itself to ensure proper
operation.
•
Refer to Epson printer manual for error message and troubleshooting tips.
Q: Disc caddy gets stuck between NK50Y and Epson printer…
Follow the steps below to get the disc caddy out of the system:
•
Unplug the USB cable, then turn off NK50Y and Epson printer.
•
Through the opening on NK50Y, try to move the disc caddy into NK50Y. Or, move
it into Epson printer.
•
Make sure the disc caddy is completely located inside either the NK50Y or Epson
printer, then detach NK50Y from Epson printer.
•
Place NK50Y on a flat surface. In case disc caddy is staying within NK50Y, push
disc caddy inwards with force all the way to the end, then turn on NK50Y to
have it reposition disc caddy during initialization.
•
In case disc caddy is staying within Epson printer, turn on the printer and gently
pull the caddy out of the printer. Refer to the Replace Disc Caddy section to re-
insert it back to NK50Y.
•
Re-attach NK50Y to Epson printer and set the system to ready.
Q: Discs does not slide out of the output ramp from NK50Y…
•
If the disc stays on the ramp, clean the ramp surface.
•
If the disc gets stuck in disc caddy, clean the caddy’s sliding surface or replace
with a new caddy. Additional caddies are available for purchasing.
Q: Jammed disc loader or it loads more than one disc at a time…
•
Some discs may be sticky and may stuck together. Loose the discs before
loading them into the loader.
•
Reduce the quantity of discs in the Loader. Try 15 to 20 discs first.
•
Use discs of the same brand and lot. Not to mix various disc brands.
•
Remove all discs from the loader. carefully load only one disc into the disc loader
and assure it is firmly resting on the three wheels. You may then gradually load
additional discs on top of the first disc, until the loader is full.
•
Try discs of different brands. Some discs are out-of-specification in diameter or
thickness, or even be distorted.
Q: Loud noise from NK50Y when disc caddy is moving…
•
Make sure NK50Y, NB11 and Epson printer are being well placed.
•
Make sure NK50Y is correctly attached onto Epson printer.
•
NK50Y may need hardware service. Contact technical support.
Q: NK50Y shows error by flashing-red indicator…
•
Remove all discs from the disc loader. Make sure no disc left in disc caddy.
•
Make sure that disc caddy doesn’t get stuck between NK50Y and Epson printer.
•
If the disc caddy stuck between NK50V and Epson printer, please refer to the
previous troubleshooting tips to reset the disc caddy.
•
Reinstall NK50Y (refer to the Hardware Installation section).
S
PECIFICATION
Disc Loader:
Use Nimbie NB11 as the burner and disc loader (100 disc
capacity when NB11 is lid-open and with extension rods attached)
Operation System:
Device driver support Windows XP, Vista and Windows 7
Supported Printer:
Epson’s 6-color, individual ink, photo-quality direct-on-disc
printers, including: Artisan 50, Stylus P50, T50, T60, R280, R285,
R290, EP-301, EP-302, PM-G860...
Disc Caddy:
Dedicated for NK50Y and Epson printer use. Additional disc caddy
as spare parts are available for purchasing.
Temperature:
42
o
F to 86
o
F (6
o
C to 30
o
C)
Humidity:
5% to 85%, no condensation
Certifications:
CE and FCC; power adapter is UL approved
Dimensions:
115 mm x 254 mm x 248 mm; 4-3/8" x 10" x 9-1/4"
Weight:
5 lbs; 2.2 kg
Power:
100 to 240VAC; 50 or 60 Hz.
O
PTIONS
Part Number:
Description
NK50Y2V-LOADER
Converter kit, turn NK50Y to NK50V for auto-print solution.
NK50-EP50-CADDY02
Disc caddy for NK50, twin pack
NK50-EP50-CADDY10
Disc caddy for NK50, ten pack
NK50Y-STANDSET
Stand set for NK50Y system
Nimbie NB11
Disc Loader and Burner
FCC R
EGULATIONS
This equipment has been tested and founded to comply with the limits for a Class A
digital device, pursuant to Part 15 of the FCC rules. These limits are designed to
provide reasonable protection against harmful interference in a residential installation.
This equipment generates, uses, and can radiate radio frequency energy. If this
equipment is not installed and used according to the instructions, it may cause
damaging to the radio communications. However, there is no guarantee that
interference will not occur in a particular installation. If this equipment does cause
harmful interference to radio or television reception, which can be determined by
turning the equipment off and on, the user is encouraged to correct the interference by
one or more of the following measures:
•
Reorient or relocate the receiving antenna.
•
Increase separation between equipment and receiver.
•
Connect equipment to an outlet on a circuit different from that to which the receiver
is located.
•
Consult your dealer or an experienced radio/TV technician.
Any changes or modifications to this device that are not expressly approved could void
the user's authority to operate this equipment.
Use of a shielded interface cable is required to comply with the Class A limits of Part 15
of FCC rules.
T
ECHNICAL
S
UPPORT
Visit Acronova Knowledge Base on website at http://www.acronova.com/kb/ and select
NK50Y to search for questions and solutions.
Always contact the local dealer or authorized service partner for first hand assistance.
For further technical support, e-mail us at [email protected].
UserGuide-NK50Y-110524.odt, Manual: v3.00, Part #: 712-NK5Y-9AC6-3
© Copyright 2011, Acronova Technology Inc. All rights reserved. Specifications are subject to change without notice.
Page: 2 of 2


