background image

©2017 ACP, Inc.

Cedar Rapids, IA 52404

For full product documentation visit:

www.acpsolutions.com

Part No. 20179916

Quick Start Reference Guide 

|


AXP & MXP High Speed Commercial Combination Oven

Connect Oven to Network:

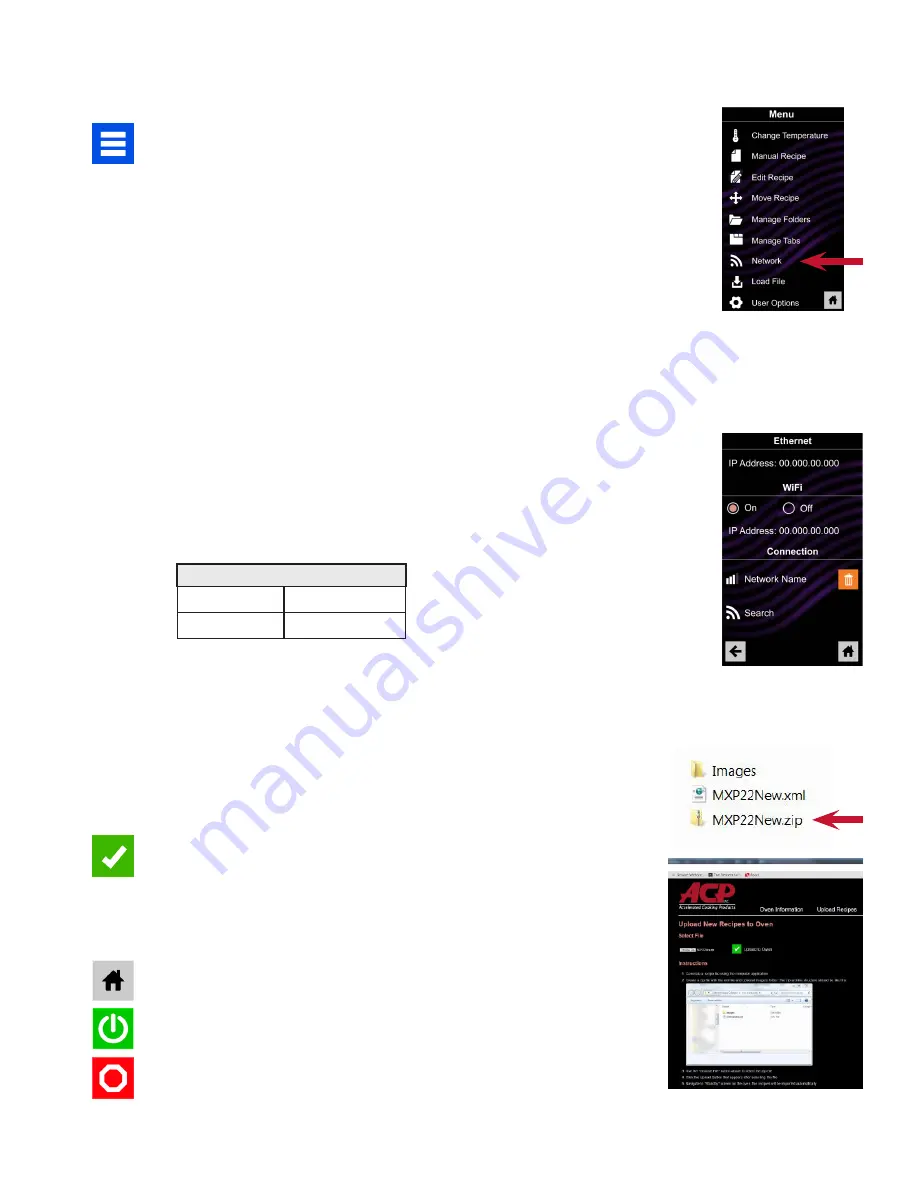
1.  Touch the blue menu icon at the bottom of the screen.
2.  Touch the “Network” option.
3. 

Connect to network using your choice of Ethernet or Wifi:

To connect via Wi-Fi:

•  Enable Wi-Fi capability by touching the “On” option.
• 

Select the desired Wi-Fi network and enter the network’s 

password. If the network does not immediately appear, touch 

“Search” to locate the Wi-Fi network from the oven. 

To connect via Ethernet:

•  Make sure the Ethernet cord is plugged into the back of the 

oven and wall jack. If necessary, use pliers to gently remove 

plastic plug from Ethernet port on right rear of oven. Insert 

Ethernet cable.

Connect Computer to Oven via Wi-Fi/Ethernet:

1.  Connect computer to same network and enter password.
2.  An IP address will appear on oven control once it has connected to 

the network. Open an internet browser window on computer and type 

in IP address exactly as it appears on oven screen.

3. 

Enter your log-in information:

4.  The oven and computer are now connected.

Transfer Recipe Information via Wi-Fi/Ethernet:

1.  After connecting the computer to the oven and logging in, click on the 

“Upload Recipes” tab in browser window.

Caution: 

 Uploading a new file will overwrite existing items on oven. To 

ensure items are not lost, first backup files by exporting to USB drive.

2. 

Upload zipped XML file (created by the ACP Remote Programming 

Interface) by following the instructions on web page, then touch the 

green check mark. 

3. 

Once the file has been fully uploaded, a message will appear that 

says 

“Upload Successful!”

 The recipes will be imported when the oven 

enters standby mode.”

4.  To cycle the oven through standby mode, touch the home icon then 

green power icon. Oven will begin cooling down. Touch the red 

stop icon to return to home screen. Menu items and settings will be 

uploaded and ready to use.

Log-in Information

Username

ACP_MXP

Password

Express

2

Summary of Contents for AXP

Page 1: ...or place food in oven and close door 2 Scroll to choose desired food item from the menu and touch the food item you wish to cook The cook cycle will begin and the screen will show the remaining amount of time left in the cook cycle Note If Preheat Warming is enabled customized user setting see page 6 and preheat temperature differs from default preheat temperature the control will interrupt cook c...

Page 2: ...wo frequently used temperatures will appear for quick selection Touch green check mark after inputting a temperature 4 For Stage 1 enter cooking time by touching time entry box Number pad will appear Enter the time up to 60 minutes per stage Touch green check mark icon Note To replace existing time entry first delete contents 5 Select desired microwave power by touching microwave power entry box C...

Page 3: ...cooking settings To delete the menu item touch the orange garbage can icon Touch the green check mark to confirm or touch the X to dismiss 4 Note Skip this step if you do not want to cook anything Open oven door and place food in the oven Touch green check mark icon to begin cooking with the revised menu item settings The display will return to manual input screen at the end of the cook cycle 5 To...

Page 4: ...mming Interface Note For more comprehensive instructions see ACP Remote Programming Interface instructions online 1 Insert flash drive into USB port on computer 2 Open ACP Remote Programming Interface 3 Select File then Open Navigate to flash drive select exported_mxp xml file and open Import Menu via USB Flash Drive 1 Touch the blue menu icon at the bottom of the screen 2 Scroll down and touch th...

Page 5: ...ess will appear on oven control once it has connected to the network Open an internet browser window on computer and type in IP address exactly as it appears on oven screen 3 Enter your log in information 4 The oven and computer are now connected Transfer Recipe Information via Wi Fi Ethernet 1 After connecting the computer to the oven and logging in click on the Upload Recipes tab in browser wind...

Page 6: ...orwegian Hindi Bengali English Chinese Mandarin Japanese Korean Russian German French Italian Polish Danish Greek Latin Swedish Portuguese Spanish Thai Lao Dutch Vietnamese Arabic Ukrainian Filipino Norwegian Hindi Bengali Temperature Scale Celsius Fahrenheit Celsius Fahrenheit Preheat Temperature 2000F 5200F 930C 2700C 520 F 270 C 270 C 520 F Keypad Activation 30 seconds 60 seconds 2 minutes 30 s...

Reviews: