


– 22 –
– 23 –
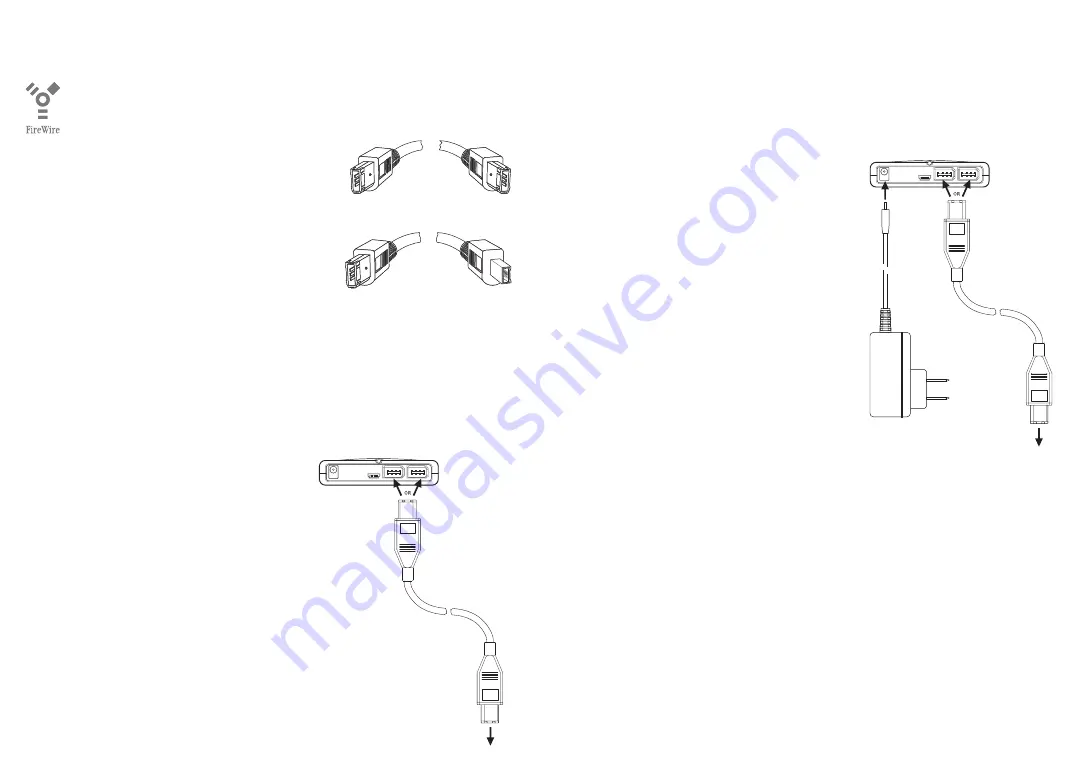
FW Option 2: Using the 6-pin to 6-pin
FireWire cable and the optional AC
adapter
You may want to use this option if you
have access to an AC outlet but you
don’t have your laptop’s AC adapter on
hand to power your computer and you
don’t want to use your laptop’s battery
power to also run the Drive.
1. Plug either end of the FireWire
cable into a 6-pin FireWire port on
your computer.
2. Plug the other end of the FireWire
cable into one of the FireWire
ports on your Ondago Drive. It
does not matter which FireWire
port you use.
3. Insert the small plug of the AC
adapter into the Drive’s Power
Port.
4. Plug the AC adapter into an AC outlet.
Once the connections are properly made, the Drive will
power up and the Power/Data Indicator will illuminate.
Proceed to “Mounting a FireWire-Connected Drive.”
Connecting the Drive
via FireWire
• FireWire plugs are shaped such that
they can only be inserted one way. Be
sure to insert the plugs properly or you
may damage the Drive.
• Your Ondago Drive has two FireWire
ports for daisy-chaining FireWire
devices. You can use either port to
connect the Drive to your computer.
FW Option 1: Using the 6-pin to 6-pin
FireWire cable
This is the recommended option for users with an available 6-pin
FireWire port on their computer. You get the convenience of
bus-powered operation with the fewest number of connections.
1. Plug either end of the FireWire
cable into a 6-pin FireWire port
on your computer.
2. Plug the other end of the FireWire cable
into one of the FireWire ports on your
Ondago Drive. It does not matter which
FireWire port you use.
Once the connections are properly made,
the Drive will power up and the Power/Data
Indicator will illuminate.
Proceed to “Mounting a FireWire-Connected
Drive.”
6-pin to 6-pin cable
6-pin to 4-pin cable
Summary of Contents for Ondago
Page 1: ...User s Guide ...


