


6
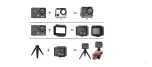
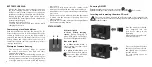
BaTTerY CHarGInG
• Charge the battery by connecting the camera to
the USB charging adapter or another powered
USB port (power bank, computer, etc.) using the
included or another good quality micro-USB cable.
• During charging the status light on the camera
will be RED. The status light will turn off when the
battery is fully charged.
• Charging takes up to 2 hours.
• You can record videos and take photos while
charging the battery.
Camera usage in cold conditions
Cold temperature can decrease the battery life. For
better using experience in cold conditions, keep the
camera in a warm place prior to use. If the camera is
turned off and kept in cold temperature for too long,
battery voltage and charge state may decrease to a
critical level and the camera may not turn on –please
recharge the battery.
Waterproof camera housing
• The waterproof housing helps to protect
the camera from water, dirt, sand and other
environmental hazards.
• Rubber seals in the camera housing protect your
camera in wet or underwater conditions. Keep the
housing’s rubber seal clean. A small particle of dirt
or foreign material can cause a leak and damage
your camera.
• After use in salty water, rinse the outside of the
waterproof housing with non-salty water and dry it.
• Warranty does not cover water damage resulted from
user’s errors.
• Touch screen controls will not work when the camera
is placed into the waterproof housing. Please use
physical buttons.
• Using the camera in the waterproof housing will cause
lower audio recording quality.
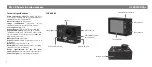
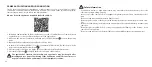
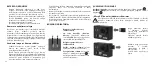
sTaTUs lIGHTs
a
B
red status light a
It shows battery charging
status:
During charging, it
glows RED, when the battery
is full, the LED light will be OFF.
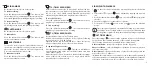
Blue status light B
In a video mode:
When a
video is being recorded, it will
constantly blink.
In a photo mode:
When you
press the shutter/select button
, the status light will blink
once after a photo is taken.
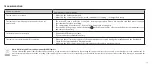
Powering on/oFF
To power on:
Press the power/mode button
once.
To power off:
press and hold the power/mode button
for 3 seconds.
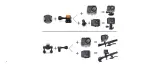
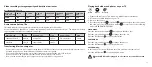
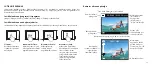
Inserting and removing the micro-sD card
The camera must be powered off before inserting or removing the card.
Please format the card in the settings menu when using it with the camera
for the first time.
Slide the memory card with
your fingernail into the
card slot as shown in the
illustration.
When fully inserted, the card
clicks into the place.
Place your fingernail against
the edge of the memory card
and lightly press it further
into the camera.
The card springs out to be
removed.
Summary of Contents for VR302
Page 1: ...1 Model VR302...
Page 2: ...2...
Page 3: ...3...
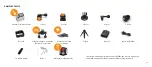
Page 65: ...65 1 2 3 4 5 mount micro USB CR2032...
Page 66: ...66 USB USB micro USB 2 A B A 3 micro SD...
Page 67: ...67 0000 9999 12MP 00 00 00 01 20 20 720p 200 micro SD micro SD micro SD card...
Page 69: ...69 3 1 7 2 15 4 24 8 0 5 1 2 3 4 5 10 15 20 30 60 3 5 10 30 60 TL Photo 1 2 o 3 II 4 5 Wi Fi i...
Page 73: ...73 micro SD USB Wi Fi Wi Fi WEEE WEEE...
Page 75: ...75 1 2 3 4 5 USB P CR2032...
Page 76: ...76 USB USB USB 2 A B A LED ON OFF 3 SD...
Page 77: ...77 0000 9999 12MP 00 00 00 01 20 20 720p 200 SD SD SD...
Page 83: ...83 SD USB Wi Fi Wi Fi WEEE WEEE...
Page 116: ...116 www acme eu...


