Electrocorder Model: CT-1A
2 of 3
When the Electrocorder is recording a flashing green light will
show. When it has completed recording, the green light will
fully extinguish and if an external 12V PSU is being used then
a steady red light will appear on the unit. Otherwise the red
(stopped) light will not light, so completion is signified by the
absence of a flashing green. The database contained within
Electrosoft will also advise that the unit has completed recording
and is ready to be collected. To download the recorded data
connect the Electrocorder to the PC serial port and click the
‘Read Setup’ icon. The recorded data is displayed for analysis.
This document is produced in conjunction with the Help file
contained in Electrosoft, which contains a detailed explanation
of all features and contains information, which should be studied
prior to using this product.
USB to RS232 Serial Converter
(for use only with RS232 models)
If you have purchased a USB to RS232 converter, you must
install the drivers. You can use the drivers shipped with the
program which may be in the USB sub-folder within the Program
Folder, normally C:\Program Files\Electrosoft\USB. You can
download them from the website www.electrocorder.com or use
the disk, if one came with the converter.
The following describes the XP installation, other operating
systems will vary slightly. When you plug the converter into the
PC, it will detect it and identify the new hardware as UC232R,
Windows will then ask to search for the drivers, choose “Yes, this
time only”, then on the next screen choose, “Install from a list
location” then specify the location of the drivers, possibly the USB
sub folder, in the installation folder, or wherever you saved the
files to when you downloaded from the internet.
When installed, make a note of the serial or COM port number
the converter has been assigned to and when you run Electrosoft,
select the appropriate serial port or COM port number.
SAFETY TIPS
Current input is labelled ‘Current Input’.
Prior to connection of the logger to any system:-
1. Electrically isolate the conductors to which you wish to
connect.
2. Current input sensor must only be used around fully insulated
conductors.
3. Connect the current sensor around the insulated current
carrying conductor, generally this is insulated live.
4. Should the sensor lead become scuffed and/or damaged
and the inner conductors become visible through the white
outer insulation, do not use the logger or sensor and get the
logger fully tested and inspected.
Feature Benefit
Unit is small and lightweight
Easy to install
Easy to use Windows software
Can be used by non-technical staff
Electrosoft contains internal database
Allows effective management of
distributed Electrocorders
True RMS voltage measurement
A true reading
Features & benefits of the CT-1A logger system
Phase
IEC
Aus/NZ US
Canadian
Colour Code
Colour Code
Colour Code
Color Code
L1 (A)
Brown
Red
Black
Red
L2 (B)
Black
White
Red
Black
L3 (C)
Grey
Blue
Blue
Blue
N (Neutral)
Blue
Black
White, grey
White
G
Yell/Green Yell/Green Green
Green
(Ground/Earth) Stripe
Stripe
Yell/Green
bare copper
Colour codes around the world
Inputs and Connections on Various Systems
Colour and
Single Phase
Single Phase
Single Phase
Input Terminal
(1-Wire)
(2-Wire)
(3-Wire)
Brown (A1)
X (L1)
X (L1)
X (L1)
Black (A2)
X (G/E)
X (L2)
Grey (A3)
X (L3)
L
N
E/G
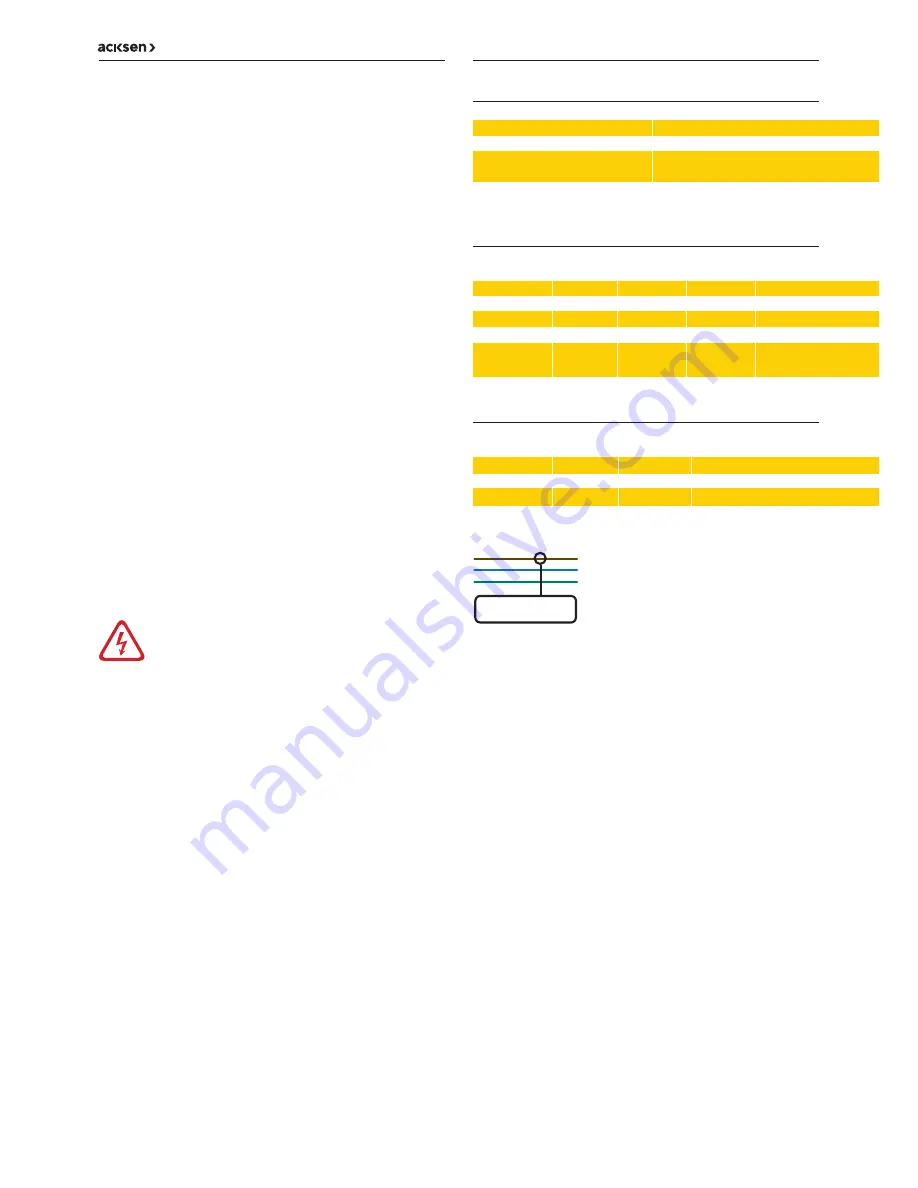
CT-1A
1Ø, Single Phase Systems
(logging current in ‘L1’)
Simply connect sensor A1 around the ‘L1 conductor’ and press
the start button.
1Ø, Single Phase 3 Wire Systems
(logging current in ‘L1’)
Connect sensor A1 around the ‘L1 conductor’,‘L2 conductor’ or
‘L3 conductor’ then press the start button.
1Ø, Power Measurement
(power in ‘L1’)
Connect sensor A1 around the ‘L1 conductor’ then press the
start button. When logging is complete, upload the data to a PC
using Electrosoft. Now click on the Power Tab and input the
nominal voltage on the conductors. The graphs shown represent
the power.


