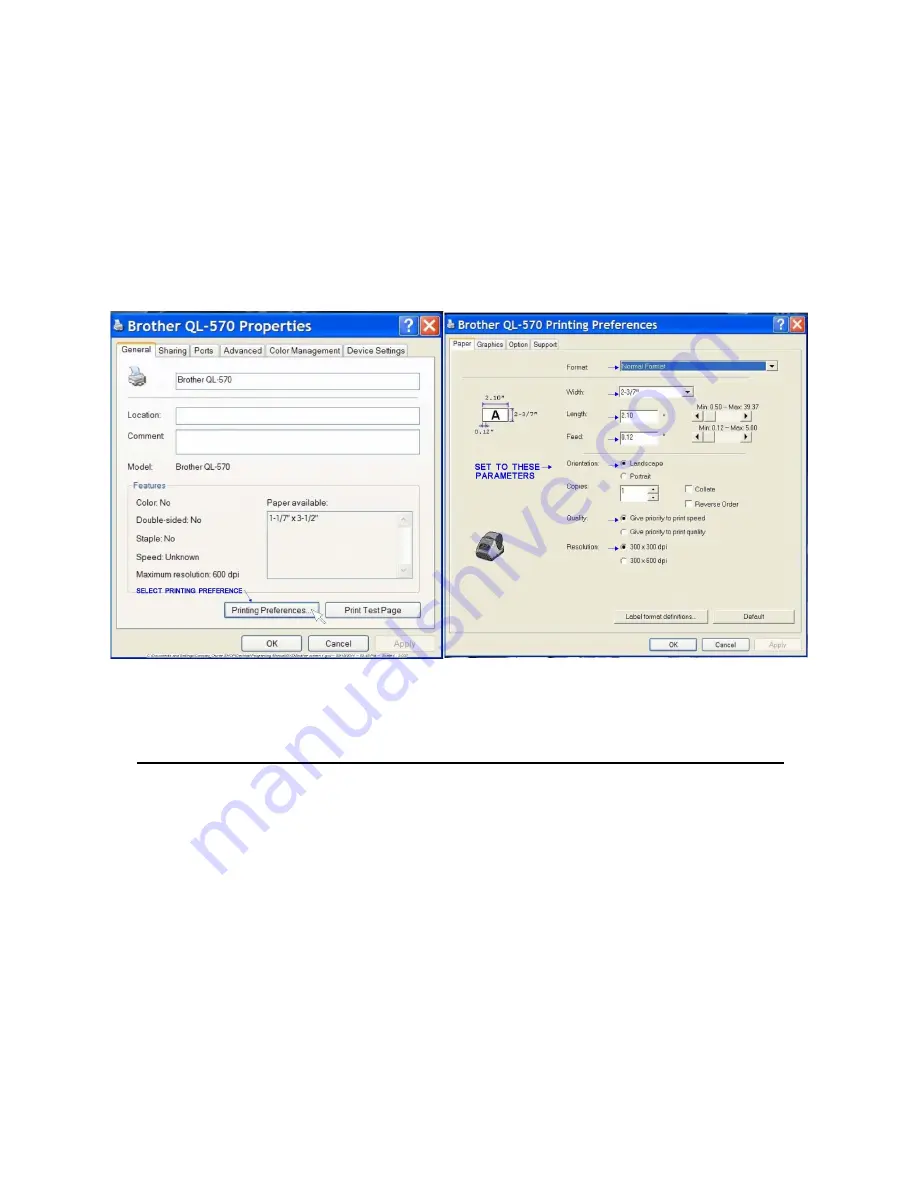
Install Brother QL
-
700 Printer
1.) Install the Brother QL
-
700 printer follow the manufacturers installation
instructions.
2.) Load the DK
-
2606 label tape in the printer.
3.) Open the “Start” menu, select control panel.
4.) Open “Printers and Faxes” in control panel.
5.) Right click on Brother QL
-
700, then click on “properties”.
6.) On properties screen click on
“Printing Preferences” 7.) Set Parameters as shown below.
SOFTWARE INSTALLATION
Windows 7, 8, 10
1.) Do not plug in the programming dongle until all steps have been completed.
2.) Place E
-
04 software Ver 3.0 CD in CD drive
3.) Open “Start Menu” click on “My Computer” and open the CD drive.
4.) Click on the “ACK E
-
04 ELT Programmer (VAR)” application and follow the
on screen installation instructions.
5.) Anytime a warning appears on screen that the application is unverified and
asks if you want to continue answer yes and continue.
6.) After the software has loaded plug the dongle in and the computer will say
“Found New Hardware” the driver will begin to load and may take a couple of
minutes to complete when done the software and driver have been loaded and
the system is ready for programming.
Windows XP Service Pack 3
Follow steps 1 through 5 above. After software installation remove the CD and
plugin the dongle. A dialog box should appear saying “Found New Hardware”.
It should say if you have a installation CD insert it now. Insert the CD and the
system should load the driver. If the driver fails to load or you have Service
Pack 1 or 2 open file XP Driver Installation on the CD and follow the installation
instructions.
3


