background image

10

3. Push the [MENU] key on your remote control or 
on the front panel of the player.

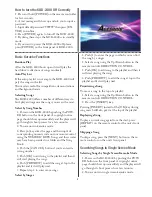
4. You will see a text-menu: 

5. Navigate through the menus using the DIREC-
TION CONTROL on your remote. Push [RE-
TURN] on the DIRECTION CONTROL to 
return to the last menu.

In single-screen play mode you can only use the re-
mote controller to access all the below functions. 
Press [MENU] on the remote controller to display its 
text menu in single-screen play mode.

Th

  ere is a number for each item shown on the TV 

screen. You can select the corresponding number to 
enter a category or press [  


] directly on the 

remote controller to move the cursor to the item you 
choose then press [ENTER] to access.

ARTIST:

     Press [1] directly to enter “Artist” sub-menu or 
[    ] to select “Artist” then press [ENTER] to enter 
its menu and then you can select an artist according to 
the artist’s genre or select option “8” in the sub-menu 
to show all artists.

Tips: You can also press [ARTIST] on the remote 
controller to enter the “ARTIST” menu directly too. 

SONG TITLE:
     

Press [   ,  ] to select the “Song Title” then press 

[ENTER] or [2] directly to enter “Song Title” menu. 

Input the fi rst letter of the song title to search a song. 
For example: Song title is “Pretty Girl”. You can input 
the fi rst letter of the song title “P”, then all songs 
starting with the letter “P” will be listed on the screen 
automatically.
Tip: You can also press [TITLE] on remote controller 
to enter “Song Title” menu directly too. 

GENRE:
     

Press [   ,   ] to select “Genre” then press [EN-

TER] or [3] directly to enter its menu. 

Tip: You can also press [GENRE] on the remote con-
troller to enter the “Genre” menu directly too.

LANGUAGE:

     Press [  ,  ] to select “Language” , then press 
[ENTER] or [5] directly to enter then search a song 
by language.

 Tip: You can also press [LANGUAGE] on the re-
mote controller to enter the “Language” menu directly 
too.

NEW RELEASES

:

     Press [  ,   ] to select “New Releases” then press 
[ENTER] or [6] directly to enter then select a song 
from the latest updated song list.

Tips: Press [RETURN] to return to the previous 
menu; press [MENU] again to exit.

    Make sure your karaoke mode is in Dual Screen 
Karaoke Mode to access all functions (See P. 15 for 
more information). 

1. Power on the KOD-2400 by pushing the POW-
ER button on the front panel. A copyright notice 
page should show up immeditaly and the player will 
go through its boot process for a few minutes. Th

  en 

the player will show the Main Page.

2. You are now in dual screen karaoke mode. If you 
are in the single screen karaoke mode, please see   
P.15 for how to change to dual screen mode.

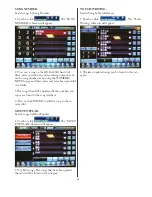
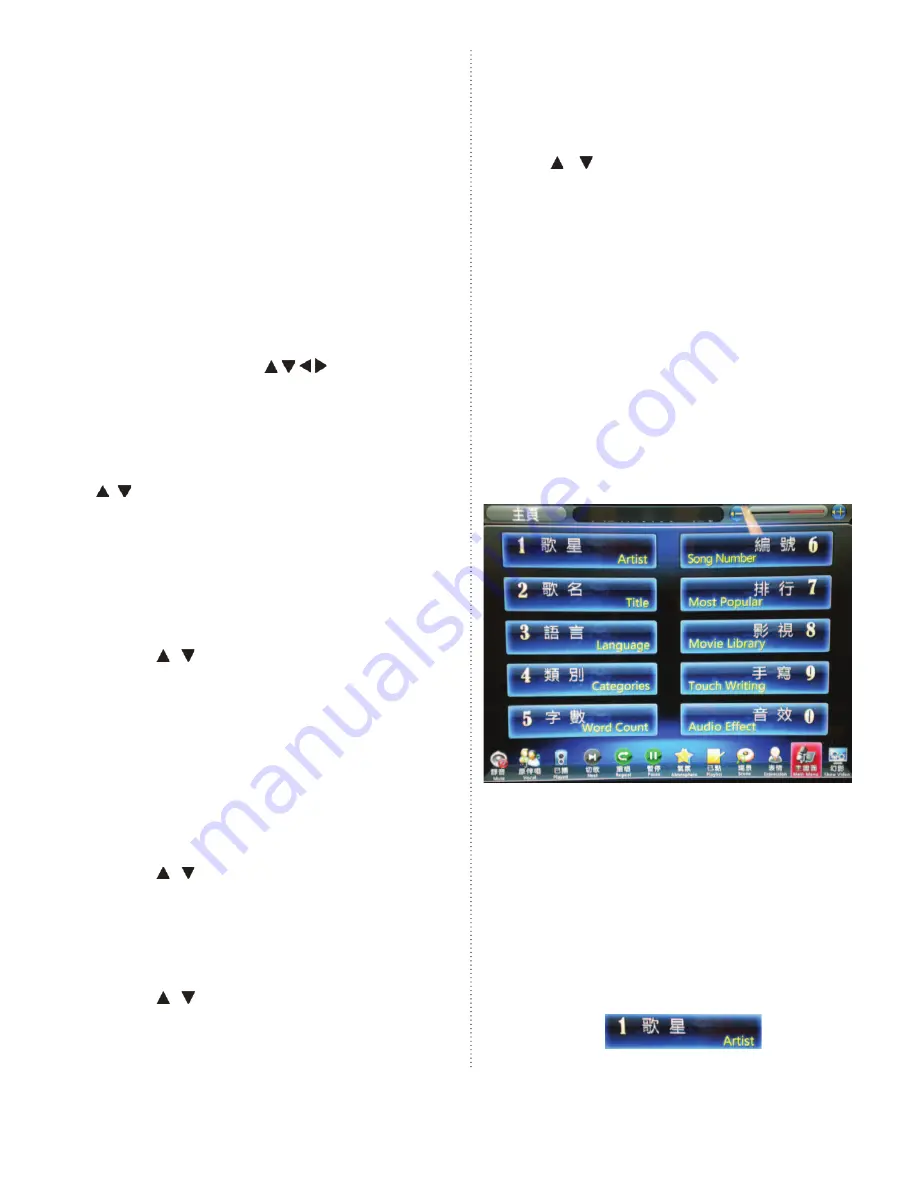
3. Touch the          icon on your touch screen or use 
your mouse to click the          icon.

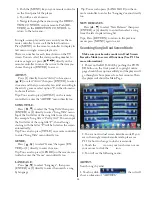
4. You will see the following menu: 

ARTIST:

Search songs by artist

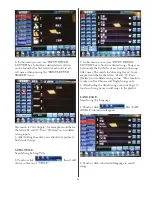
1. Touch or click                                         then it will 
show a submenu of  “ARTISTS”.

Searching Song in Dual Screen Mode

Summary of Contents for KOD-2400

Page 1: ...nt air flow for cooling First Things First Before using your KOD 2400 there are a few things you should do and know Check to see that your local power outlets supply the correct voltage for the AC ada...

Page 2: ...plug not the cord to disconnect the player from its wall outlet Never handle the power cord with wet hands Replace the cord if it is damaged or if wires are exposed and check it every few months for...

Page 3: ...t generally found in the U S Canada most countries in South America Japan South Korea and the Philip pines The KOD 2400 also supports the PAL format which is used in many parts of Europe Asia and Sout...

Page 4: ...h control volume 12 13 MIC 1 2 Microphones input jacks 14 TRABLE This switch control high sound 15 BASS This switch control bass sound vious menu or last step Back Panel Functions and Operation 1 MOUS...

Page 5: ...e TV 12 PgUp PgDn Press this button to advance or return to previ ous pages 13 SETUP Press this button to set the KOD 2400 s user pref erences Setup Password is 4652 14 VOCAL Press this button to isol...

Page 6: ...t compatibility format flash in FAT32 If you have problems formatting in FAT32 please refer to your computer s operating manual A V Monitor Touch Screen Connections Ensure that your KOD 2400 is turned...

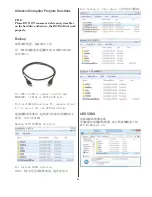
Page 7: ...ard Disks and run KTVManager software to manage KOD 2400 song library Plug in KOD 2400 s SATA 1 2 port and PC s USB port and then turn on the KOD 2400 Your PC will see one of the two Hard Disks in KOD...

Page 8: ...audio components refer to the diagram below to connect the player to the power cord and an appropriate electrical outlet Please note that the KOD 2400 uses 100 V to 120 V at 50 60 Hz It is compatible...

Page 9: ...l s DIRECTION CONTROL 3 Push OK to add song to the playlist and then it will start playing the songs 4 Push PRIORITY to add the song at top in the playlist and it it will play next Prioritizing a Song...

Page 10: ...ting with the letter P will be listed on the screen automatically Tip You can also press TITLE on remote controller to enter Song Title menu directly too GENRE Press to select Genre then press EN TER...

Page 11: ...uch or click then it will show a submenu of TITLE 2 In this menu you can use INPUT INITIAL LETTER box to find your desired songs Songs can be found by the first letter of each word in the song title s...

Page 12: ...der 3 The song title will be displayed if the numbers you input are found in the song database 4 Press or click ENTER to add the song to the re served list MOST POPULAR Search songs by Most Popular 1...

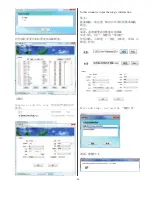
Page 13: ...properly Backup 86 2 6 7 6 7 8VH 86 WR 86 WR FRQQHFW RXU 3 DQG 2 V 6 7 RU 6 7 86 SRUW 7XUQ RQ 2 DQG RXU 3 VXSSRVH GULYHU LV RQH RI WKH WZR 7 DUG LVNV 79 6 67 0 DFNXS 79 6 67 0 GLUHFWRU 1RW LQFOXGH 621...

Page 14: ...14 6XSSRVH ZH DGG WKLV VRQJ In this windows input the song s information IWHU DGG VRQJV RX QHHG GR 2...

Page 15: ...iew the player Distorted Sound Check connections on the KOD 2400 and audio equipment or television Check input and volume settings on the audio equipment or television Distorted Picture Check connecti...

Page 16: ...more of the following measures Reorienting and or relocating the receiving antennae Increasing the distance between the radio TV equipment and the KOD 2400 Connecting the radio TV equipment to an outl...

Page 17: ...n the product label and in this User Manual If you are not sure of the type of power supplied to your home consult your product dealer or local utility 13 An outside antenna system should not be locat...

Page 18: ...OD 2400 HDD to your computer 6 How many songs can I record to my KOD 2400 HDD This depends entirely on the HDD capacity and the file format s in which you choose to save your songs 7 No Sound Check if...

Page 19: ...208 U S A 2012 Acesonic USA Inc All rights reserved KOD 2400 Karaoke On Demand Jukebox New Songs Download Account Register Purchase of KOD 2400 you can register 6 months free account for downloading A...

Reviews:

Related manuals for KOD-2400