background image

 1 Getting to know your TravelMate

30

Hard Disk Password protects your data by preventing 
unauthorized access to your hard disk.  Even if the hard disk is 
removed from the computer and moved to another computer, it 
cannot be accessed without the Hard Disk Password.

Important! 

 Do not forget your Setup and Hard Disk Password!  If 

you forget your password, please get in touch with your dealer or 
an authorized service center.
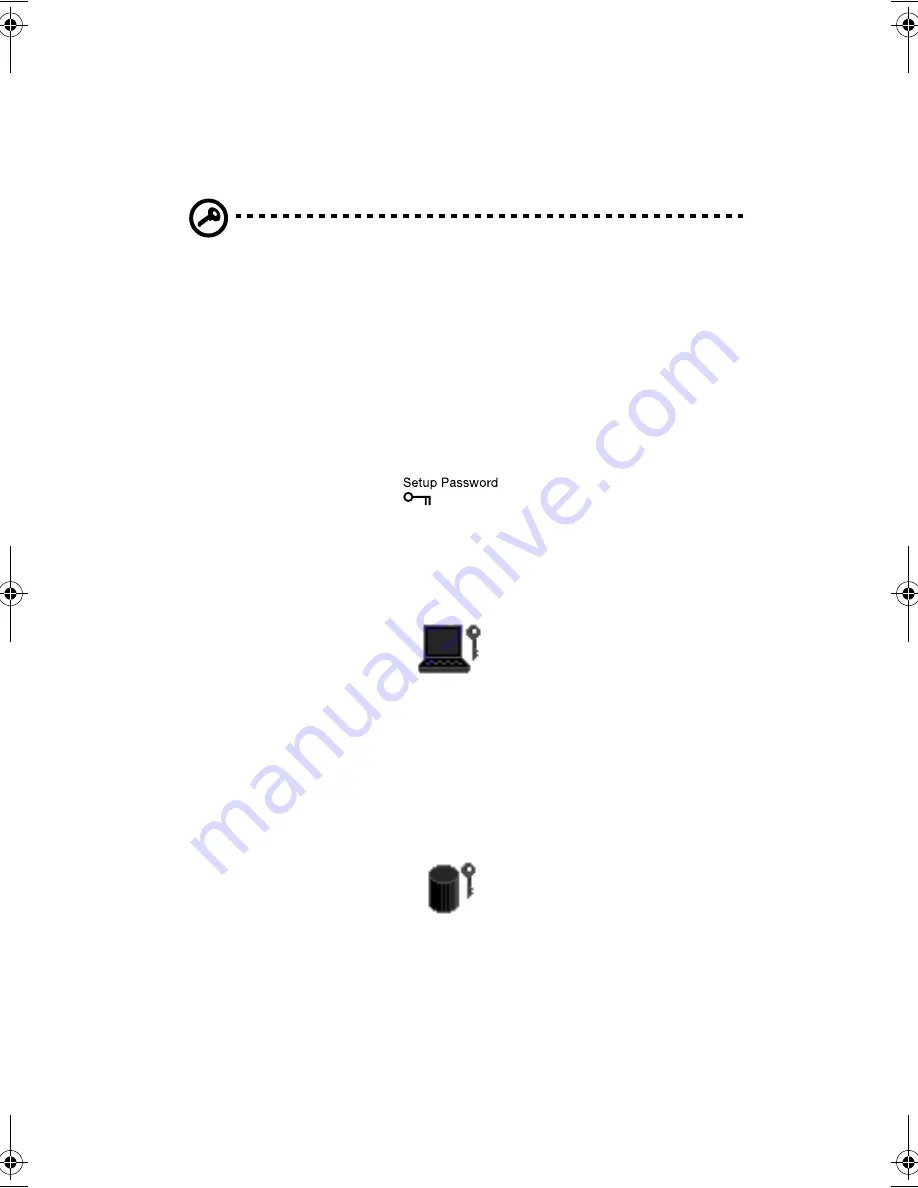
Entering passwords

When a password is set, a password prompt appears in the left-hand 
corner of the display screen.

When the Setup Password is set, the following prompt appears 
when you press 

F2

 to enter the BIOS Utility at boot-up.

Type the Setup Password and press 

Enter

 to access the BIOS Utility.

When the Power-on Password is set, the following prompt appears 
at boot-up.

Type the Power-on Password (a 

.

 symbol appears for each 

character you type) and press 

Enter

 to use the computer.   If you 

enter the password incorrectly, an 

x

 symbol appears.  Try again 

and press 

Enter

.

When the Hard Disk Password is set, the following prompt appears 
at boot-up.

Type the Hard Disk Password (a 

.

 symbol appears for each 

character you type) and press 

Enter

 to use the computer.    If you 

enter the password incorrectly, an 

x

 symbol appears.  Try again 

and press 

Enter

.

210-e.book  Page 30  Wednesday, February 7, 2001  8:55 AM

Summary of Contents for TravelMate 210 series

Page 1: ...TravelMate 210 series User s guide...

Page 2: ...nce concerning your unit should include the serial number model number and purchase information No part of this publication may be reproduced stored in a retrieval system or transmitted in any form or...

Page 3: ...vides clear and concise information about the computer so read it thoroughly If you ever need to print out a copy this User s guide is also available in PDF Portable Document Format Follow these steps...

Page 4: ...then click on OK Use the power switch Note You can also use the power switch to perform power management functions See Power management on page 23 Use the customized functions for power management Yo...

Page 5: ...ect the computer to heavy shock and vibration Do not expose the computer to dust and dirt Never place objects on top of the computer to avoid damaging the computer Do not slam the computer display whe...

Page 6: ...ocal regulations Recycle if at all possible Cleaning and servicing When cleaning the computer follow these steps 1 Power off the computer and remove the battery pack 2 Disconnect the AC adapter 3 Use...

Page 7: ...drive 20 Using software 21 Audio 22 Adjusting the volume 22 Power management 23 Moving around with your TravelMate 24 Disconnecting from the desktop 24 Moving around 24 Taking the computer home 25 Tra...

Page 8: ...omputer 43 Frequently asked questions 45 Troubleshooting tips 49 Using PC Doctor 49 Error messages 50 Requesting service 52 International Traveler s Warranty ITW 52 Before you call 52 Appendix A Speci...

Page 9: ...1 Getting to know your TravelMate...

Page 10: ...er combines high performance versatility power management features and multimedia capabilities with a unique style and ergonomic design Work with unmatched productivity and reliability with your new p...

Page 11: ...een Also called LCD liquid crystal display displays computer output 2 Touchpad Touch sensitive pointing device which functions like a computer mouse 3 Floppy activity indicator LED light emitting diod...

Page 12: ...e computer 8 Keyboard Inputs data into your computer 9 Status indicators LEDs that turn on and off to show the status of the computer and its functions and components Item Description 1 Security keylo...

Page 13: ...ono stereo condenser microphone 8 Volume control Controls the volume of the speakers 9 Video capture kit slot Accepts the video capture kit option on the left side of the computer Item Description 1 V...

Page 14: ...computer is turned off See page 46 for more detail 7 Power jack Connects to an AC adapter Item Description 1 PS 2 port Connects to any PS 2 compatible device e g PS 2 keyboard mouse keypad 2 Serial po...

Page 15: ...0x1024 resolution 6 Modem jack Connects to a phone line Item Description 1 Memory compartment Houses the computer s main memory 2 Hard disk anti shock protection Protects your hard disk against shocks...

Page 16: ...ia drive for removal or swapping 5 AcerMedia bay Houses an AcerMedia drive module 6 Battery bay Houses the computer s battery pack 7 Battery release latch Unlatches the battery to remove the battery p...

Page 17: ...lay LCD displaying 32 bit true color at 800x600 Super Video Graphic Array SVGA or 1024x768 eXtended Graphics Array XGA resolution 3D capabilities Simultaneous LCD and CRT display support Supports othe...

Page 18: ...centric design and ergonomics All in one design CD ROM or DVD ROM floppy drive hard disk drive Sleek smooth and stylish design Full sized keyboard Ergonomically centered touchpad pointing device Expan...

Page 19: ...cover is closed Icon Function Description Power Lights when the computer is on Sleep Lights when the computer enters Standby mode and blinks when it enters into or resumes from hibernation mode Media...

Page 20: ...is on all alphabetic characters typed are in uppercase Num Lock Fn F11 When Num Lock is on the embedded keypad is in numeric mode The keys function as a calculator complete with the arithmetic operat...

Page 21: ...nal keyboard or keypad is connected to the computer the Num Lock feature automatically shifts from the internal keyboard to the external keyboard or keypad Desired access Num lock on Num lock off Numb...

Page 22: ...er s controls like screen brightness volume output and the BIOS Utility Key Description Windows logo key Start button Combinations with this key perform shortcut functions Below are a few examples Tab...

Page 23: ...Toggle Switches the power management scheme used by the computer function available if supported by operating system See Power management on page 23 Fn F4 Sleep Puts the computer in Sleep mode See Po...

Page 24: ...ernational To verify the keyboard type 1 Click on Start Settings Control Panel 2 Double click on Keyboard 3 Click on the Language tab Fn F7 Touchpad Toggle Turns the internal touchpad on and off Fn F8...

Page 25: ...ro symbol Some fonts and software do not support the Euro symbol Please refer to http www microsoft com typography faq faq12 htm for more information Launch Keys Located at the top of the keyboard are...

Page 26: ...If you are using an external PS 2 mouse the touchpad is automatically disabled Touchpad basics The following items teach you how to use the touchpad Move your finger across the touchpad to move the cu...

Page 27: ...iveness Function Left button Right button Center buttons Tap Execute Click twice quickly Tap twice at the same speed as double clicking a mouse button Select Click once Tap once Drag Click and hold th...

Page 28: ...he answer to your storage needs AcerMedia drive The AcerMedia drive bay accepts a wide variety of media drive modules for use with your computer Drive modules available include CD ROM drive DVD ROM dr...

Page 29: ...e times including the first time after which the last region code set will remain permanent Recovering your hard disk does not reset the number of times the region code has been set Refer to the table...

Page 30: ...kers are easy to access There are audio ports on the left panel of the computer See Left view on page 4 for more information on external audio devices Adjusting the volume Adjusting the volume on the...

Page 31: ...orts and video memory If no activity is detected for a period of time called an inactivity timeout the computer stops some or all of these devices in order to conserve energy This computer employs a p...

Page 32: ...Disconnect the keyboard pointing device printer external monitor and other external devices 8 Disconnect the Kensington lock if you are using one to secure the computer Moving around when you are just...

Page 33: ...ing to long meetings If your meeting will last longer than 2 5 hours or if your battery is not fully charged you may want to bring the AC adapter with you to plug in your computer in the meeting room...

Page 34: ...the trunk of the car to avoid exposing the computer to excessive heat Changes in temperature and humidity can cause condensation Allow the computer to return to room temperature and inspect the scree...

Page 35: ...battery pack s Additional printer driver files if you plan to use another printer AcerMedia drive module s Special considerations In addition to the guidelines for taking the computer home follow thes...

Page 36: ...s Warranty passport Special considerations Follow the same special considerations as when traveling with the computer In addition these tips are useful when traveling internationally When traveling i...

Page 37: ...as a table or locked drawer handle Insert the lock into the notch and turn the key to secure the lock Using passwords Three password types protect your computer from unauthorized access Setting these...

Page 38: ...screen When the Setup Password is set the following prompt appears when you press F2 to enter the BIOS Utility at boot up Type the Setup Password and press Enter to access the BIOS Utility When the Po...

Page 39: ...three tries the following message or symbol appears Slide and hold the power switch for four seconds to shut down the computer Then turn on the computer again and try again If you fail to enter the H...

Page 40: ...1 Getting to know your TravelMate 32...

Page 41: ...2 Customizing my computer...

Page 42: ...basics of your TravelMate computer let s get acquainted with the advanced features of your computer In this chapter you will learn how to add options upgrade components for better performance and cust...

Page 43: ...erMedia drive bay release latch a then pull out the drive module from the AcerMedia drive bay b 5 Insert a drive module into the AcerMedia drive bay The bay release latch locks it in place 6 Turn the...

Page 44: ...structions Universal Serial Bus The Universal Serial Bus USB port is a high speed serial bus which allows you to connect and daisy chain USB peripherals without taking up precious system resources You...

Page 45: ...EG in the form of a ZV PC card Note Refer to your card s manual for details on how to install and use the card and its functions Inserting a PC Card Insert the card into the slot and make the proper c...

Page 46: ...rformance Note Contact your authorized dealer if you decide to perform a key component upgrade Memory upgrade Memory is expandable to 512 MB employing 64 128 256 MB 64 bit industry standard soDIMMs Sm...

Page 47: ...ps to install memory 1 Turn off the computer unplug the AC adapter if connected and remove the battery pack Then turn the computer over to access its base 2 Remove the screw from the memory cover then...

Page 48: ...nsert the memory module diagonally into the slot then gently press it down until it clicks into place 4 Replace the memory cover and secure it with the screw The computer automatically detects and rec...

Page 49: ...To start the Notebook Manager press Fn F2 or follow these steps 1 Click on Start Programs then Notebook Manager 2 Select the Notebook Manager application to run the program See your online guide for...

Page 50: ...put system Your computer is already properly configured and optimized and you do not need to run this utility However if you encounter configuration problems you may need to run it To activate the BIO...

Page 51: ...3 Troubleshooting my computer...

Page 52: ...system problems Read it before calling a technician if a problem occurs Solutions to more serious problems require opening up the computer Do not attempt to open the computer by yourself Contact your...

Page 53: ...s any key or tap on the touchpad to resume Is a non bootable non system diskette in the floppy drive Remove or replace it with a system diskette and press Ctrl Alt Del to restart the system The operat...

Page 54: ...trol speaker icon on the taskbar If it is crossed out click on the icon and deselect the Mute option The speakers may be turned off Press Fn F8 to turn the speakers on this hot key also turns the spea...

Page 55: ...only one PS 2 port on the computer To connect two PS 2 type devices to the computer you need to use an optional PS 2 Y bridge connector The printer does not work Check the following Make sure that the...

Page 56: ...Manager requires needs to be contiguous To solve this problem use tools such as Disk Defragmenter Windows to compact these free disk spaces Then run Sleep Manager again to create the file Disk compres...

Page 57: ...i e PC Cards external mouse 2 Open System Properties to check and make sure that the components you diagnose are enabled To open the System Properties window a Click on Start Settings Control Panel b...

Page 58: ...ntroller Present Contact your dealer or an authorized service center Diskette Drive Error Contact your dealer or an authorized service center Diskette Drive Type Mismatch Press F2 during POST to enter...

Page 59: ...exit and reconfigure the computer Non system disk or disk error Replace and strike any key when ready Insert a system bootable diskette into the floppy drive A then press Enter to reboot Pointing Dev...

Page 60: ...nside the front cover of the ITW passport If the country you are traveling in does not have an Acer authorized ITW service site you can still get in contact with our offices worldwide There are three...

Page 61: ...ou haven t registered your notebook computer you will be required to register during your first call to Acer You are required to provide the following information Name ________________________________...

Page 62: ...3 Troubleshooting my computer 54...

Page 63: ...Appendix A Specifications...

Page 64: ...This appendix lists the general specifications of your computer...

Page 65: ...ansistor TFT liquid crystal display LCD displaying 32 bit true color at 800x600 Super Video Graphic Array SVGA or 1024x768 eXtended Graphics Array XGA resolution 2X AGP bus with 3D acceleration 3D cap...

Page 66: ...ne audio line in jack One microphone in jack Two USB ports One 9 pin RS 232 serial port UART16550 Weight and dimensions 2 8 kg 6 2 lbs for 12 1 TFT model with battery and CD ROM drive 310 W x 255 D x...

Page 67: ...ns 64 128 256 MB memory upgrade module PS 2 Y bridge cable Additional AC adapter and battery pack USB video capture kit External numeric keypad External battery charger InviLink 802 11b wireless LAN P...

Page 68: ...Appendix A Specifications 60...

Page 69: ...Appendix B Notices...

Page 70: ...This appendix lists the general notices of your computer...

Page 71: ...ration between the device and receiver Connect the device into an outlet on a circuit different from that to which the receiver is connected Consult the dealer or an experienced radio television techn...

Page 72: ...a complaint with the FCC Your telephone company may make changes in its facilities equipment operations or procedures that could affect the proper functioning of your equipment If they do you will be...

Page 73: ...is product make sure that the total ampere rating of the equipment plugged into the extension cord does not exceed the extension cord ampere rating Also make sure that the total rating of all products...

Page 74: ...D ROM or DVD ROM drive used with this computer is a laser product The CD ROM or DVD ROM drive s classification label shown below is located on the drive CLASS 1 LASER PRODUCT CAUTION INVISIBLE LASER R...

Page 75: ...d til fabrikantens instruksjoner VARNING Explosionsfara vid felaktigt batteribyte Anv nd samma batterityp eller en ekvivalent typ som rekommenderas av apparattillverkaren Kassera anv nt batteri enligt...

Page 76: ...sted by NSTL using the YMark2000 test and has been found to meet NSTL s standards for Year 2000 hardware compliance For more details check the Acer Year 2000 Resource Center Web site http global acer...

Page 77: ...69 Index 0 1 1 1 1 2 340 4 0 0 0 0 5...

Page 78: ...70 1 1 1 1 6 2 2 2 2 7 3 3 3 3 6 4 4 4 4 8 8 3 9 6 5 5 5 5 1 8 7 7 7 7 6 8 8 8 8 6 6 9 9 9 9...

Page 79: ...71 3 4 4...

Reviews: