background image

Using Your Gateway Flat-Panel Monitor

6

Adjusting monitor settings

Use the monitor controls (located on the monitor itself) and computer controls (accessible through 
Windows) to adjust the display image. For more information about computer controls, see 

“Changing Windows screen settings” on page 10

.

Using the EzTouch menu buttons

This monitor features an on-screen display (OSD) and EzTouch menu buttons that let you adjust 
contrast, brightness, and other settings for the monitor. The monitor saves changes you make to 
the settings, even if you turn off the monitor.
Your monitor has two levels of menus, and the functionality of the touch buttons depends on the 
menu that is currently open:

The shortcut menu lets you quickly change some of the most commonly accessed settings.

The main menu lets you precisely adjust all levels of settings.

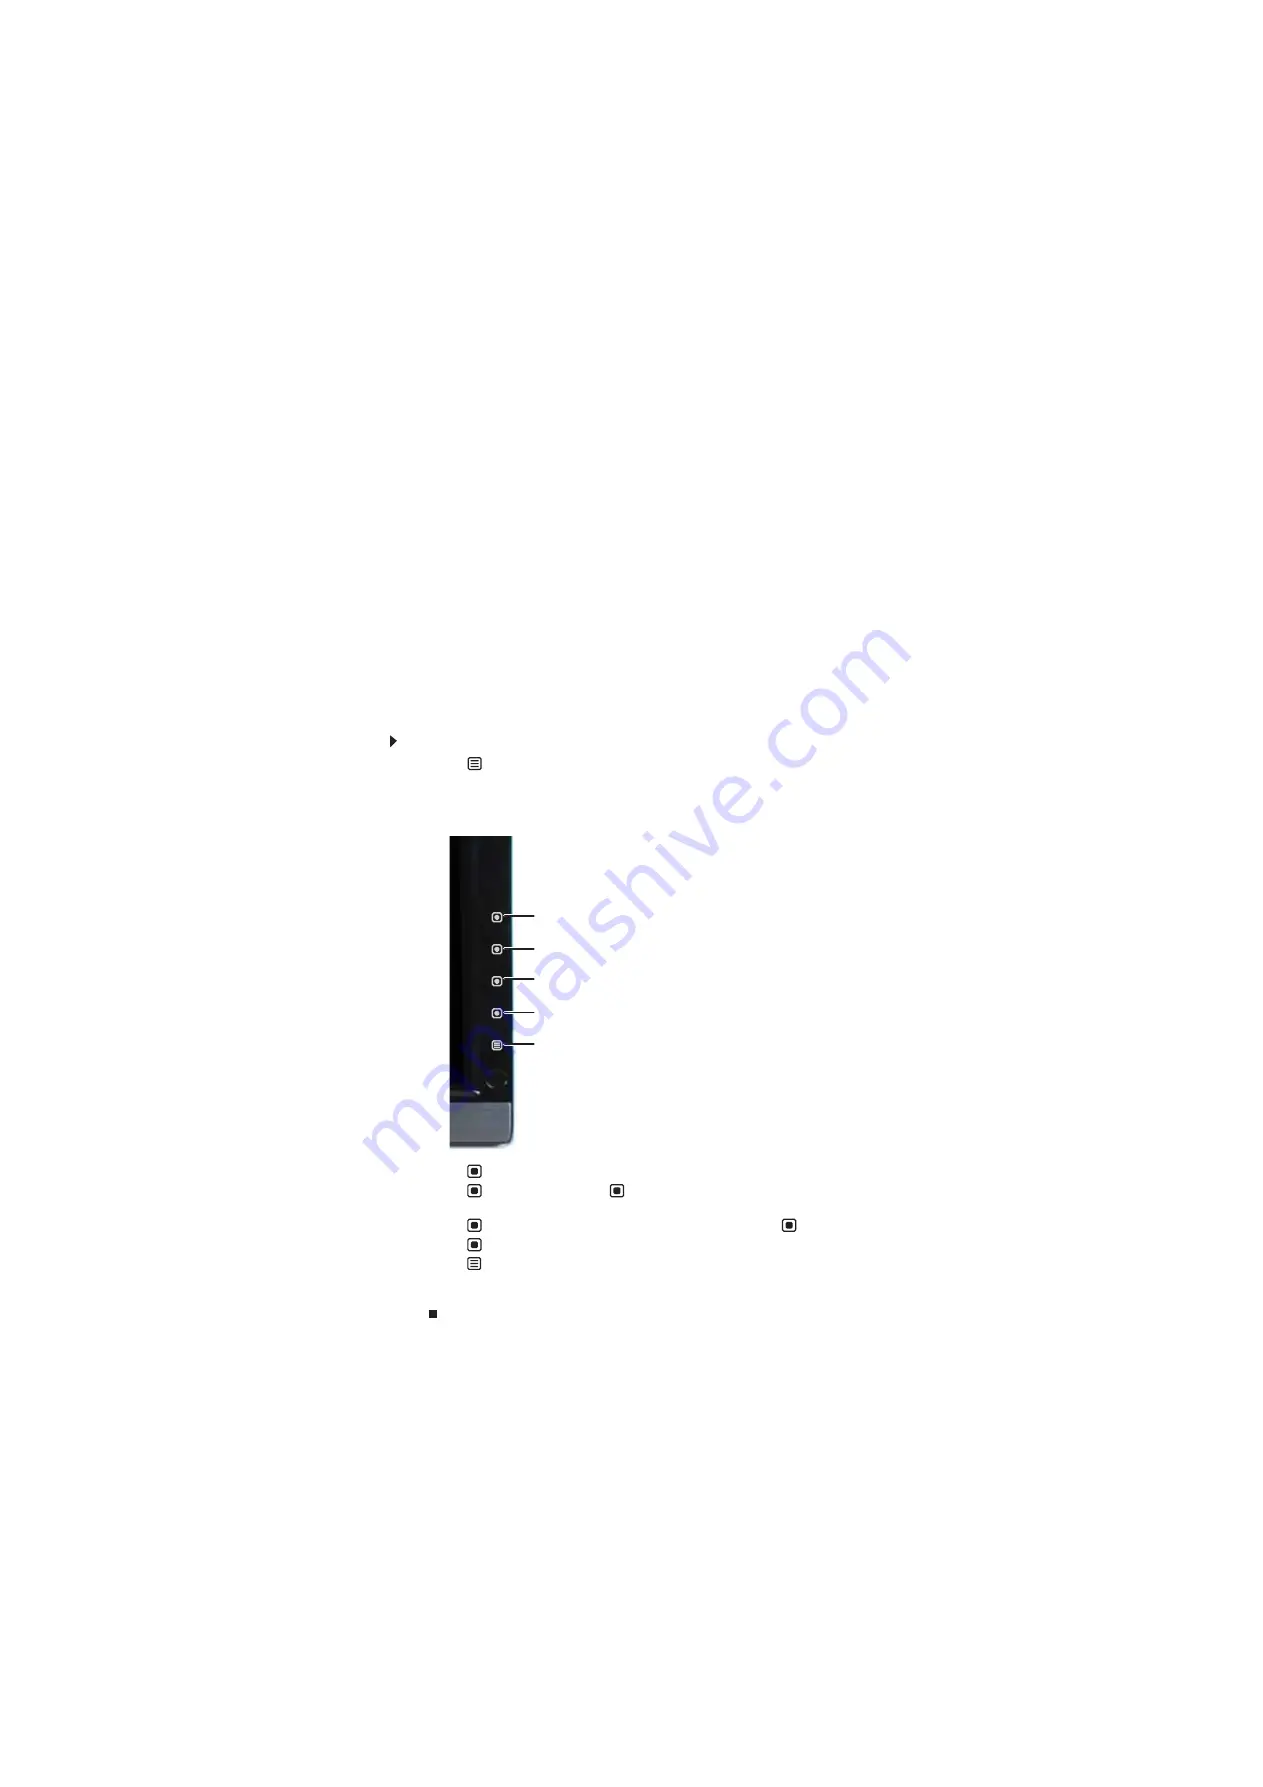
Using the shortcut menu

To use the shortcut menu:


1

Touch 

Menu on the front of your monitor. The rest of the button icons light up and the 

shortcut menu opens.

2

To use an EzTouch menu button, lightly touch its icon. For adjusting a setting’s values, you 
can touch and hold touch buttons as you would conventional buttons.

Touch

Input Select to select an available video source.

Touch

Auto (VGA mode) or 

Video Adjust (DVI, HDMI, and component modes) to adjust 

your display image to the ideal settings. 

Touch

PIP On to turn on Picture-in-Picture, and touch 

PIP Off to turn it off.

Touch

Cancel to exit the shortcut menu.

Touch

Main Menu to open the main menu.

To turn off the button icons and close the menu, wait about ten seconds without touching 
a button. 

PIP On/PIP Off

VGA mode: Auto

DVI, HDMI, and Component mode: Video Adjust

Input Select

Cancel

Main Menu

Summary of Contents for HD2200

Page 1: ... 22 inch Widescreen LCD Monitor USERGUIDE ...

Page 2: ......

Page 3: ...dows screen settings 10 Changing color depth and screen resolution 10 EzTune software 11 Power management 12 Energy declaration 12 Maintaining 12 Troubleshooting 12 No power 12 No picture 13 Display colors are wrong 13 Picture has shadows or ghosts 13 Color is not uniform 13 Image is not sized or centered correctly 14 The monitor has pixels that are always dark or too bright 14 Configuring video s...

Page 4: ...Contents ii ...

Page 5: ... Using Your Gateway Flat Panel Monitor Connecting the monitor Starting the monitor Adjusting monitor settings Changing Windows screen settings Power management Maintaining Troubleshooting Specifications ...

Page 6: ...ct component video cables to the component video ports on the monitor 3 Make sure that your computer is turned off then connect the other end of the video cable to the matching video port on the back of your computer Connecting power To connect power 1 Position your monitor so you can reach the back then connect the power cord to the power connector under the back of the monitor Important For best...

Page 7: ... secure your monitor to your computer desk or to another heavy object with a cable lock To connect a cable lock follow the cable lock s instructions to connect it to the Kensington lock slot on the back of your monitor cable lock not included Setting up the optional speaker bar An optional speaker bar is available for mounting underneath your monitor In the United States you can order a speaker ba...

Page 8: ... speaker bar onto the bottom of the monitor until it snaps into place Make sure that it is secure by pulling it downward 4 Plug the speaker bar s power plug into the power connector on the monitor Mounting slot Mounting clip Speaker bar power connector ...

Page 9: ...blue Allow about 10 seconds for the display image to appear If the power LED is not blue or you do not see a display image check the connections For more troubleshooting information see Troubleshooting on page 12 3 Adjust the tilt of the monitor for the best viewing angle 4 Use the on screen display OSD to adjust other monitor settings For more information see Adjusting monitor settings on page 6 ...

Page 10: ... most commonly accessed settings The main menu lets you precisely adjust all levels of settings Using the shortcut menu To use the shortcut menu 1 Touch Menu on the front of your monitor The rest of the button icons light up and the shortcut menu opens 2 To use an EzTouch menu button lightly touch its icon For adjusting a setting s values you can touch and hold touch buttons as you would conventio...

Page 11: ...here you can adjust the source position size and transparency of the Picture in Picture image Video adjust Opens the Video Adjust menu where you can adjust the sharpness video scaling overscan noise reduction film mode detection and auto video enhance values of the video image from a source such as component video Geometry Opens the Geometry menu where you can adjust image size and minimize distor...

Page 12: ...with black bars on the left and right sides of the image 1 1 mode preserves the movie s original aspect ratio so a standard broadcast or full frame movie appears with black bars on the left and right of the image PC input Preserves the original aspect ratio of the resolution by using black bars on the left and right sides and variable sizes of black bars on the top and bottom of the image depends ...

Page 13: ...s Language Changes the language of the OSD LED Mode Changes the brightness of the Standby and Power LED to Day Mode or Nite Mode When watching movies in a darkened room you may want to change the LED mode to Nite Mode to avoid an over bright distracting power LED indicator DVI Video mode Changes the DVI video mode by enabling either RGB Color Space used for digital input and YUV Color Space used f...

Page 14: ...lick the color depth you want Low 8 bit 256 colors Medium 16 bit 65 500 colors Highest 24 bit 16 700 000 colors 3 To change the screen resolution drag the Resolution slider to the size you prefer 4 Click Apply If the new settings do not look right click No If the new settings make the screen illegible and you cannot click No the settings return to their previous values after several seconds 5 Clic...

Page 15: ...r computer EzTune software included on CD lets you control many of the monitor settings from your computer With EzTune you can Change the orientation of the image landscape to portrait Requires the optional height adjustable stand available in the United States at www gateway com Change brightness contrast and color balance Change screen geometry Set the display position and resolution For more in...

Page 16: ...he monitor in optimal working order Do not block the ventilation holes Do not expose the monitor to rain or use near water Keep the monitor away from radiators or heat vents Keep the monitor out of direct sunlight To clean the monitor use a soft cloth slightly moistened with water only Wipe the cabinet screen and controls Troubleshooting If you have problems with the monitor the information in thi...

Page 17: ...e 2 Display colors are wrong Touch Menu Main Menu then touch Auto to automatically adjust the display image to the ideal settings VGA mode only Restart your computer with the monitor turned on Make sure that the video cable is connected securely to the back of the monitor and your computer For more information about connecting the video cable see Connecting the monitor on page 2 Make sure that the...

Page 18: ...lso go directly to your video card s support Web site for the most up to date video drivers The Web sites for the major video card manufacturers are ATI www ati com Intel www intel com Nvidia www nvidia com When you run your games you do not see support for widescreen displays Newer games are adding support for widescreen displays as the widescreen format becomes more popular Check the game s Web ...

Page 19: ...Control Panel Sounds and Audio Devices the Volume tab then click Advanced For optimum volume control using the speaker bar we recommend that you set the Windows volume mid way between the lowest and highest setting I want to plug in my headphones but there is a headphone jack on both sides of the speaker bar Which should I use You can use either jack or both jacks at the same time The sound coming...

Page 20: ...ssion After authentication is established the transmitter encrypts the data and sends it to the receiver for decryption You lose the signal to the display while watching a movie on a HDCP equipped component The component must be restarted to establish renegotiation For example while watching a movie on a HDCP enabled DVD player you change the receiving device DTV monitor or projector input to watc...

Page 21: ...ons and may vary from similarly marketed products Panel size 22 inches diagonal Panel type 22 inch viewable TFT active matrix TN High brightness glare HD2200 High brightness non glare HD2201 Pixel resolution 1680 1050 native 60 Hz Pixel pitch 0 0111 0 0111 inches 0 282 0 282 mm Aspect ratio 16 10 Brightness 300 cd m2 Contrast ratio 1000 1 Viewing angles 160 horizontal 160 vertical Response time Ul...

Page 22: ...60 C Humidity Operating 20 80 non condensing Storage 5 90 non condensing Altitude Operating 12 000 feet 3 658 m Storage 40 000 feet 12 192 m Security Kensington lock slot Resolution Horizontal frequency kHz Vertical frequency Hz Available in DVI mode 720 400 31 469 70 N 640 480 31 469 60 Y 640 480 37 9 72 N 640 480 37 5 75 N 800 600 35 1 56 N 800 600 37 879 60 Y 800 600 48 1 72 N 800 600 46 875 75...

Page 23: ...19 Safety Regulatory and Legal Information Important safety information Environmental information Regulatory compliance statements Notices ...

Page 24: ... the appropriate outlet If you use an extension cord with this system make sure that the total ampere rating on the products plugged into the extension cord does not exceed the extension cord ampere rating Care during use Do not walk on the power cord or allow anything to rest on it Do not spill anything on the system The best way to avoid spills is to avoid eating and drinking near your system Do...

Page 25: ...ction The Crossed Out Waste Bin label affixed to this product is your reminder to dispose of your end of life product properly Substances such as glass plastics and certain chemical compounds are highly recoverable recyclable and reusable You can do your part for the environment by following these simple steps When your electrical or electronic equipment is no longer useful to you take it back to ...

Page 26: ...cessories The accessories associated with this equipment are shielded video cable These accessories are required to be used in order to ensure compliance with FCC rules FCC declaration of conformity Model HD2200 E HD2201 Responsible party Gateway Inc 7565 Irvine Center Drive Irvine CA 92618 USA This device complies with Part 15 of the FCC Rules Operation of this device is subject to the following ...

Page 27: ...stem improvements Gateway is not responsible for inaccurate information which may appear in this manual For the latest product updates consult the Gateway Web site at www gateway com In no event will Gateway be liable for direct indirect special exemplary incidental or consequential damages resulting from any defect or omission in this manual even if advised of the possibility of such damages In t...

Page 28: ...Safety Regulatory and Legal Information 24 ...

Page 29: ......

Page 30: ...MAN HD2200 HD2201 USR GDE R1 11 07 ...

Reviews: