English
Attaching the monitor to the base
1. Remove the monitor bracket and base from the packaging and place it on a stable and level workspace.
2. Remove the monitor from the packaging, by aligning the front-end of the bracket with the corresponding
slot on the back of the display, push the bracket into the slot until you hear a click sound.
3. Then, install the base onto the bracket. You should hear a click sound when the base is correctly and firmly
fixed to the bracket.
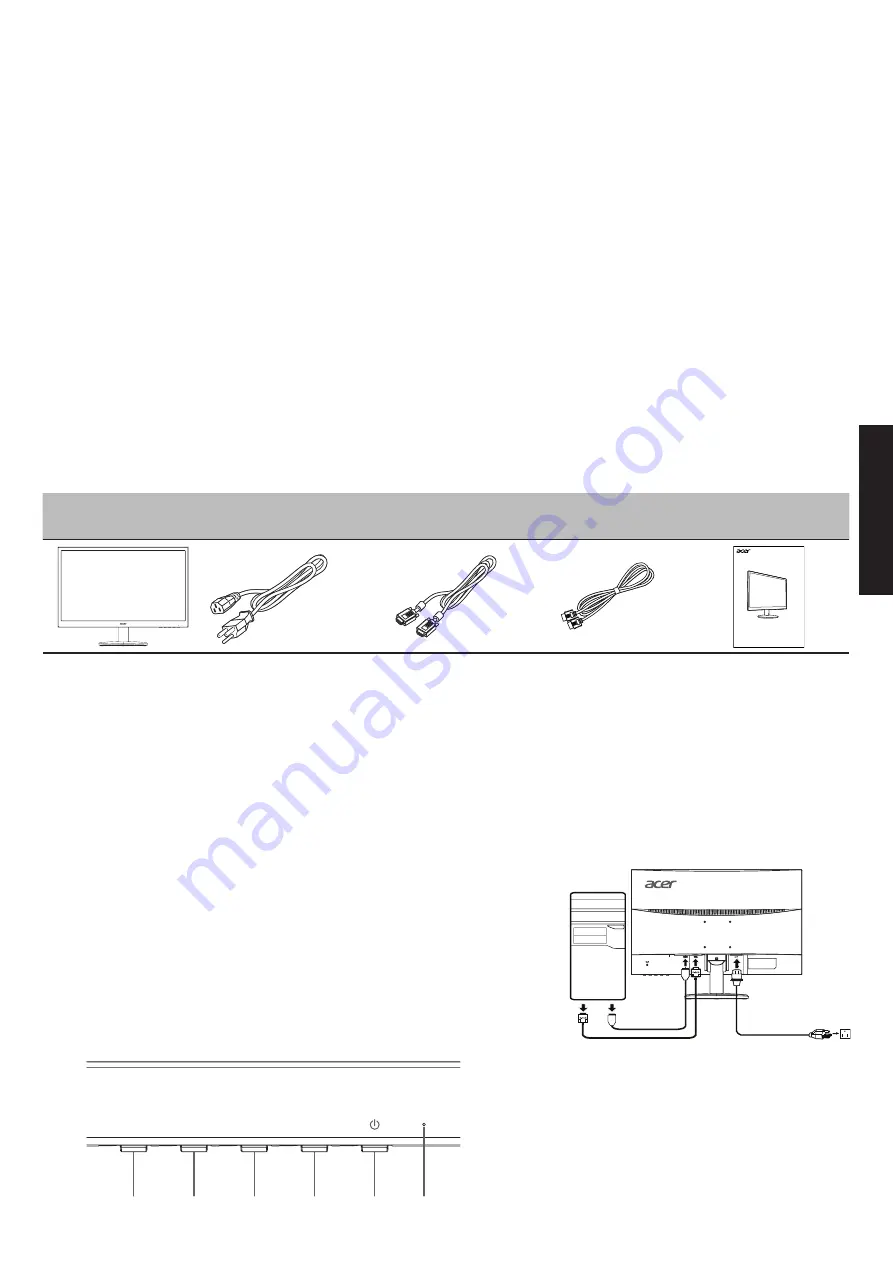
Connecting your monitor to a computer
1. Turn off your computer and unplug your computer's power cord.
2. Connect the signal cable to the VGA and/or HDMI (optional) input
socket of the monitor, and the VGA and/or HDMI (optional) output
socket of the graphics card on the computer. Then tighten the
thumbscrews on the signal cable connector.
3. Insert the monitor power cable into the power port at the back of
the monitor.
4. Plug the power cords of your computer and your monitor into a
nearby electrical outlet.
Acer LCD Monitor Quick Start Guide (QSG)
Important safety instructions
Please read the following instructions carefully.
1. To clean the LCD monitor screen:
• Turn off the LCD monitor and unplug the power cord.
• Spray a non-solvent cleaning solution onto a rag and clean the screen gently.
2. Do not place the LCD monitor near a window. Exposing the monitor to rain, moisture or sunlight can
severely damage it.
3. Do not apply pressure to the LCD screen. Excessive pressure may cause permanent damage to the display.
4. Do not remove the cover or attempt to service this unit yourself. An authorized technician should perform
servicing of any nature.
5. Store the LCD monitor in a room with a temperature of -20° to 60°C (-4° to140°F). Storing the LCD monitor
outside this range may result in permanent damage.
6. Immediately unplug your monitor and call an authorized technician if any of the following circumstances
occur:
• Monitor-to-PC signal cable is frayed or damaged.
• Liquid spills onto the LCD monitor or the monitor is exposed to rain.
• The LCD monitor or case is damaged.
6
5
4
3
1
2
Package contents
LCD monitor
Power cord
VGA cable
(optional)
HDMI cable
(optional)
Quick start guide
LCD monitor
EB2 series-EB192Q
USER GUIDE
Summary of Contents for EB2 Series
Page 1: ...LCD monitor EB2 series EB192Q USER GUIDE ...
Page 2: ......


